For a long time I’ve wondered how some people photograph their handmade items to make them look like they are floating on a white background. I didn’t know enough about photography to even think of how to search for that technique. So I was super excited when I saw this tutorial on how to make your own macro photo studio.
First I’ll show you how to make the macro photo studio, then I’ll show you what it does!
You’ll need:
- Large Cardboard Box
- Duct Tape and Regular Tape
- Tissue Paper
- Exacto Knife and Scissors
- White Poster Board
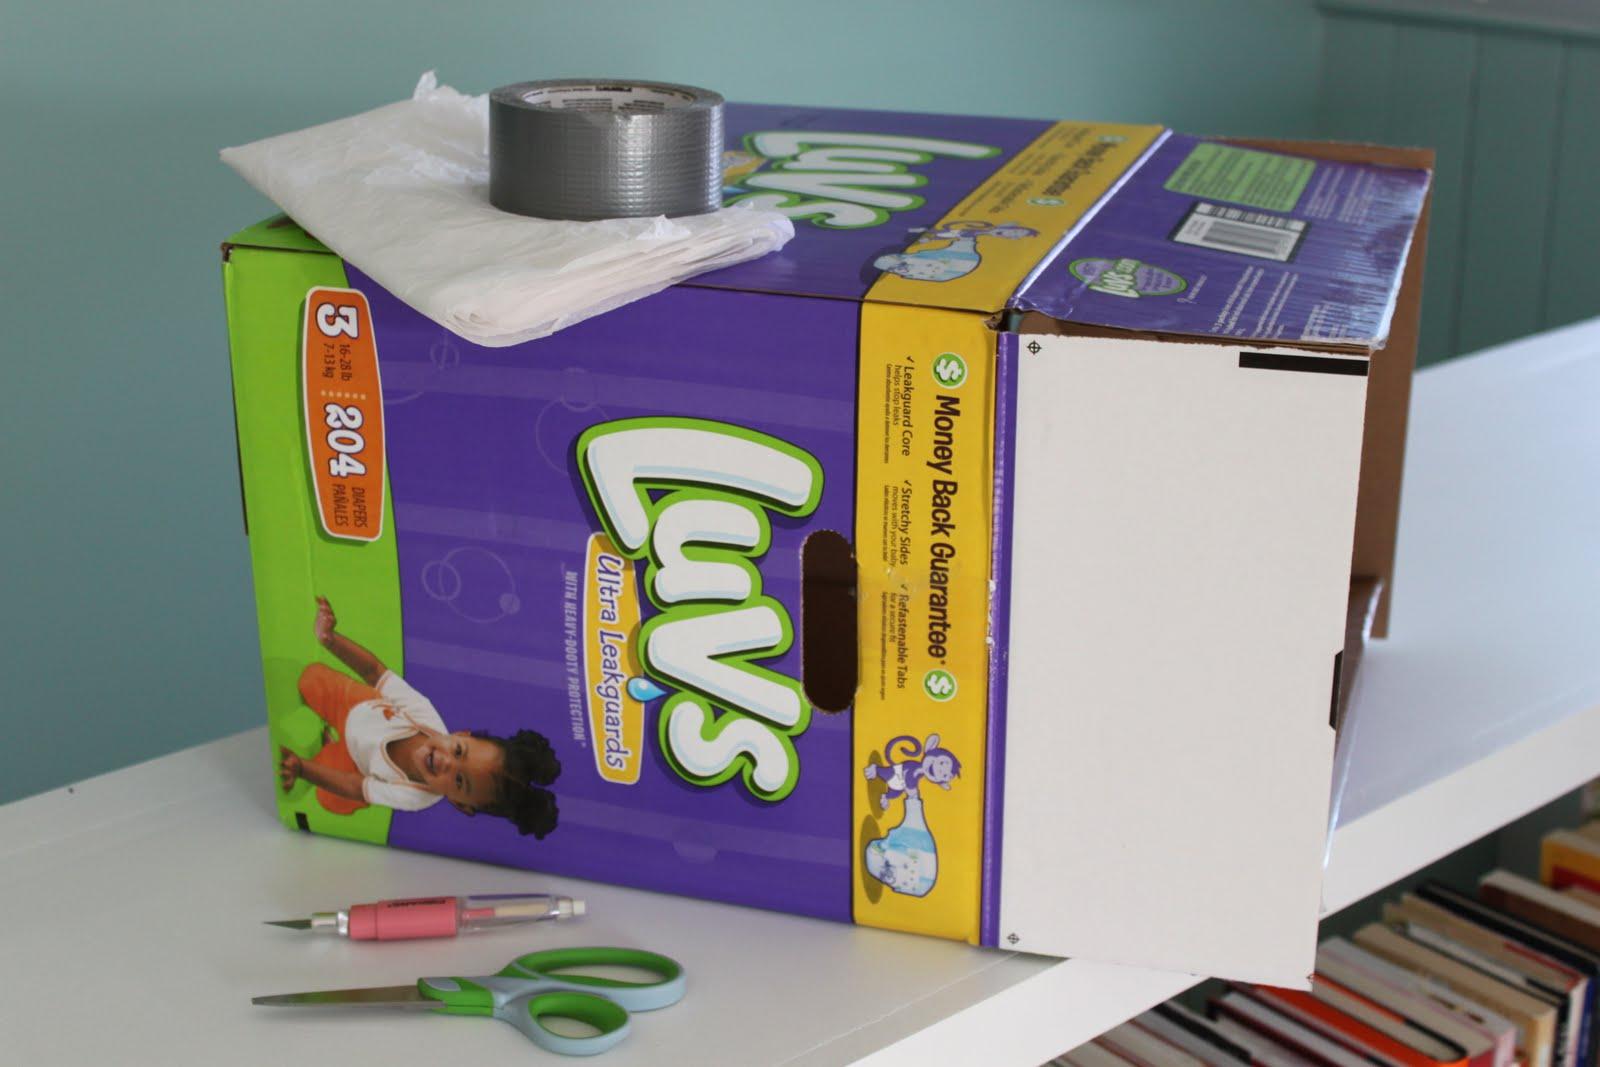
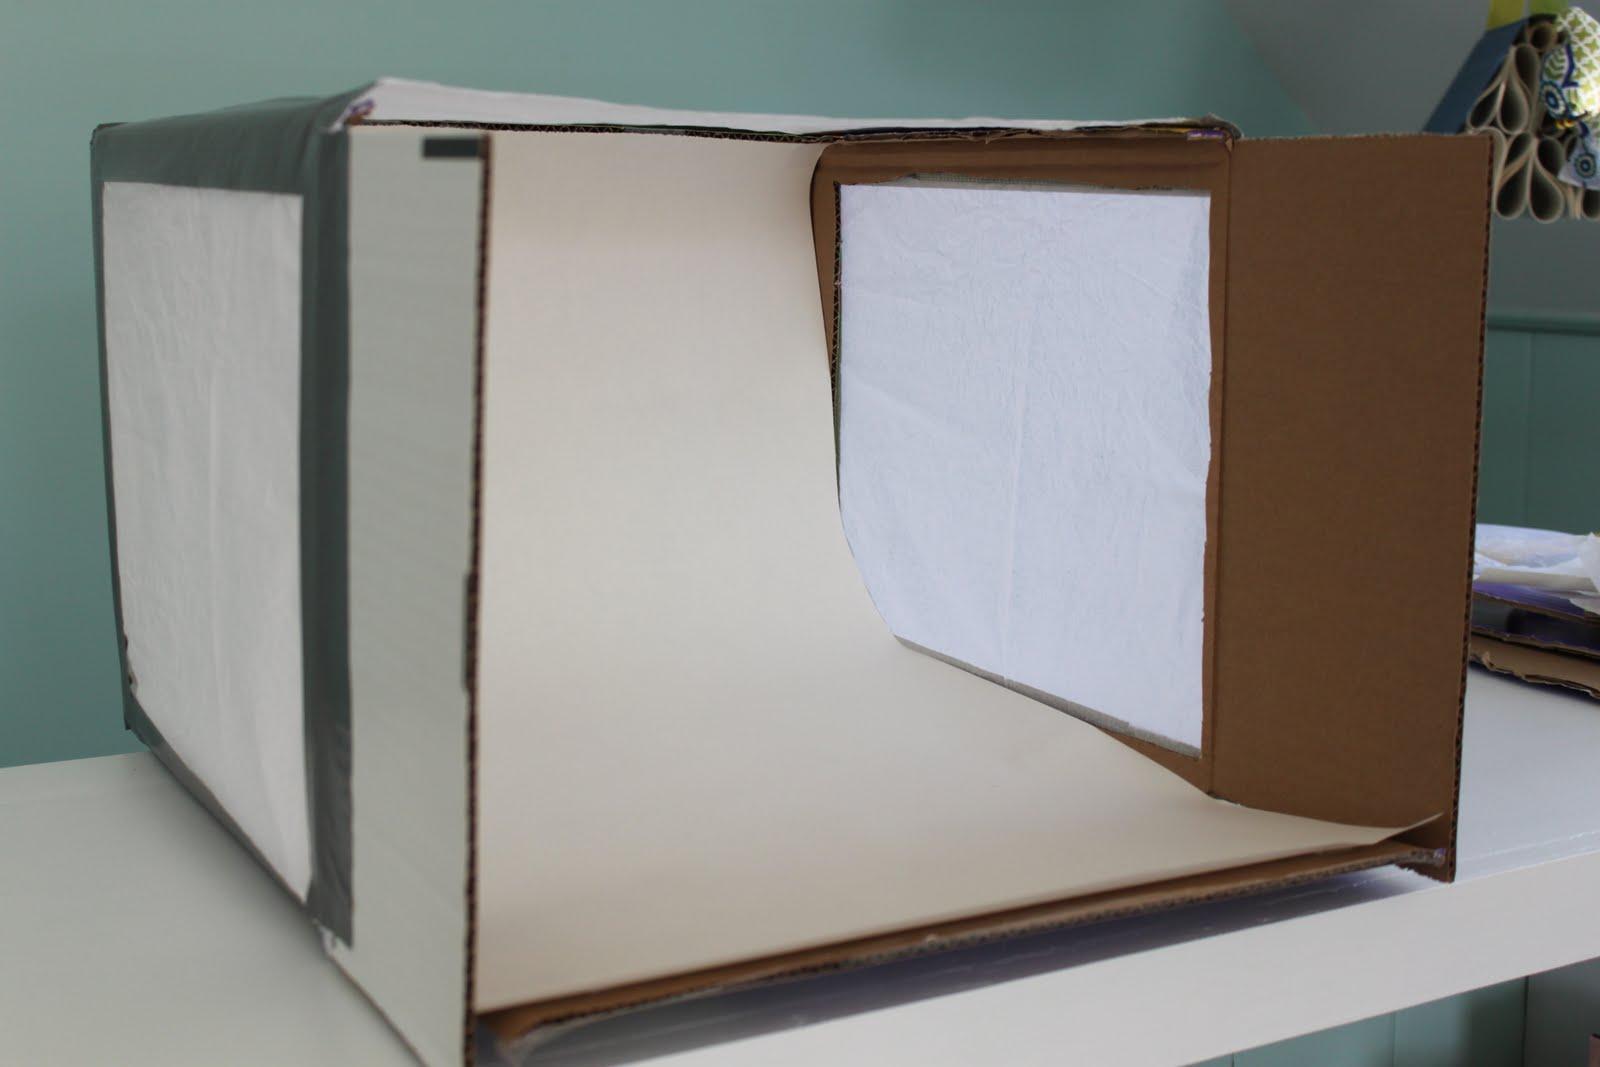
First, cut large squares out of three sides of your cardboard box, leaving one inch of cardboard around the edges. Do not cut the bottom of the box and one side. This uncut side will be the new bottom of your box and the original bottom will now be the back of your photo studio.
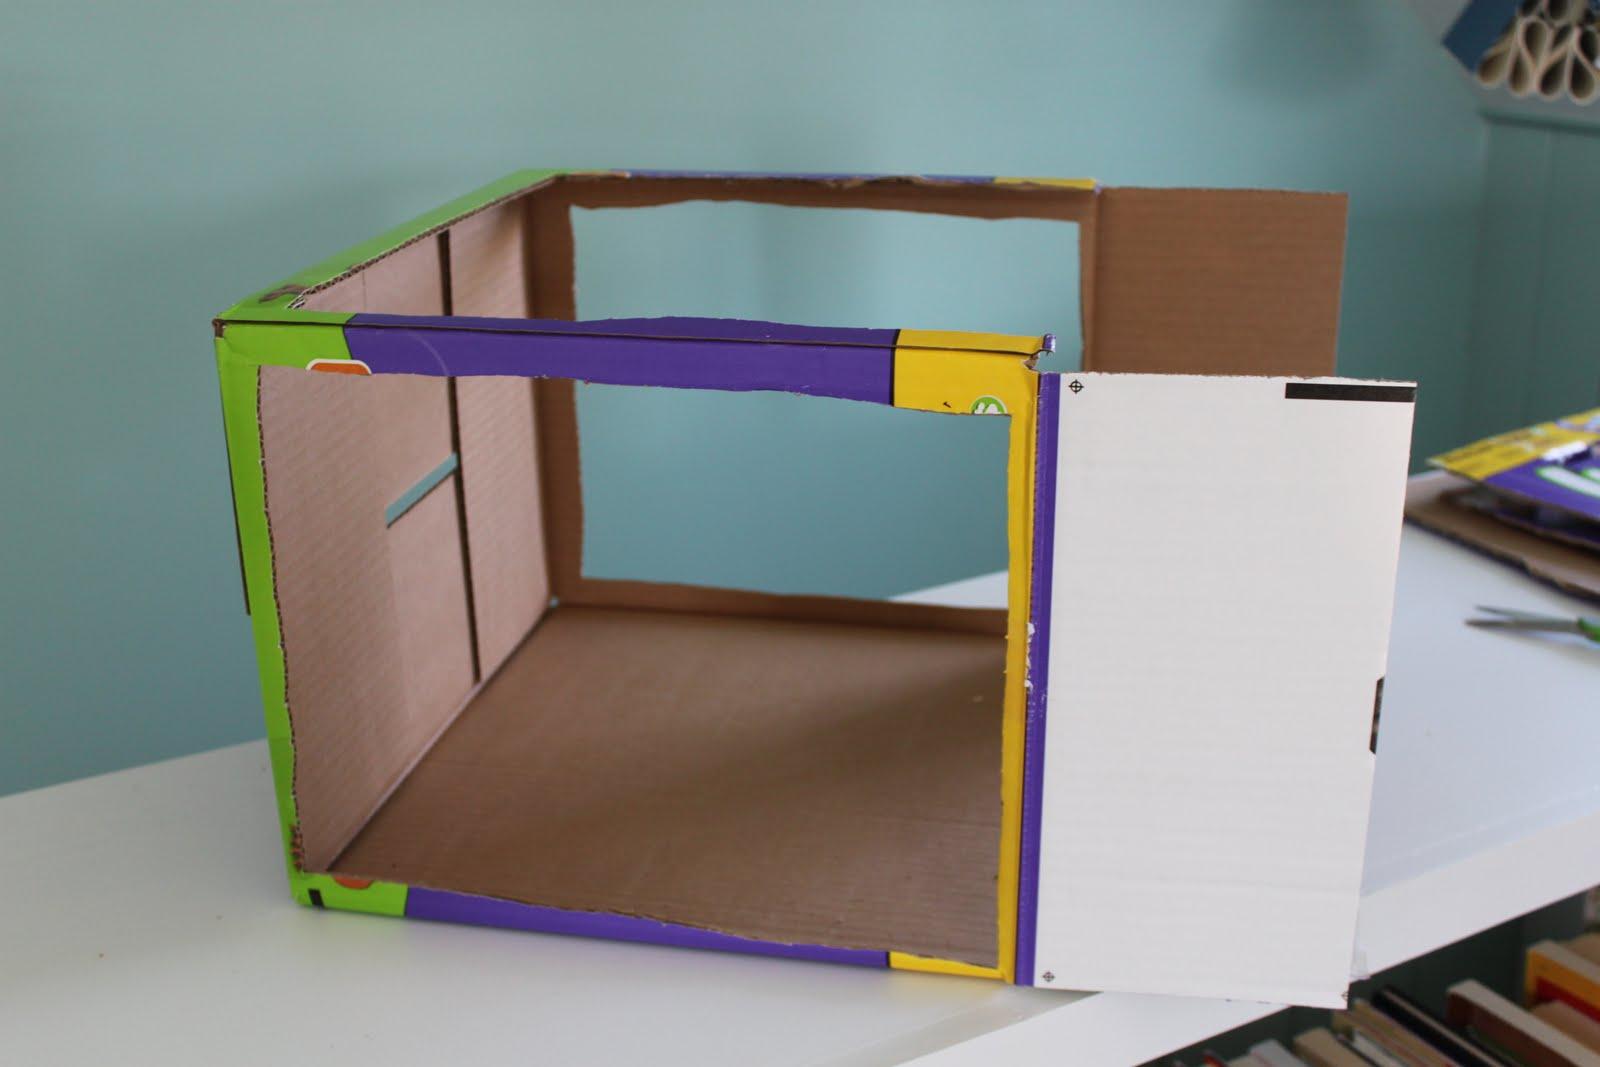
Next, attach tissue paper to the three sides of your box. The easiest way to do this is to secure the tissue paper with regular tape in the corners and then go over the entire side with duct tape. The tissue paper will diffuse the light around the subject you are shooting.
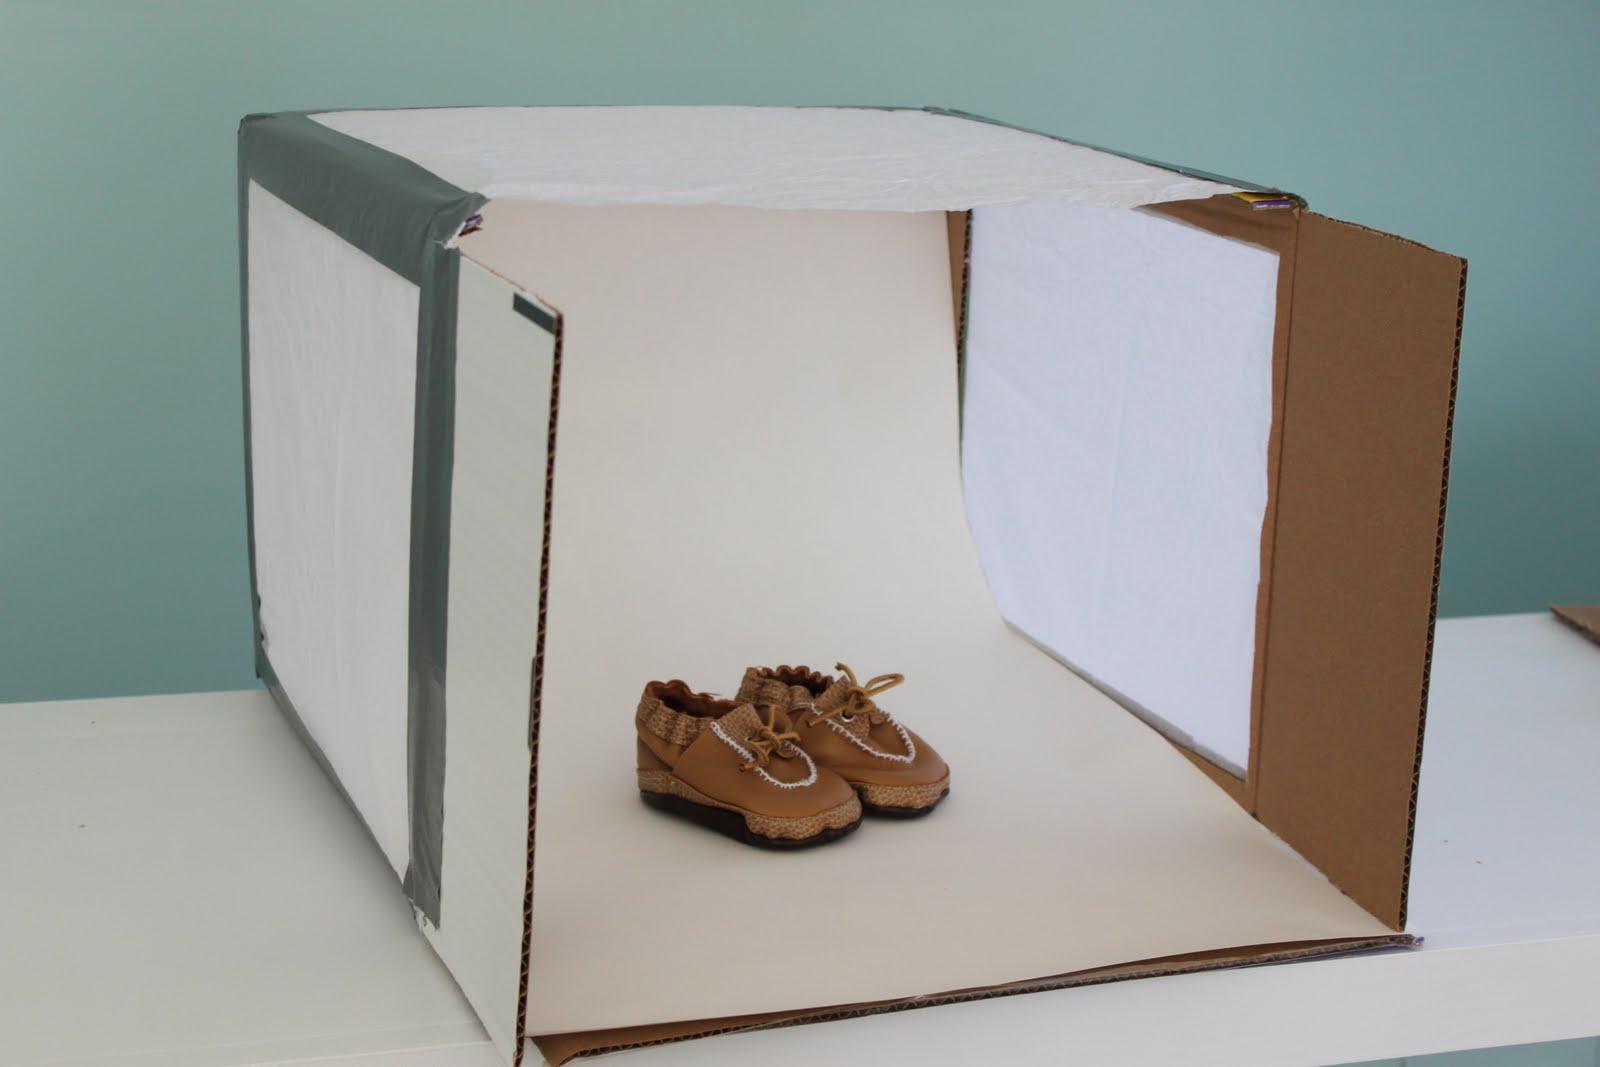
The last step is to cut your poster board to the width of your box. Secure one end of the poster board strip to the top back of your box then allow it to drape naturally down the back of your photo studio. This will create the white background for your pictures.
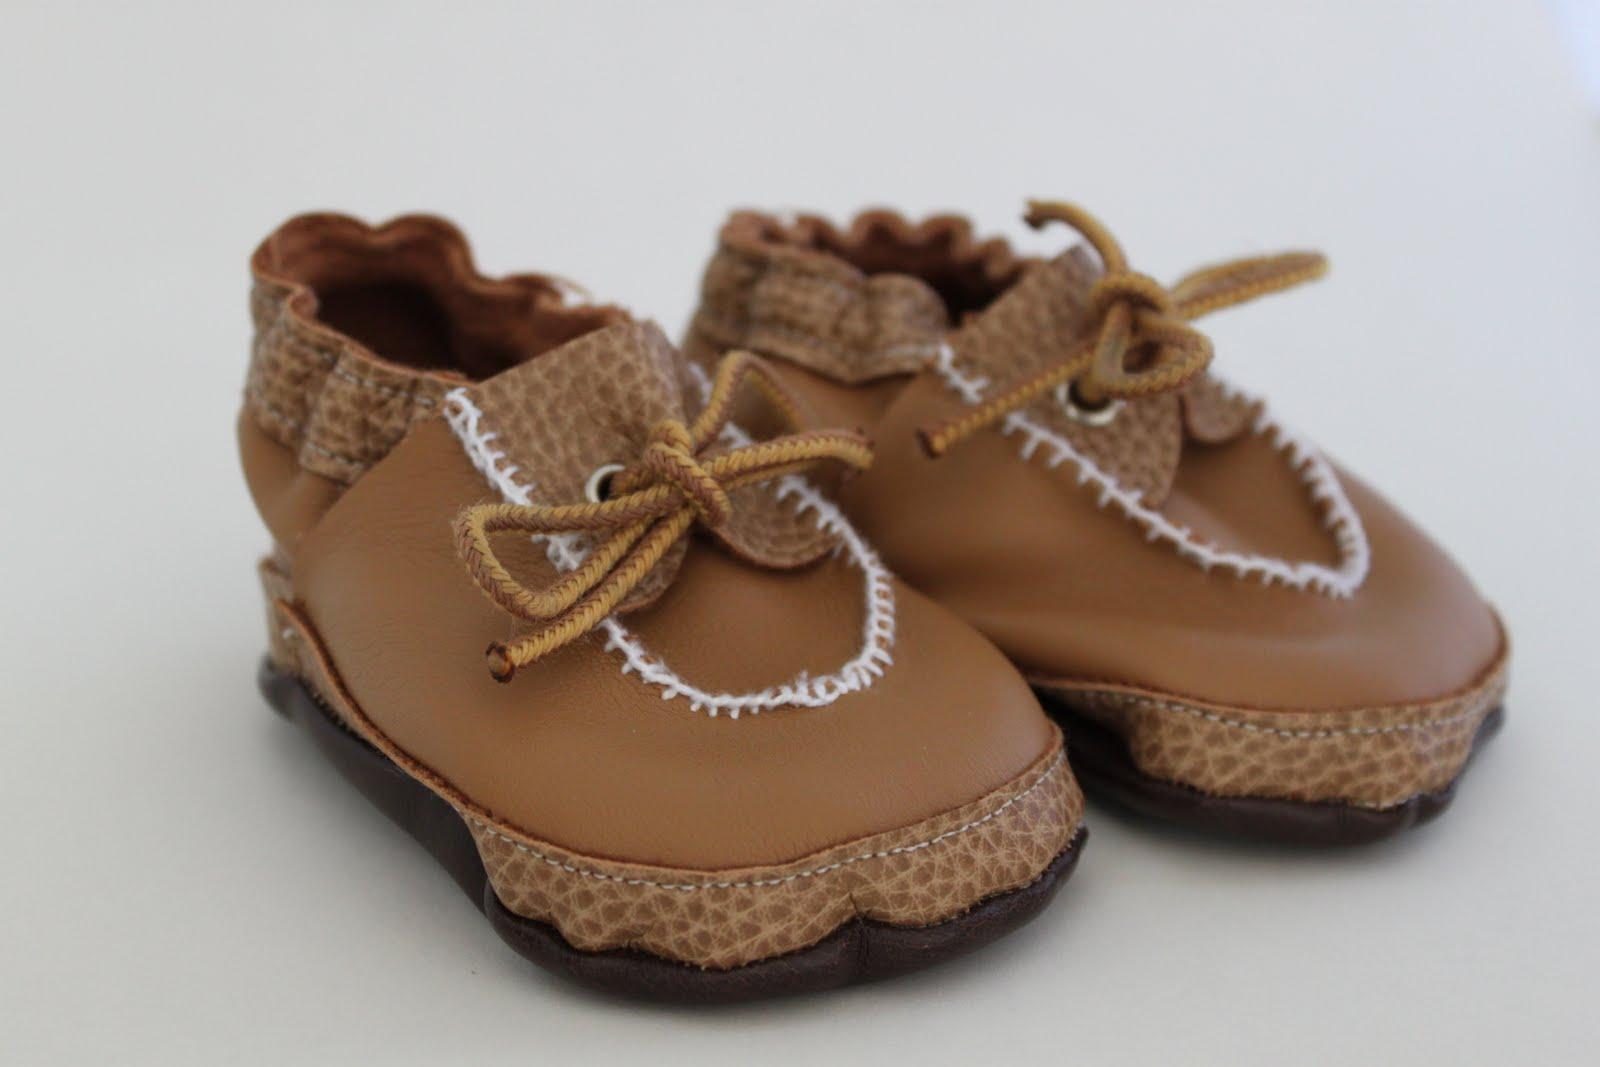
Now that your photo studio is finished you can experiment with different lighting to see what you like the best. I have three examples below of how to set up different lighting effects and what it does to your subject. Remember my Little Man Shoes?
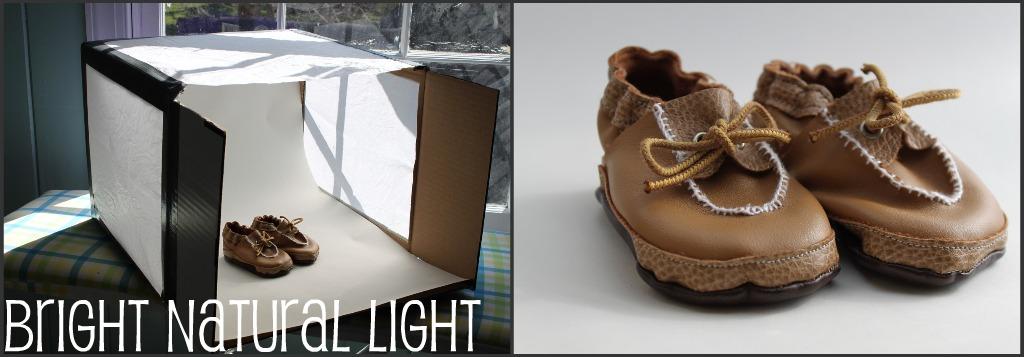
Place the photo studio in a room with lots of natural, diffused light and this is the effect you get:
 If you put it in bright, direct sunlight you get soft shadows:
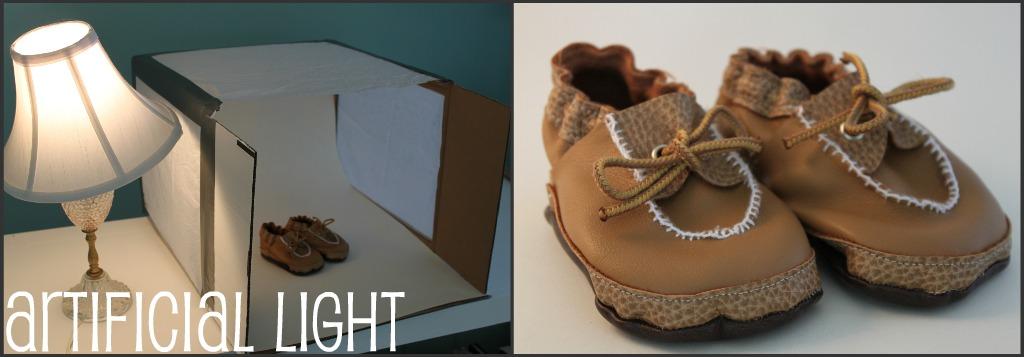
 And with artificial light you get a more warm glow to the picture:
It’s really a personal preference and I imagine you’d want to photograph different items in different light. Which is your favorite?
Mine is the first, with natural light:

I've often wondered how they did that too! Thanks so much for sharing this, I may have to make one of these.
What a great tutorial! I also like the natural light. You must be a mom using the Luv's box 🙂
awesome! missing you.
Great Idea!!! I have been trying to figure this one out for awhile now!!!
Oooh – thanks so much for this tute! I've switched to a white table for most of my pics, but this box trick would be so much more convenient!
thanks! that's a great tutorial!
That'll come in SO handy when I have some jewellery ready to photograph! Thank you!
This is a great project. I made one and use clamp lights that you can find at the hardware store with high wattage daylight bulbs as a decent alternative to natural light if you can't wait to get your shots.
Deb, what a great idea! I do a lot of nighttime crafting, so that's a great solution!
Brilliant tutorial. I will be sharing this one!
AWESOME! I can't wait to do this! My current method is annoying (to say the least)! Thank you, thank you, thank you!!
My cousin just hooked me up with this link. So GREAT. Just last night my husband and I were talking about a photo studio he saw in sky mall. This will fit our budget MUCH better!
I just tried to post a comment…must've been user error. I'll try again. What I said, basically, was that I had to improvise on your idea since I had no box or poster board. I attached long sticks to my husband's easel and draped a white sheet across them, then draped another from the bottom of the easel to the floor, like you had the poster board. If I knew how to post a picture here, I would. It worked! I love it – thank you for this!!
Oh I'm so glad to hear that this worked well for you all, if nothing more it gets your wheels turning, there's no need to buy a big ol' photo studio when you can whip one up yourself! 🙂
This is SO helpful. Thanks for the great tutorial!
Lesley
http://byporchlight.blogspot.com
Merci beaucoup! :-)))
thanks so much for this tutorial – this is on my to-do list!!
You fully match our expectation and the selection of our data.
http://www.bristolphtoboothfun.co.uk/