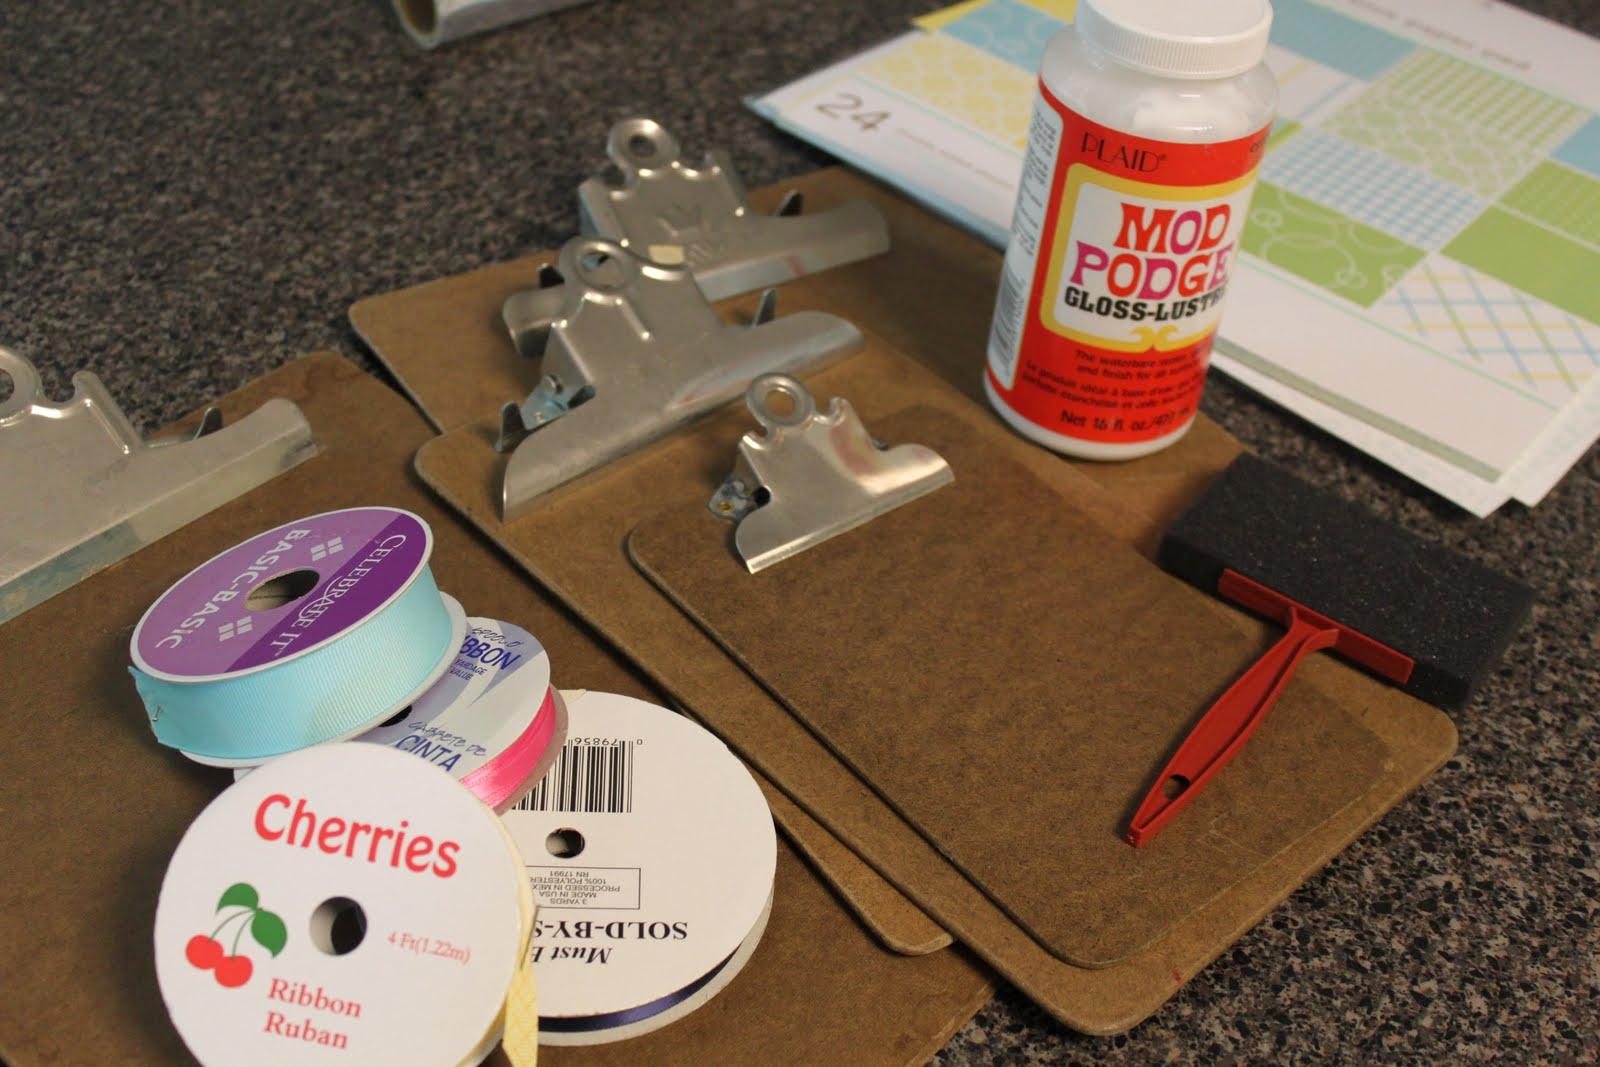
- Clipboard
- Mod Podge
- Wide sponge brush
- Paper
- Ribbon
- Old credit card
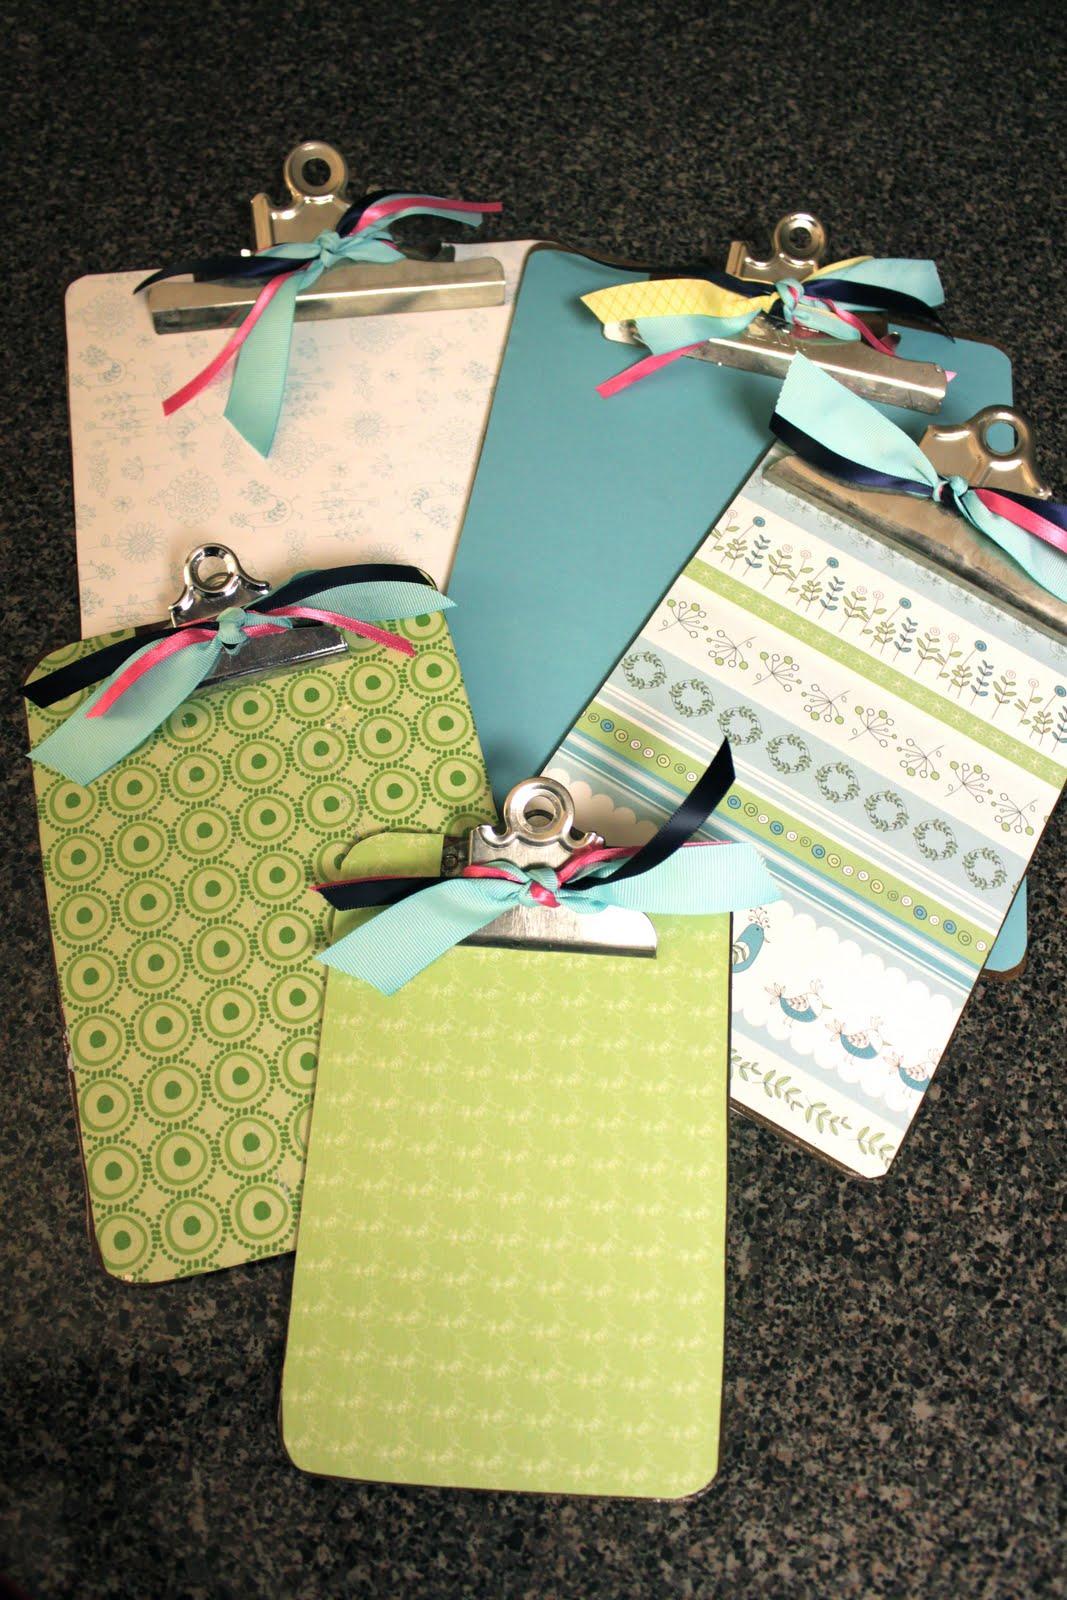
First, measure your paper by tracing the clipboard on the paper you chose and cut on the inside of your line. Cut out a piece of paper for the front and back and set these aside for a minute. I’ve made these before with tissue paper, wrapping paper, even old maps, but this time I used card stock and I was really pleased with how they turned out.
Put a thin layer of Mod Podge directly on the clipboard.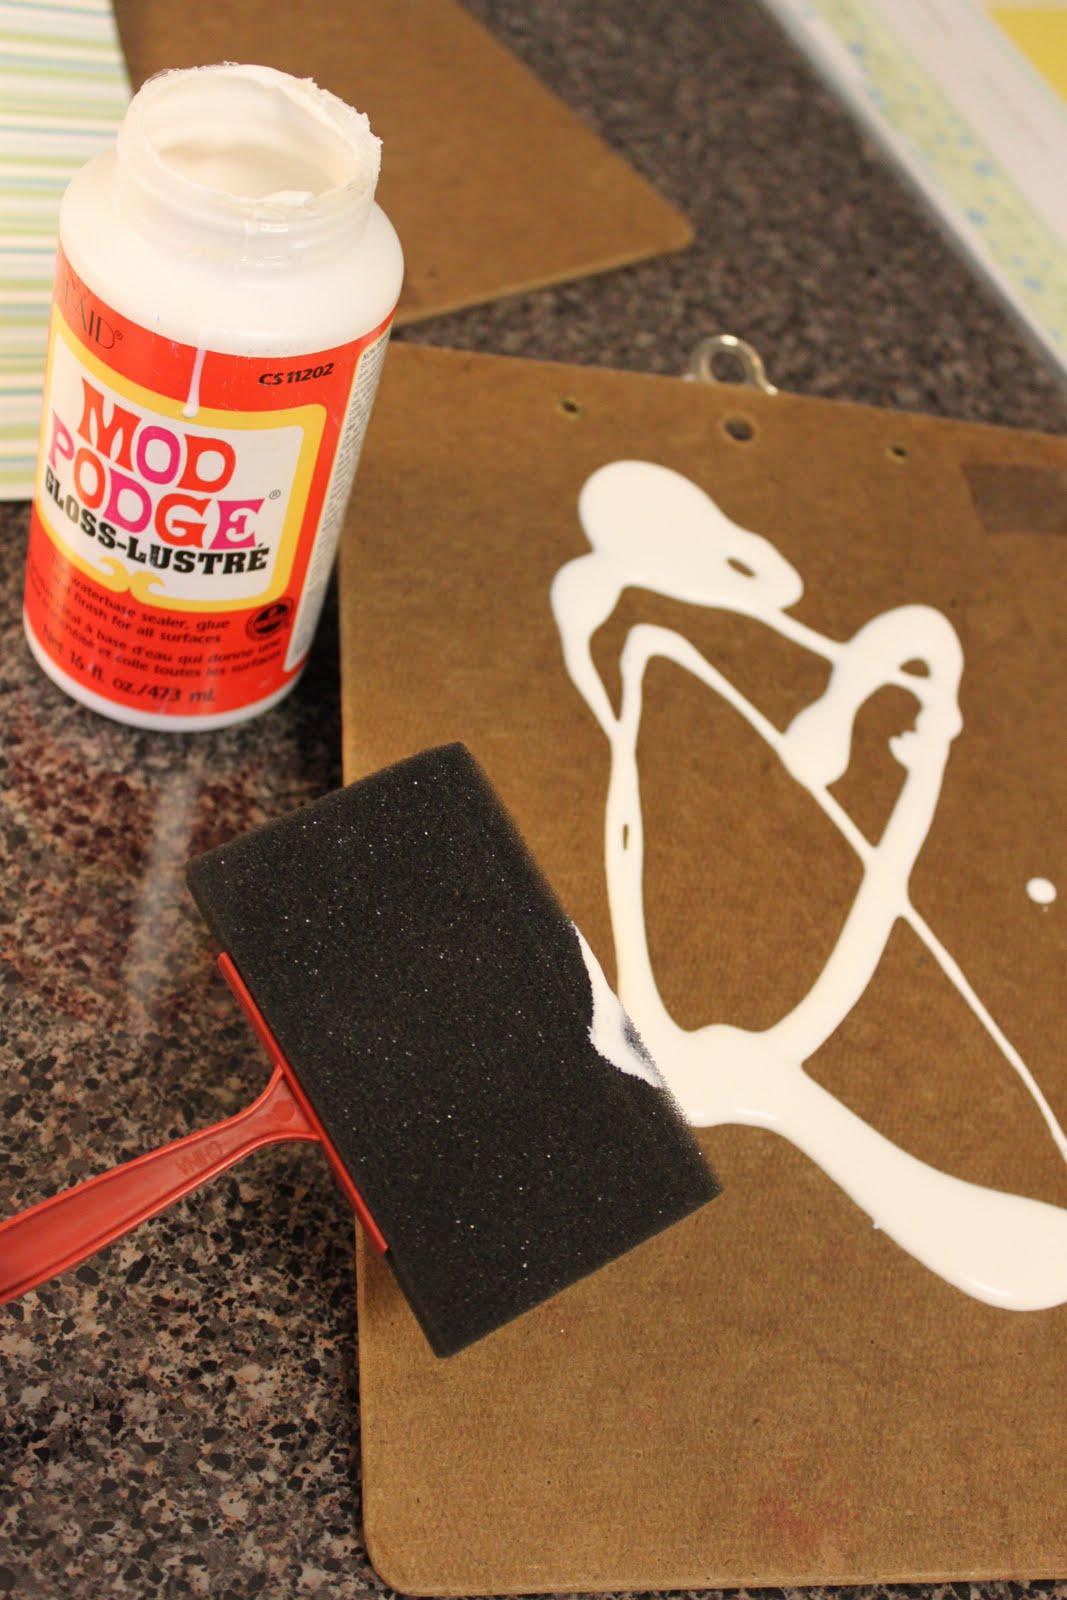 Use your wide sponge brush to spread it out like this:
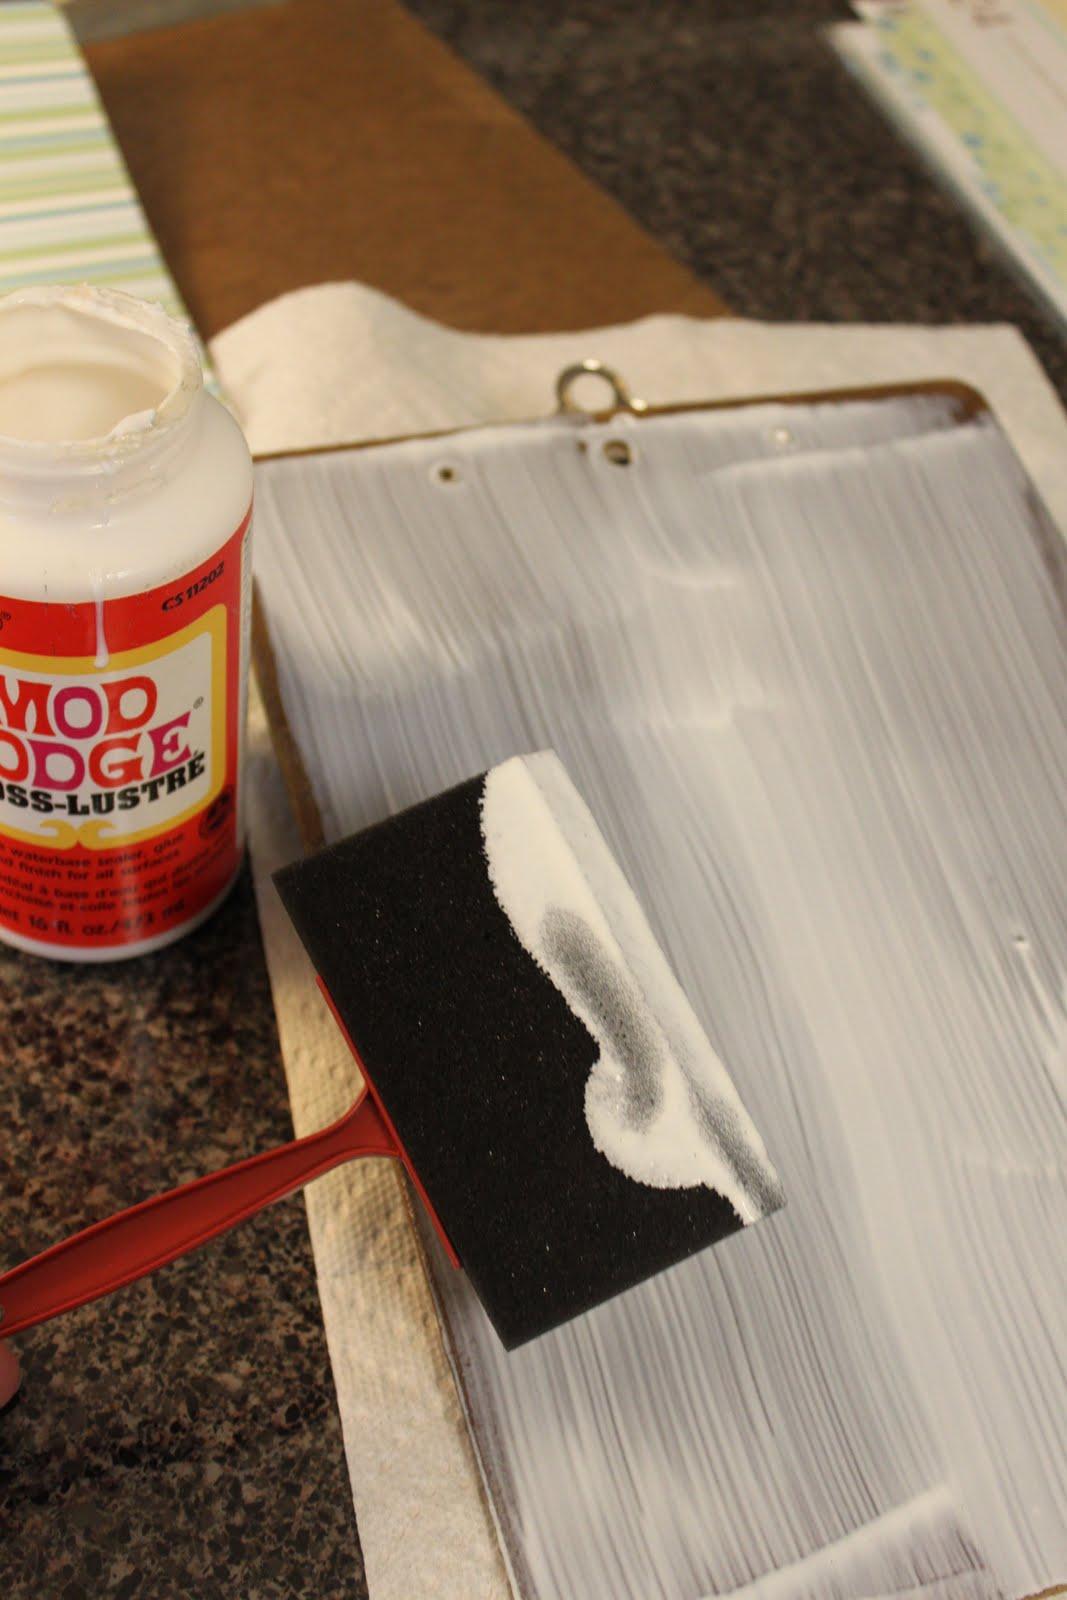 Then place your paper on top of the Mod Podge layer and smooth out the bubbles. You can use an old credit card or a food scraper. This is an important step so that you don’t get any bubbles, don’t just use your hands, I promise you’ll miss some bubbles.
 After the bubbles are smoothed out, put another layer of Mod Podge on top of the paper to seal it. Allow that side to dry. Repeat these steps on the other side of your clipboard. Once both sides are done, prop up your clipboard and allow the whole thing to dry for a couple of hours.
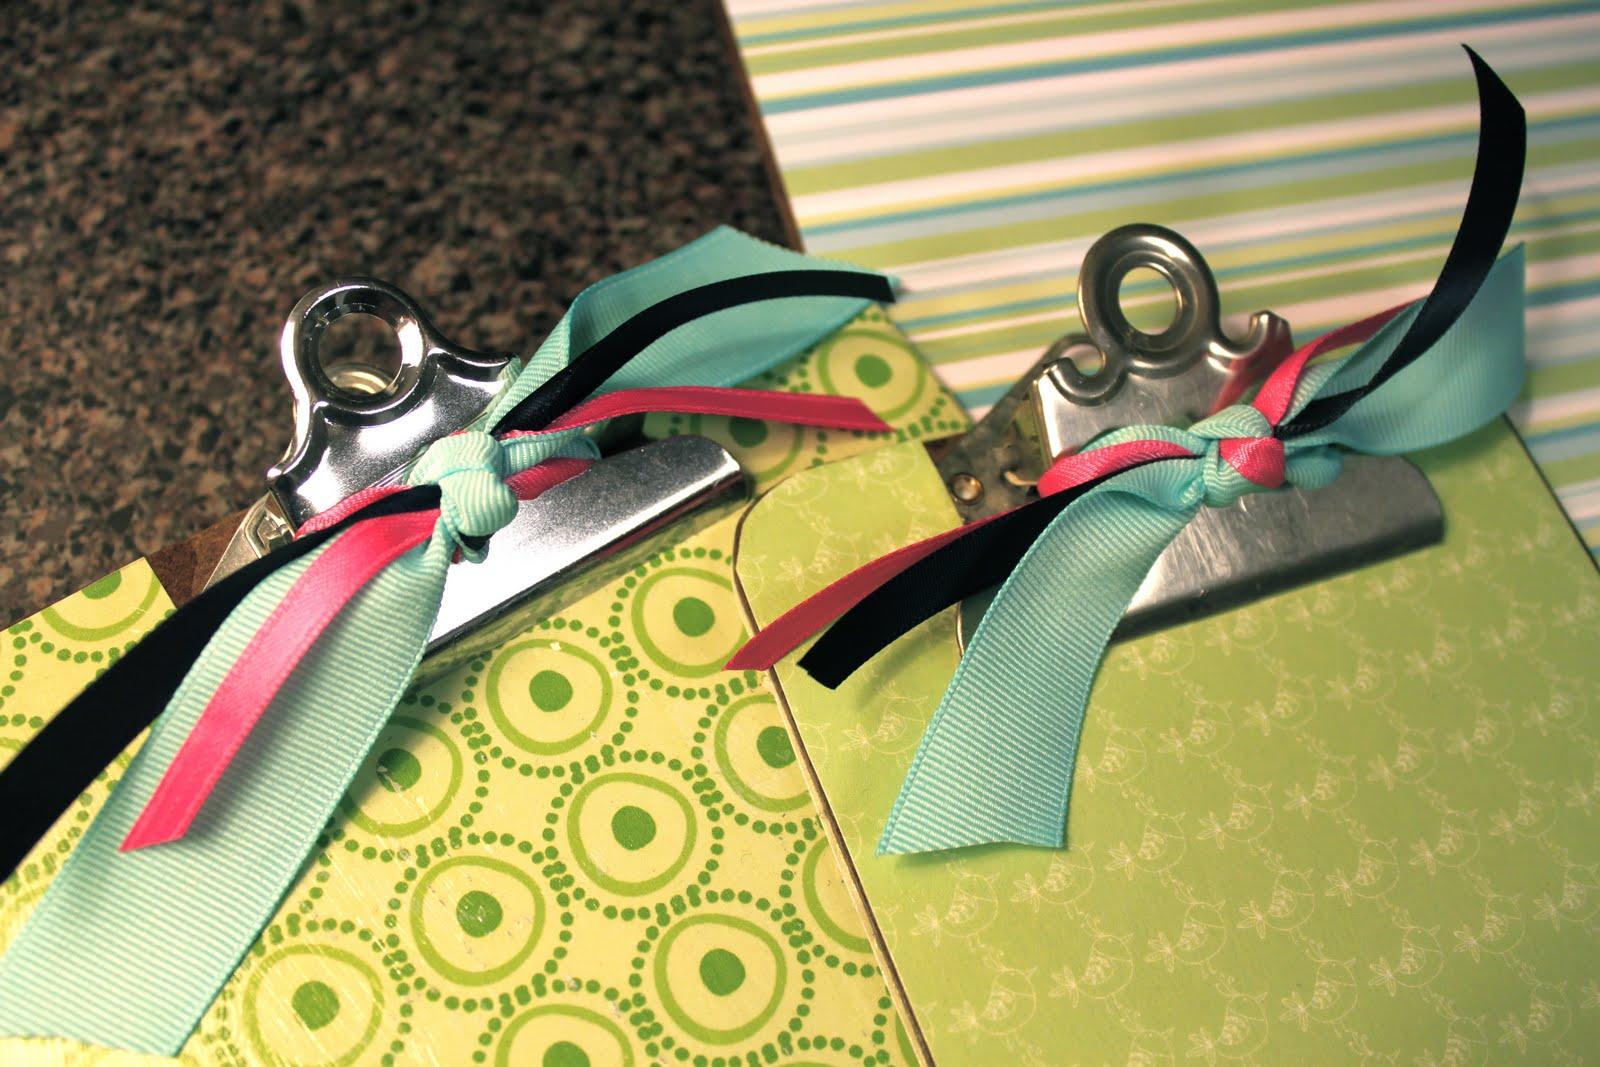
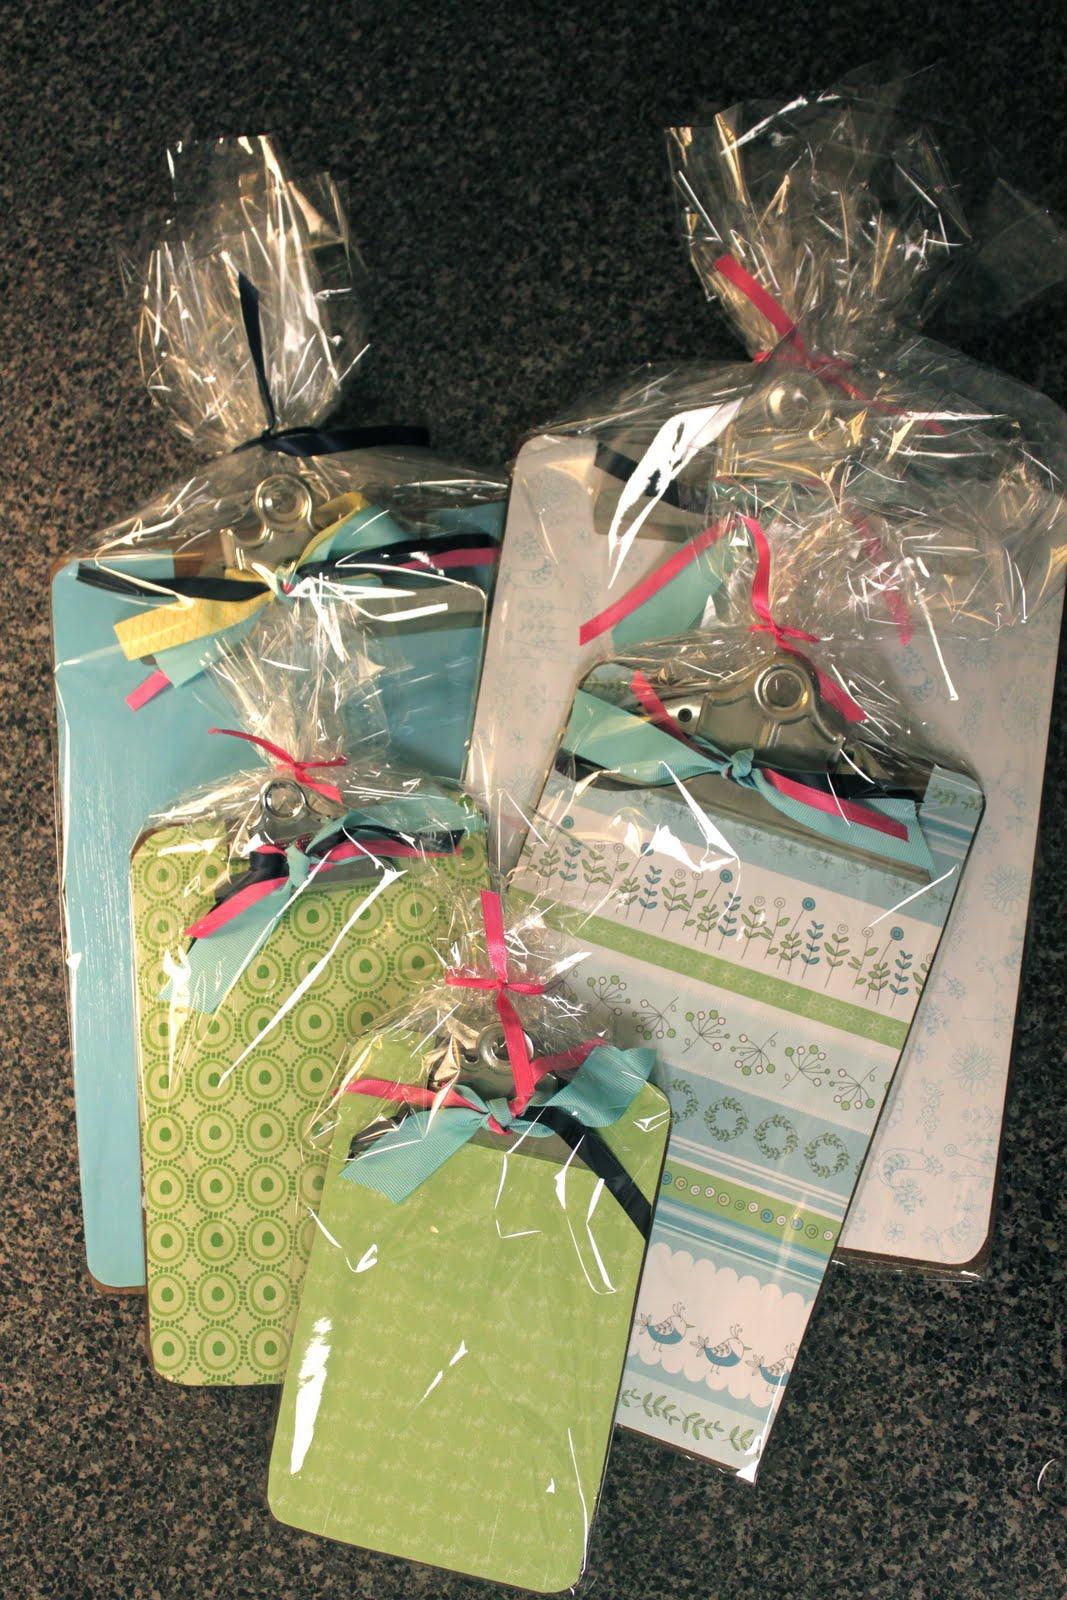
After it’s dry you can attach the ribbons. I threaded the ribbons under the clip and tied it around rather than through the loop at the top.

Then package them in cellophane, because what girl doesn’t like getting a gift wrapped in cellophane?! I love that stuff!

These are so cute! I've seen clipboards at the thrift store and have always thought to do this. But never have. I think I just might have to try it out. Great idea for gifts! Thanks for sharing. 🙂
justenoughstyle.blogspot.com
You are such an awesome woman! I have been following your blog and LOVE all your ideas! Thanks for the updates! Hope you had a good Easter! 🙂
Jessica, go for it girl! Catherine, thanks so much for your encouragement and taking the time to write!!
-Sarah
Love your new picture and looking forward to trying one of your cupcake recipes for a shower I'm hosting! Thanks for sharing!
Thanks for the fun idea Sarah! I am totally going to make these for teacher gifts! Hope your family is doing well!
These would make GREAT teachers gifts, especially when you can personalize them with the teachers taste. Thanks so much!
Found this on Pinterest! Thanks for the awesome idea! This might be a dumb question, but I didn't really see how you worked around the metal part of the clipboard in your tutorial. Could you please give me some pointers? I am also just noticing that the scrapbook paper that I bought, 12×12, is just a little bit too small. Wondering if I bought odd sized clipboards?
Hey Jennifer, I cut a rectangle out of the top of my clipboard, opened the clip then slid the paper under and slathered it with Mod Podge. I used the smaller size clipboards. For the larger ones, you could always do a strip of a different paper at the bottom of your board if it's not long enough. That would be really cute! Maybe even some hot glued ribbon at the seam? oh I'm gunna have to try that! 🙂
Love it
I really like this idea. I've been thinking of a gift for my master teacher as I just finished student teaching. I think this is it!
Oh what a great idea! What teacher can’t use another clipboard!?
Hi Sarah! I just did this wonderful project and linked it back to you. Check it out if you'd like! two-in-diapers.blogspot.com. Love it, thanks for sharing! You are so creative!
Thank you!
I was so excited to find a great idea for clipboards. The brand new clipboards purchased for my classroom last year that also need to last this year look absolutely awful! I was going to paint them, but I think I'm going to cover and ModgePodge them instead. Thanks for a wonderful idea and an inspiring blog!
Oh wonderful!! I’m glad to have inspired you to make something more beautiful!!
Olá Sarah!!!
Adorei as suas idéias.Você tem bom gosto.
Beijos.
Marcia Rachel.
Gracias!
Hi Sarah,
I love this idea and I was just thinking of sprucing my clipboard up as well since I'm homeschooling my son. I do have a question on the ribbon though. When you demonstrated pulling the ribbon up from underneath the clipboard, did you drill holes in the back or how did you get holes in the back of the clipboard?
I pushed the ribbon through the holes in the clipboard that were already there. I think these are the holes they put on the clipboard if you want to hang it on the wall. Does that answer your question?
I made these several years ago but have trouble when I put paper onto the clipboard. The sheet sticks to the mod podged surface. It seems like the mod podge has just enough tackiness to grab it. It also creates a bumpy writing surface. Any ideas?
Yes, roll the paper out slowly from the top of the clipboard down to the bottom, smoothing out the bumps as you go down. (Think about the way wallpaper is applied.) Going slower will help decrease the bubbles.