
I’ve never been too keen on math. Words I love, but numbers I loathe. (Although for some strange reason I’m drawn to Sudoku puzzles… try to figure that one out!) Anyway, I’m hoping my little Owen will have more of a love of numbers and math than his mommy, so we’re starting early by making numbers into toys!
You can see by the impatient little hands in this picture that these have already been a big hit. He didn’t want to wait for me to photograph his new toys!
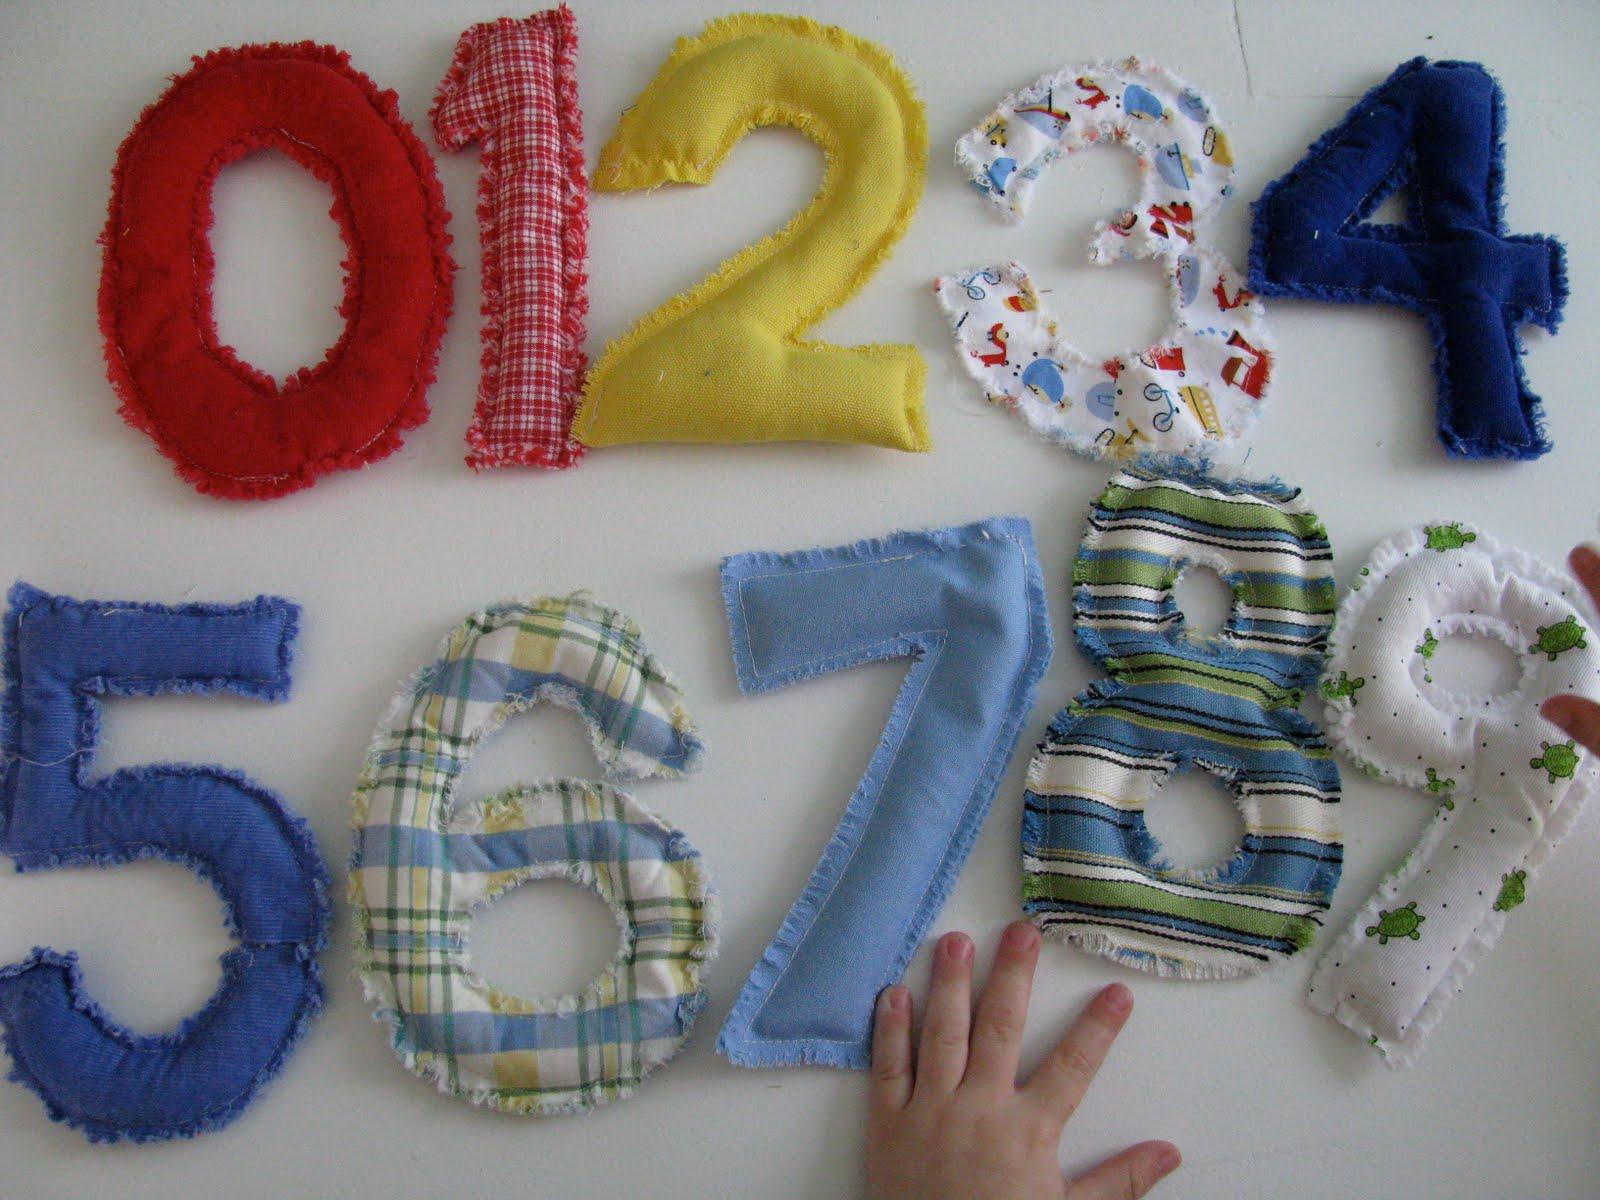
I made these numbers using the technique I used to make my tummy time mat.
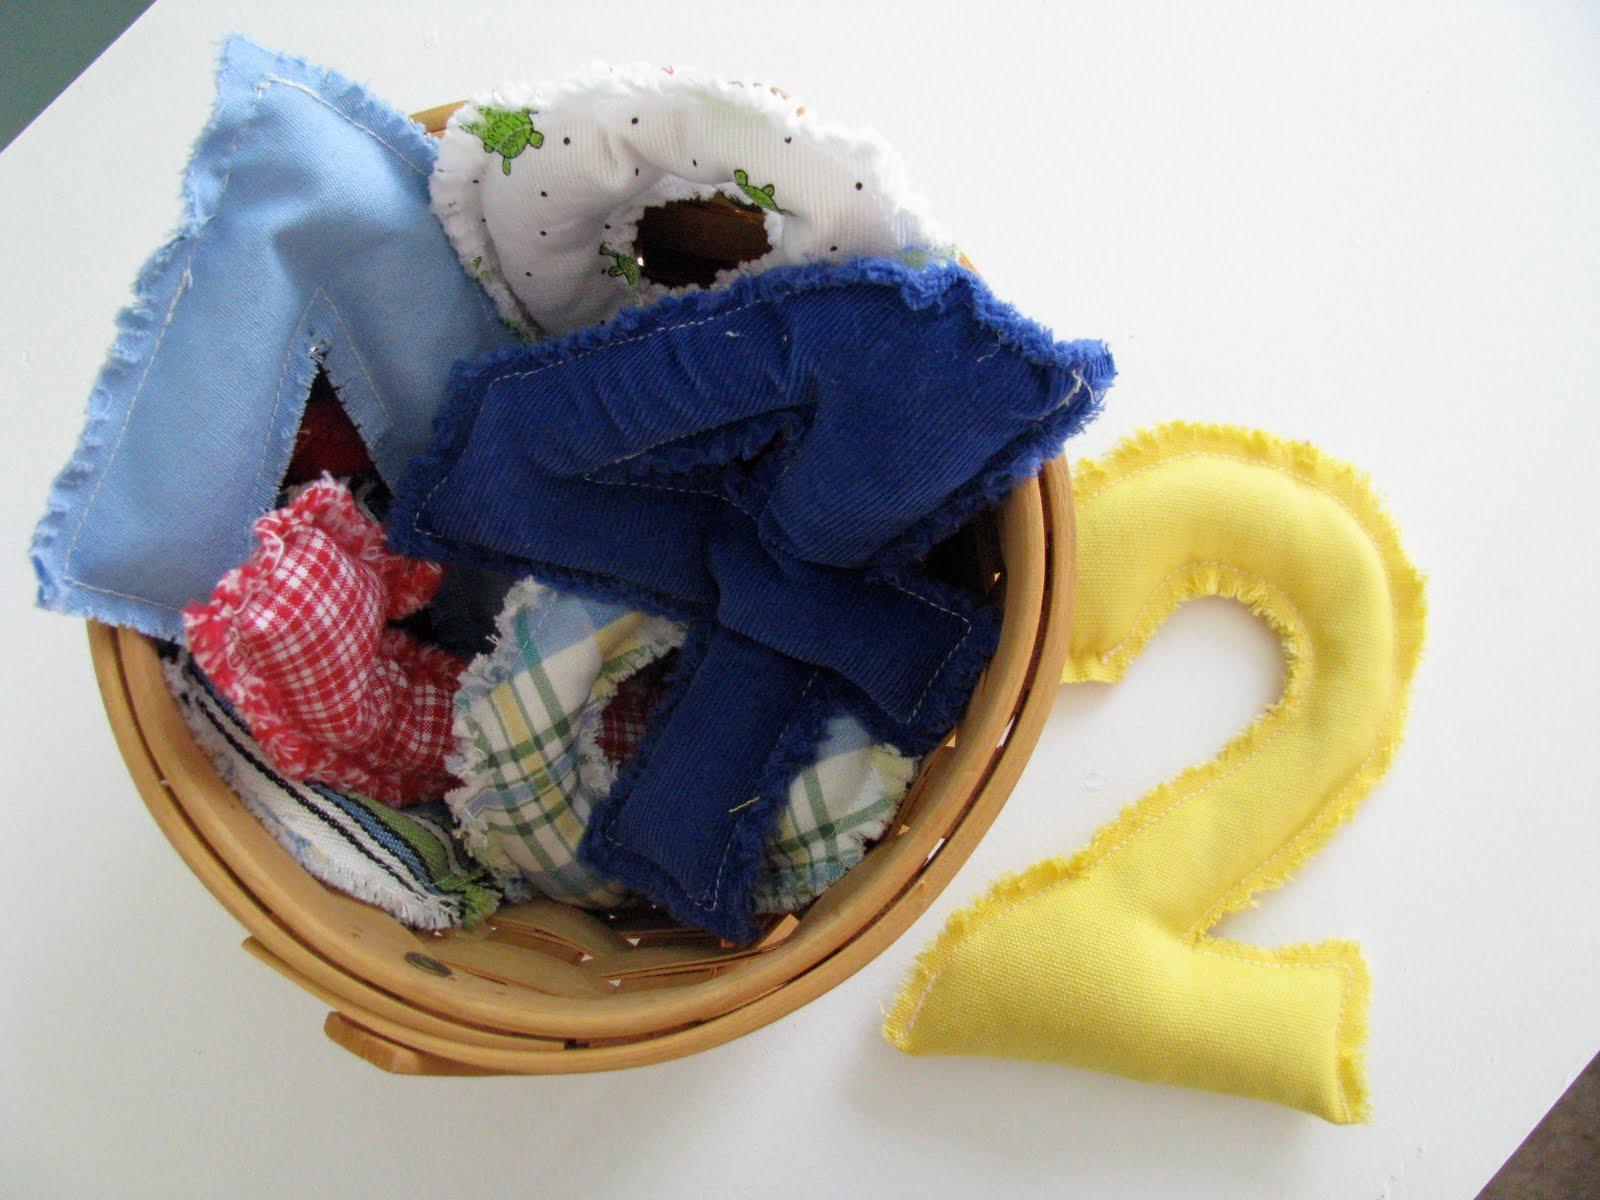
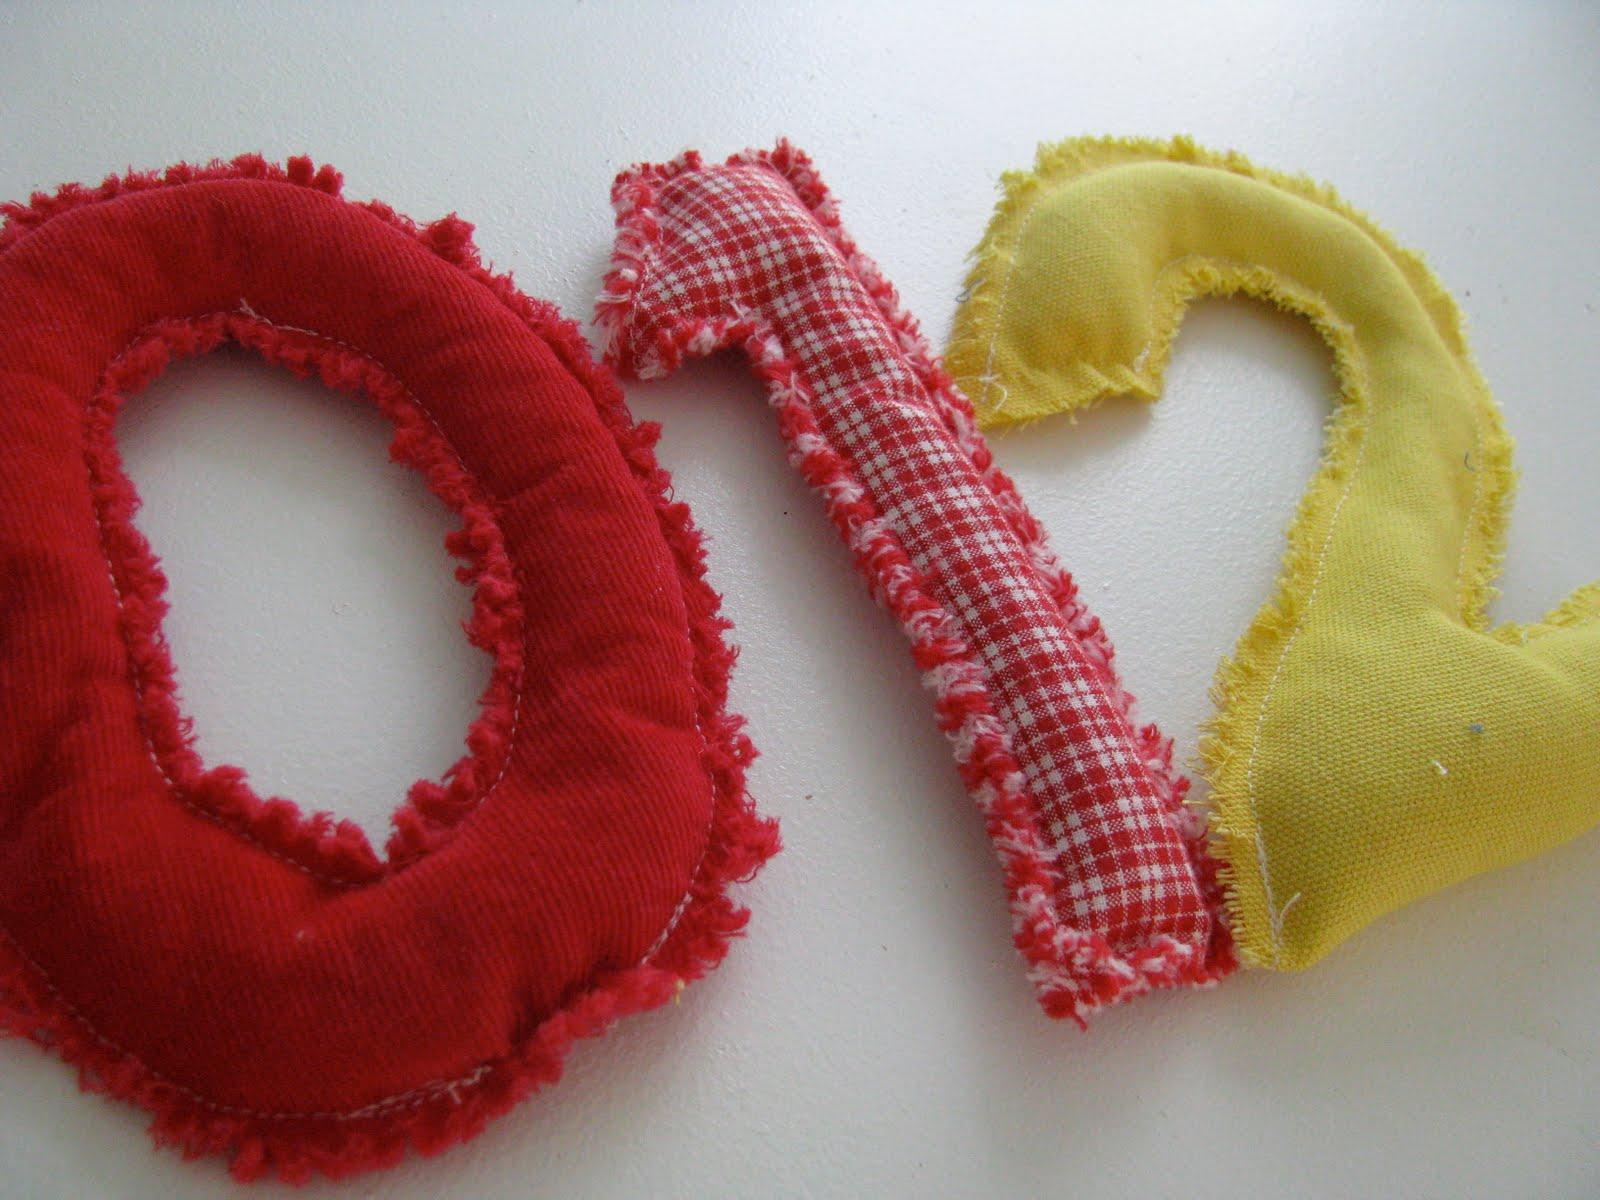
After washing them they get these really great frayed edges, then I stuffed them with rice. (So I guess technically these are more like ricebags than beanbags… ricebags sounds a little weird though!)
Do you want a tutorial? Well alright!

Here’s what you’ll need:
- 10 different scrap pieces of fabric
- Rice
- Funnel
- Plastic Straw
- Graph Paper
- Sharp Scissors
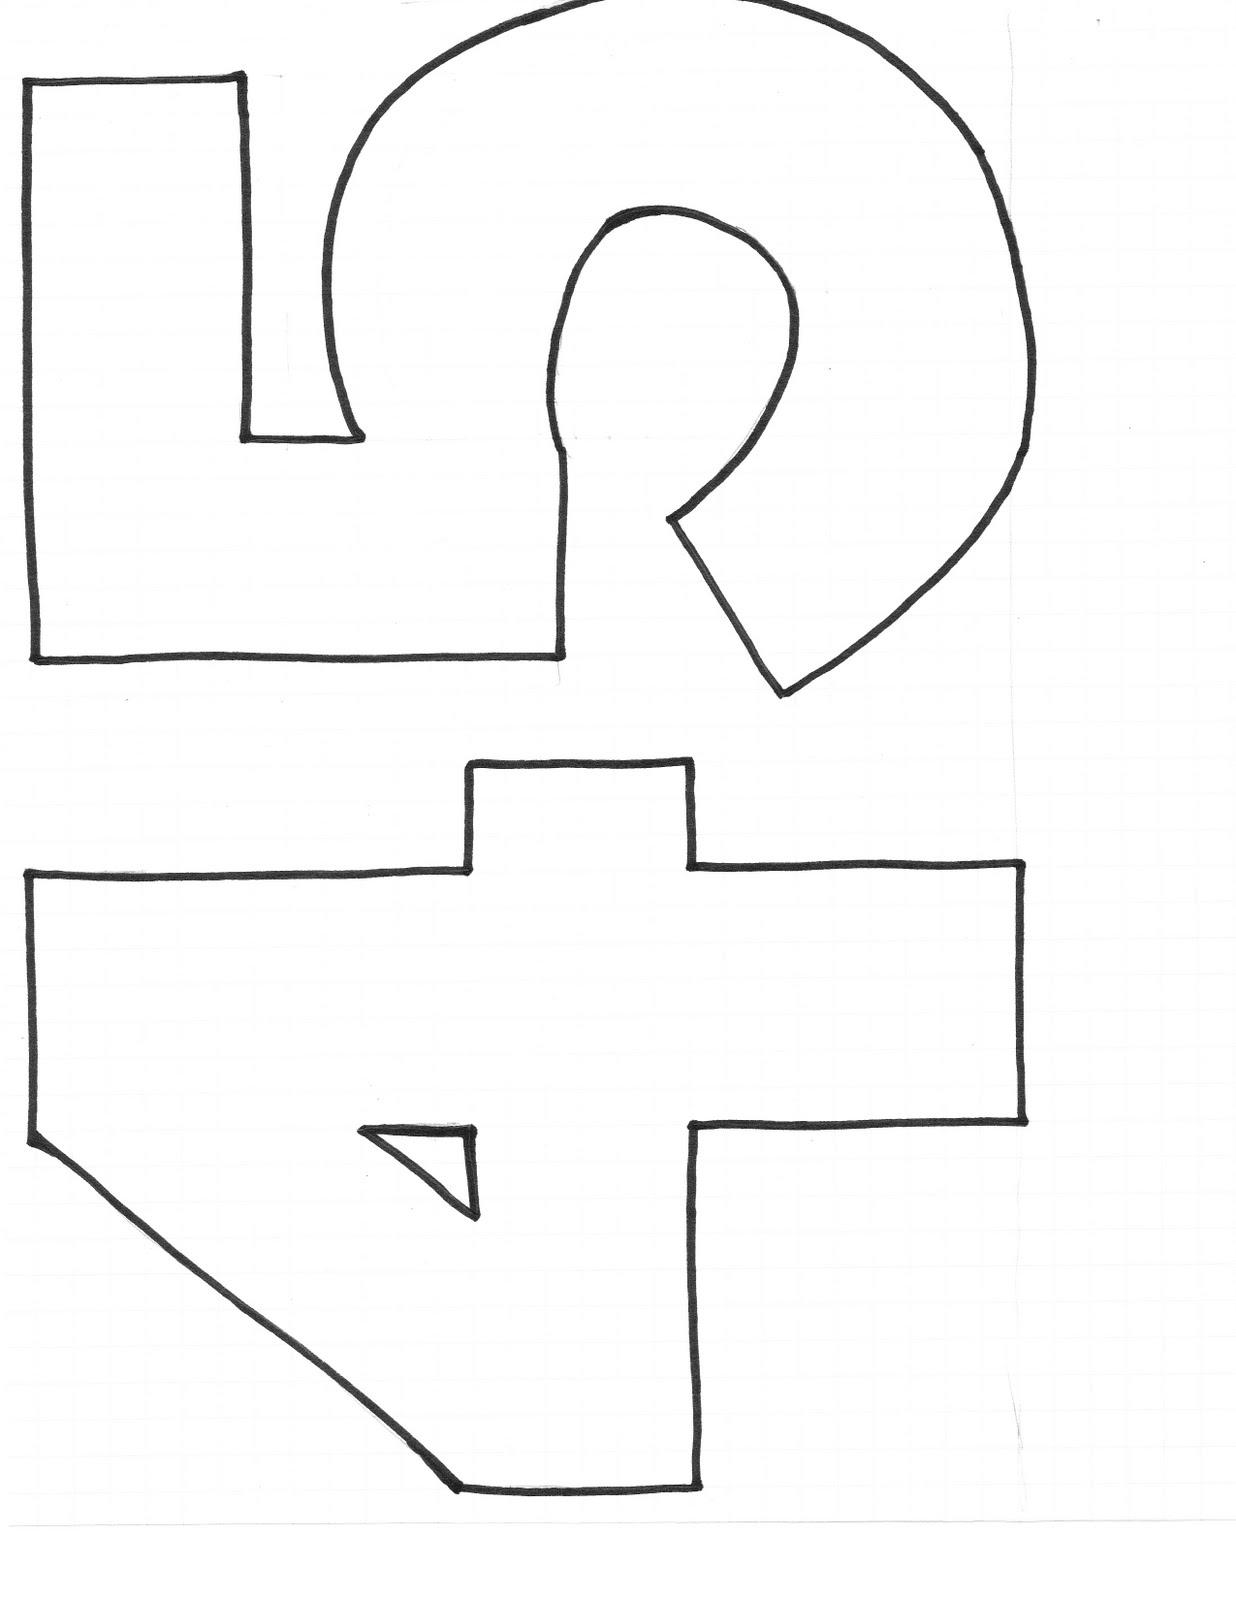
First you’ll want to draw some numbers on your graph paper. I made sure that the width was at least 2 1/4 inches at all points of the number, the graph paper helped with that a bunch. Below are my numbers “4” and “5”. If you would like to print this picture out on a full 8 1/2 by 11 piece of paper you’ll see the scale I used. If you would like the other numbers, check out this post.
Next, cut out your numbers from the graph paper and pin them to your fabric. Be sure you have the wrong sides of the fabric together when you cut the numbers out. You won’t be flipping these inside out, so you’ll want the pretty side of the fabric to face out.
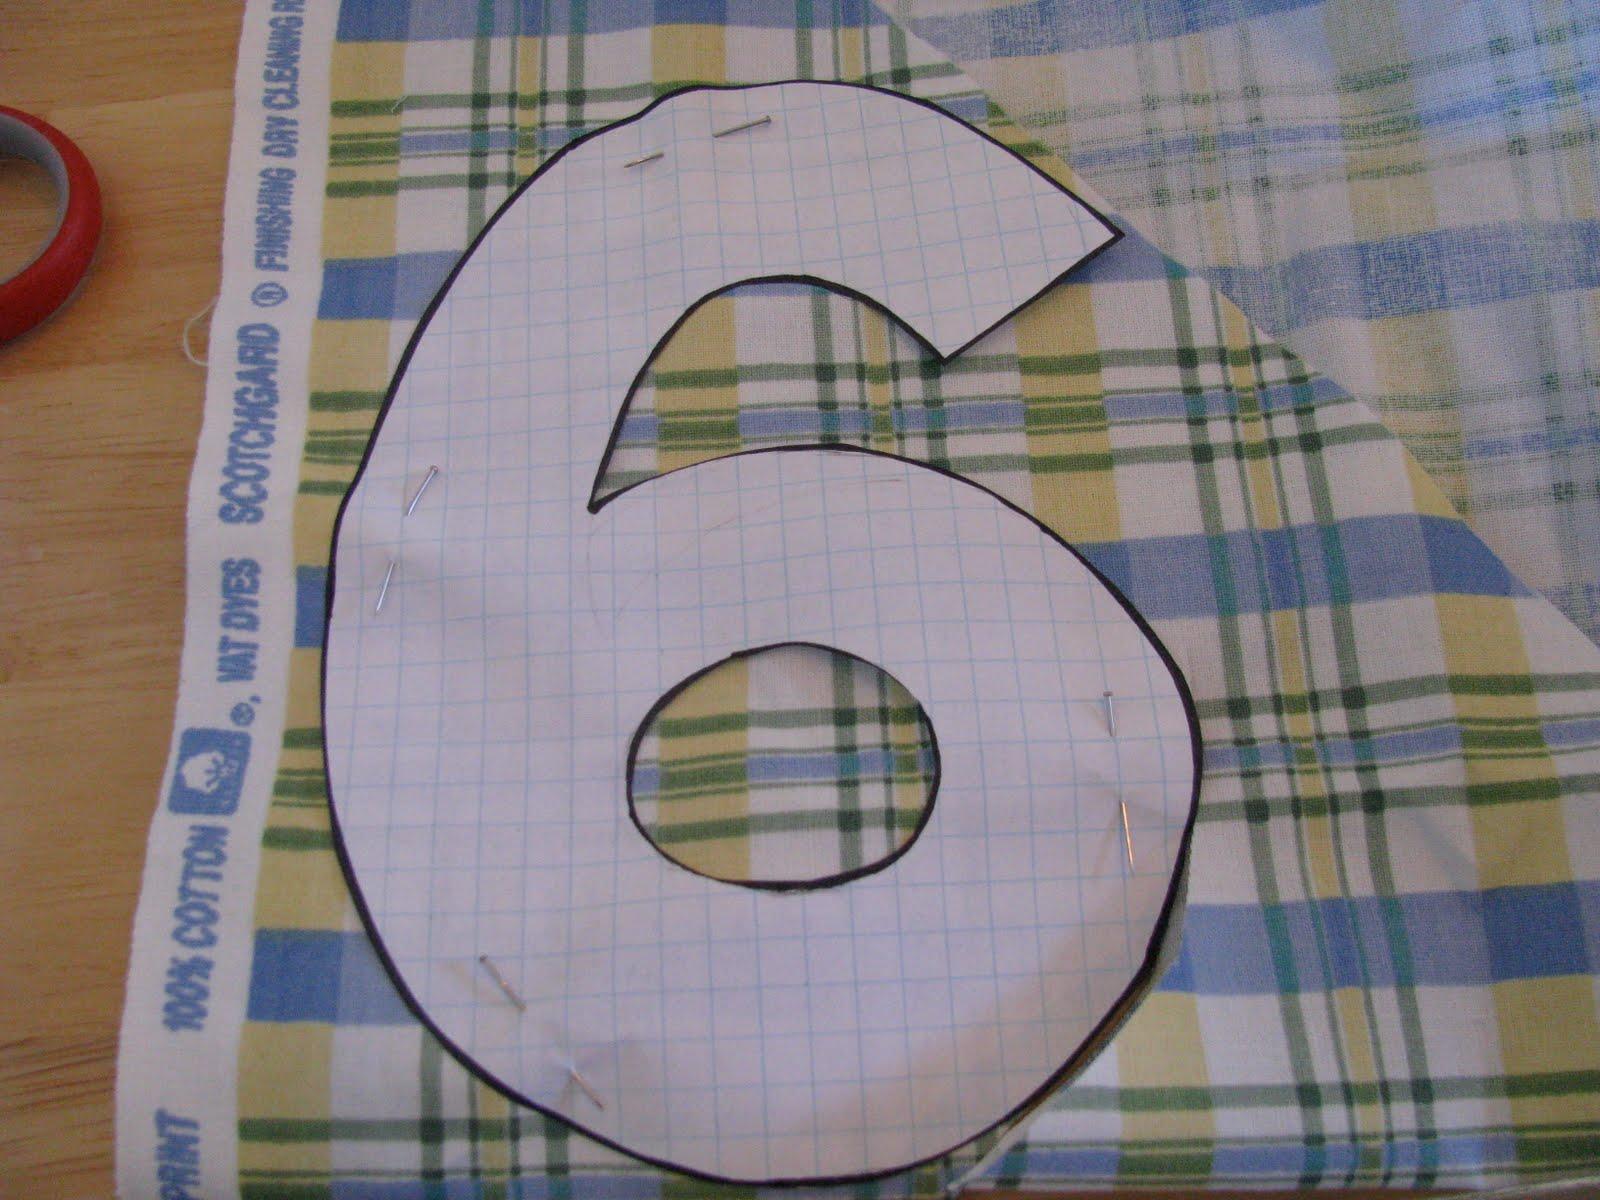
Stitch around the outside edges of each number, be sure to leave a 1/4 inch seam allowance and at least a 1 inch opening to put the rice in later.
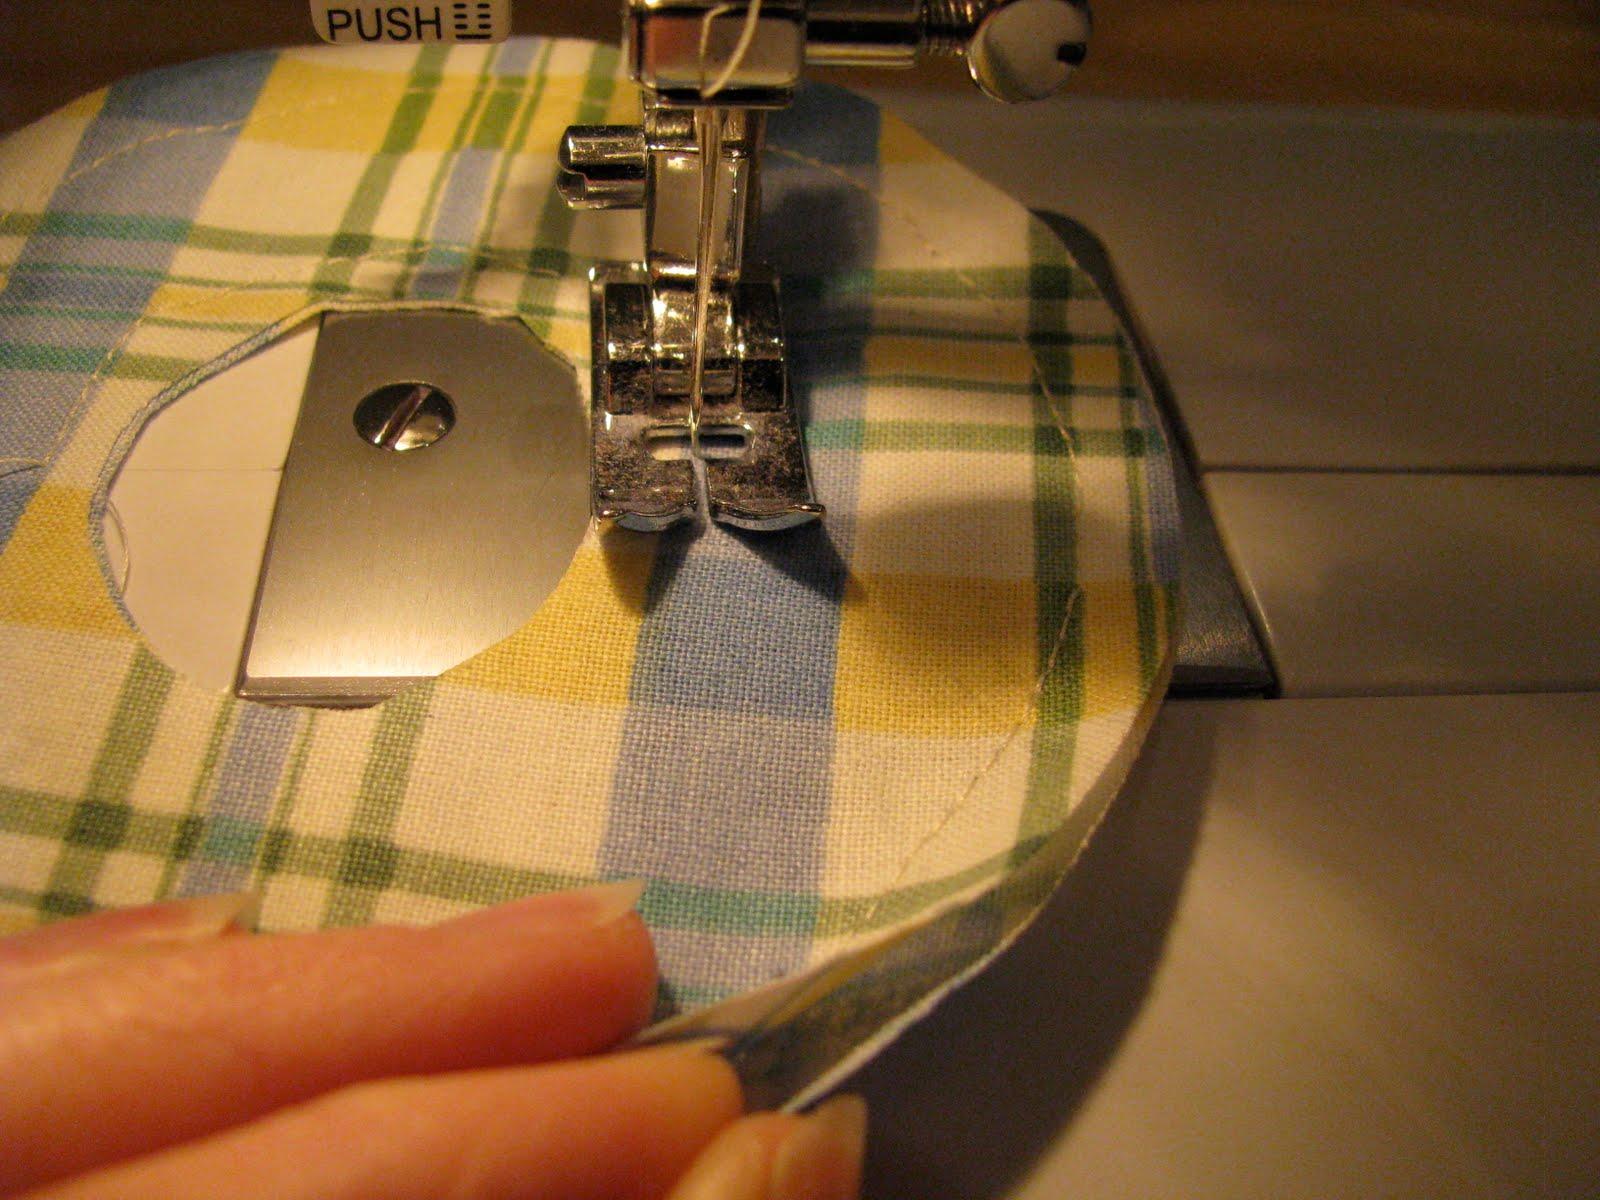
Using some sharp scissors, cut the edges of the number. Be super careful not to cut your sewed edge or you’ll be going back to your sewing machine to fix it. Be patient with this step, it takes some time, but it’s worth it in the end!
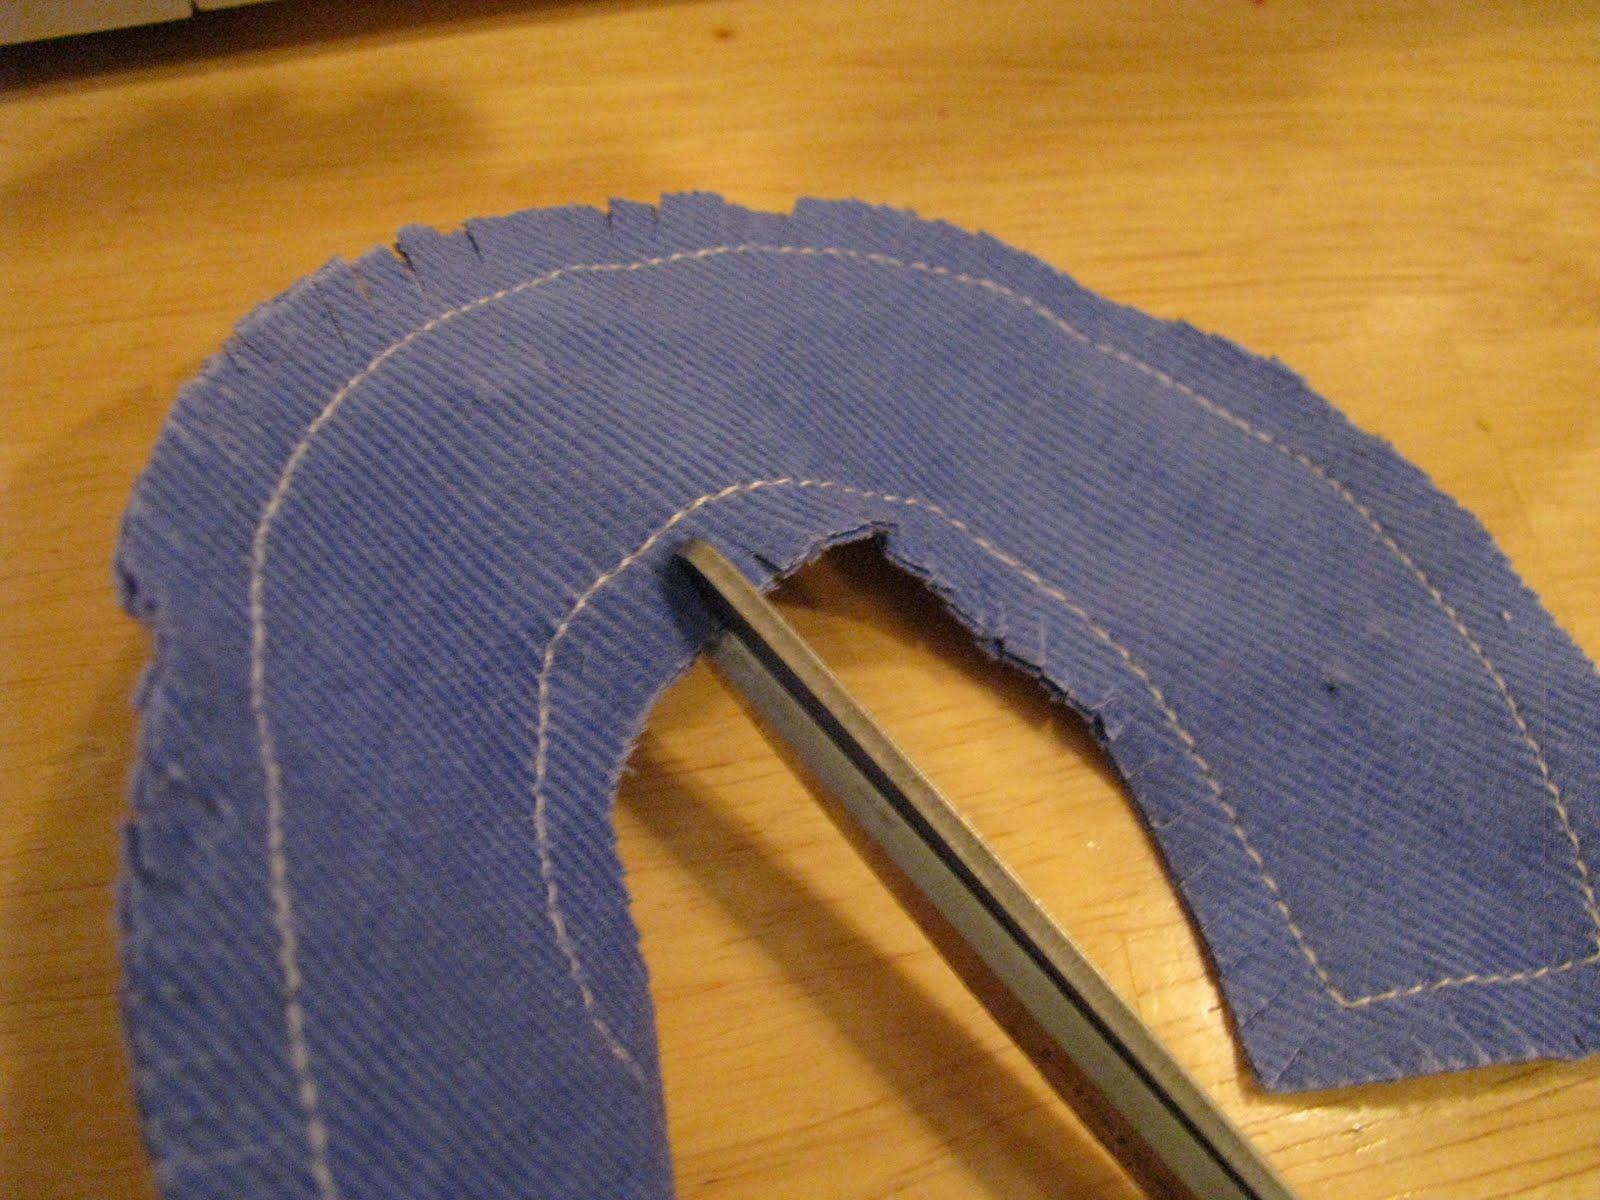
When all of the edges have been clipped you’re ready for the fun part! Throw the numbers into your washer and dryer and the edges will fray beautifully! Your final step is to fill each number with rice using the funnel. I’ve found that a plastic straw works well to jam the rice down into the bottom of the numbers. Stitch the opening closed and you’re all done!

Oh, these are so cute! As soon as I saw them I thought they would be so cute on a blanket, stuffed with batting to still give them the raised look. I think i'll try it. Thanks for the cute idea!
I love these! I plan on making these for sure. Thanks!
These are great!
Really cute idea! I think I'll steal it for my son's second birthday coming up. I found you from SYTYC, and I've been enjoying your blog!
Adorable!
Love your blog! I'm adding your button to my blog. Thanks,
PatC with all is bright!
HEllo CUTE!!!!!! I'm totally going to make these!
These are so cute Sarah. I would love to make an alphabet for my little girl.
I'm FOR SURE making these! My friend has a shower coming up- I think this would be a great personalized gift.
Oh my gosh what a cute idea!!
So cute! I just may have to do this! Thanks for the tutorial!!
I just wanted to say thank you for the time and effort you put into your blog. I love your ideas and inspirations.
I was recently provided a "Sunshine Award" which I wanted to pass along to you as a thank you for all your work. It isn't much, but it is a small symbol of my appreciation. You have so many wonderfully creative ideas. Thank you for sharing and inspiring us all.
[http://pinktea-cj.blogspot.com/]
Wow, you guys are so sweet! I love putting in the effort when I know that you all enjoy these projects so much! Thanks for commenting!
I found your bean bag numbers via the Girl Creative and I am swooning over them. Sadly I do not own the capabilities you demonstrate. Do you have an Etsy shop? Because I would buy them from you if you did! I am now following! Can't wait to see more!
Browneyes, Thanks so much for your comment! I'm flattered that you would like to buy these. I have an Etsy shop, but it's not really up and running yet. I have plans for that in the future, so stay tuned!
-Sarah
Love the frayed look. Thanks for sharing. I'm going to attempt the entire alphabet…fingers crossed!
This comment has been removed by the author.
Is it weird that I will be making these, even though I am childless? Oh, well. No one has ever called me normal. I'd just better embrace my weirdness.
I found you through thegirlcreative. Good job, little lady!
I sometimes stop by your blog to check out your great ideas! I couldn't help but tell you that your bean bag numbers tutorial is perfect for the "crafthope.com" new project. http://crafthope.com/2010/04/project-7-liberia-orphan-education-project/
Hi! I love your website. I host a link up party called TOT TUESDAYS every Tuesday where people share their recipes, crafts and activities for toddlers. I’ve also currently got a giveaway for a Mother Earth scarf at the moment. I hope you’ll stop by:
http://www.mydeliciousambiguity.com/
I made these using letters and they turned out so great. I am going to try the numbers next and give them for Christmas gifts for little cousins!
Lazysackchair.com are among the leading firms engaged in manufacturing, supplying and exporting Giant Bean Bag,Giant Bean Bag Chairs Covers.
Great to attractive kids mind.Gemstone Online
This is very awesome post! Its really great.your post is highly informative and impressive also.I am looking for this type of awesome post.Thanks a lot for sharing,create a professional email address.
hiii i like your pics.thanks for sharing.keep it up.for Apple Support Services visit on Apple Mac Support
Deserved design. Thanks Rubber Flooring Bangalore
Delhi based Ruchi Sharma escort agency offering highly varied, exciting and enthusiastic service to make sure your valuable time with our sexy escorts will be enjoyable and memorable. Our sexy South Delhi escorts are very naughty and you will definately come to us again for our VIP female escort service in Delhi by Sonali Sharma.
I found your bean bag numbers via the Girl Creative and I am … bigbeanbagchair.blogspot.com
Hi,
very nice blog
Bean Bag : Bean Bag manufacturer in Mandawali, Delhi, India
This is a great inspiring article.I am pretty much pleased with your good work.
A Bean Bag Bed
Mattress Stores Denver
Furniture Denver