It’s a quick craft with a big “Wow” factor…
It takes only five (cheap!) supplies plus your fabric to come up with something this cute!
You don’t need any special talents to make a gift that’s especially memorable…
And personal…

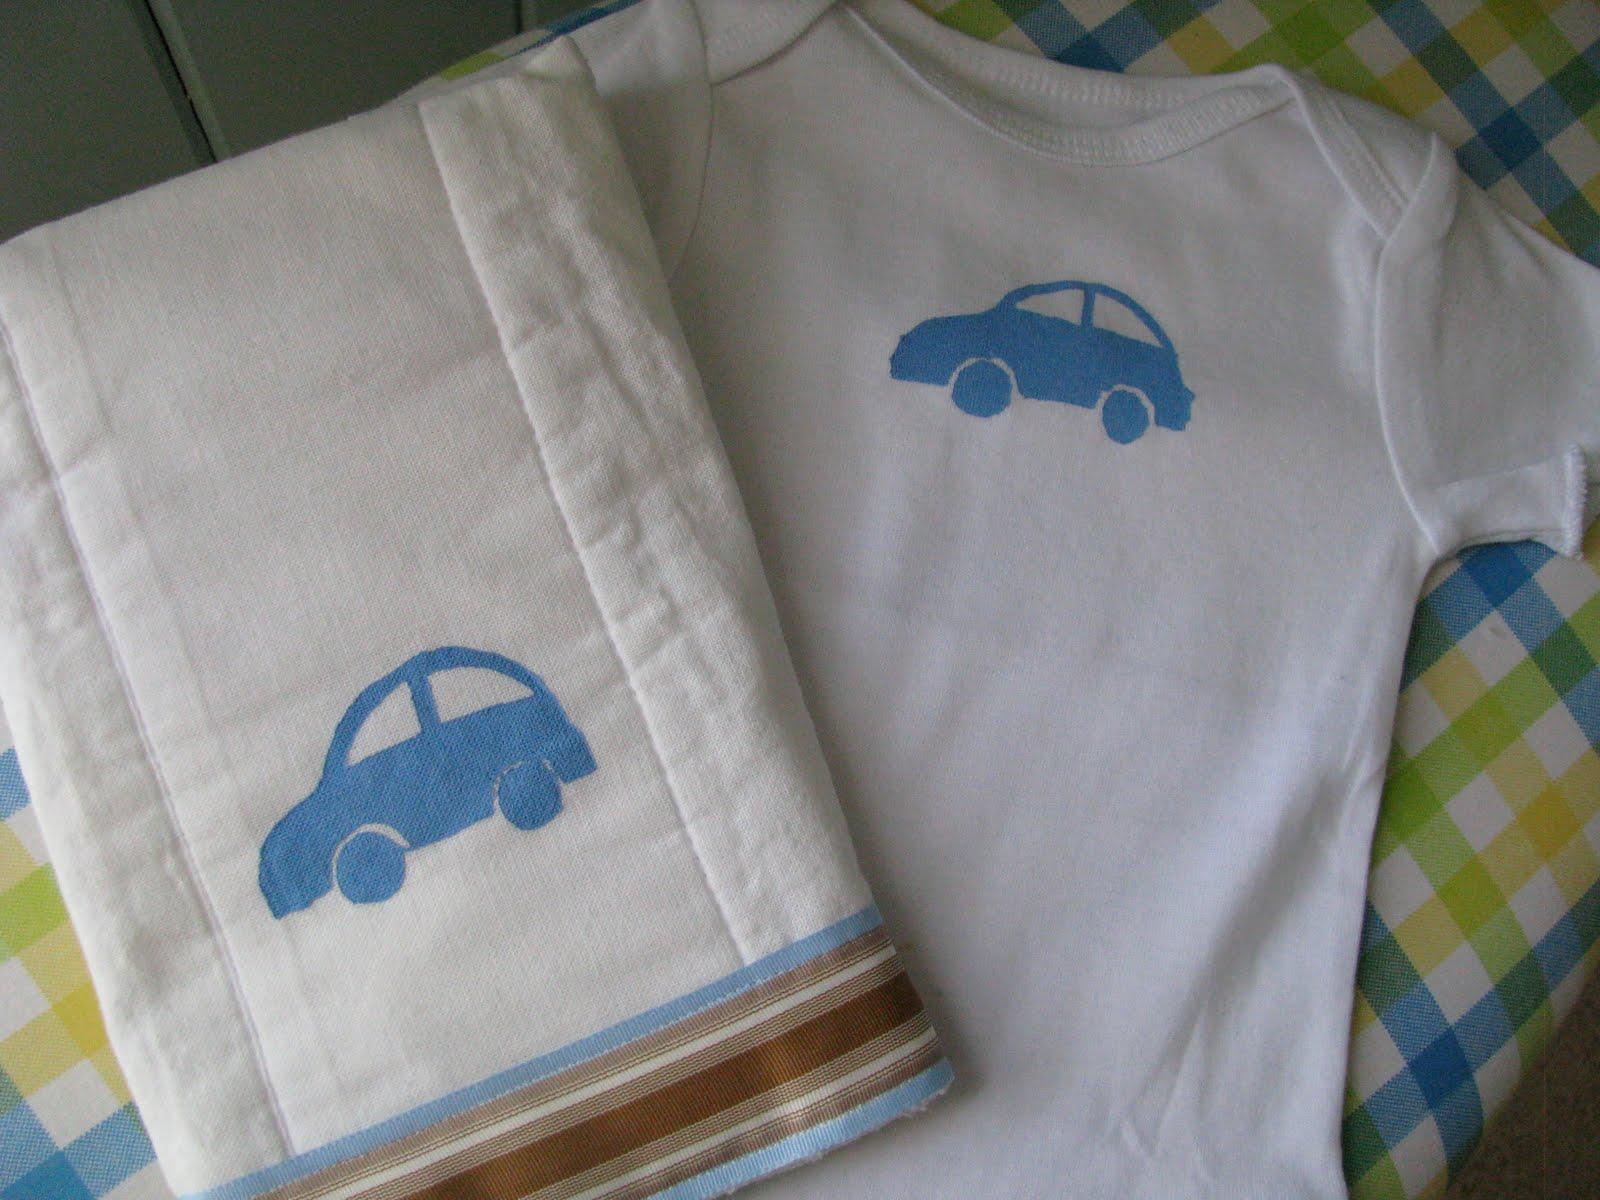
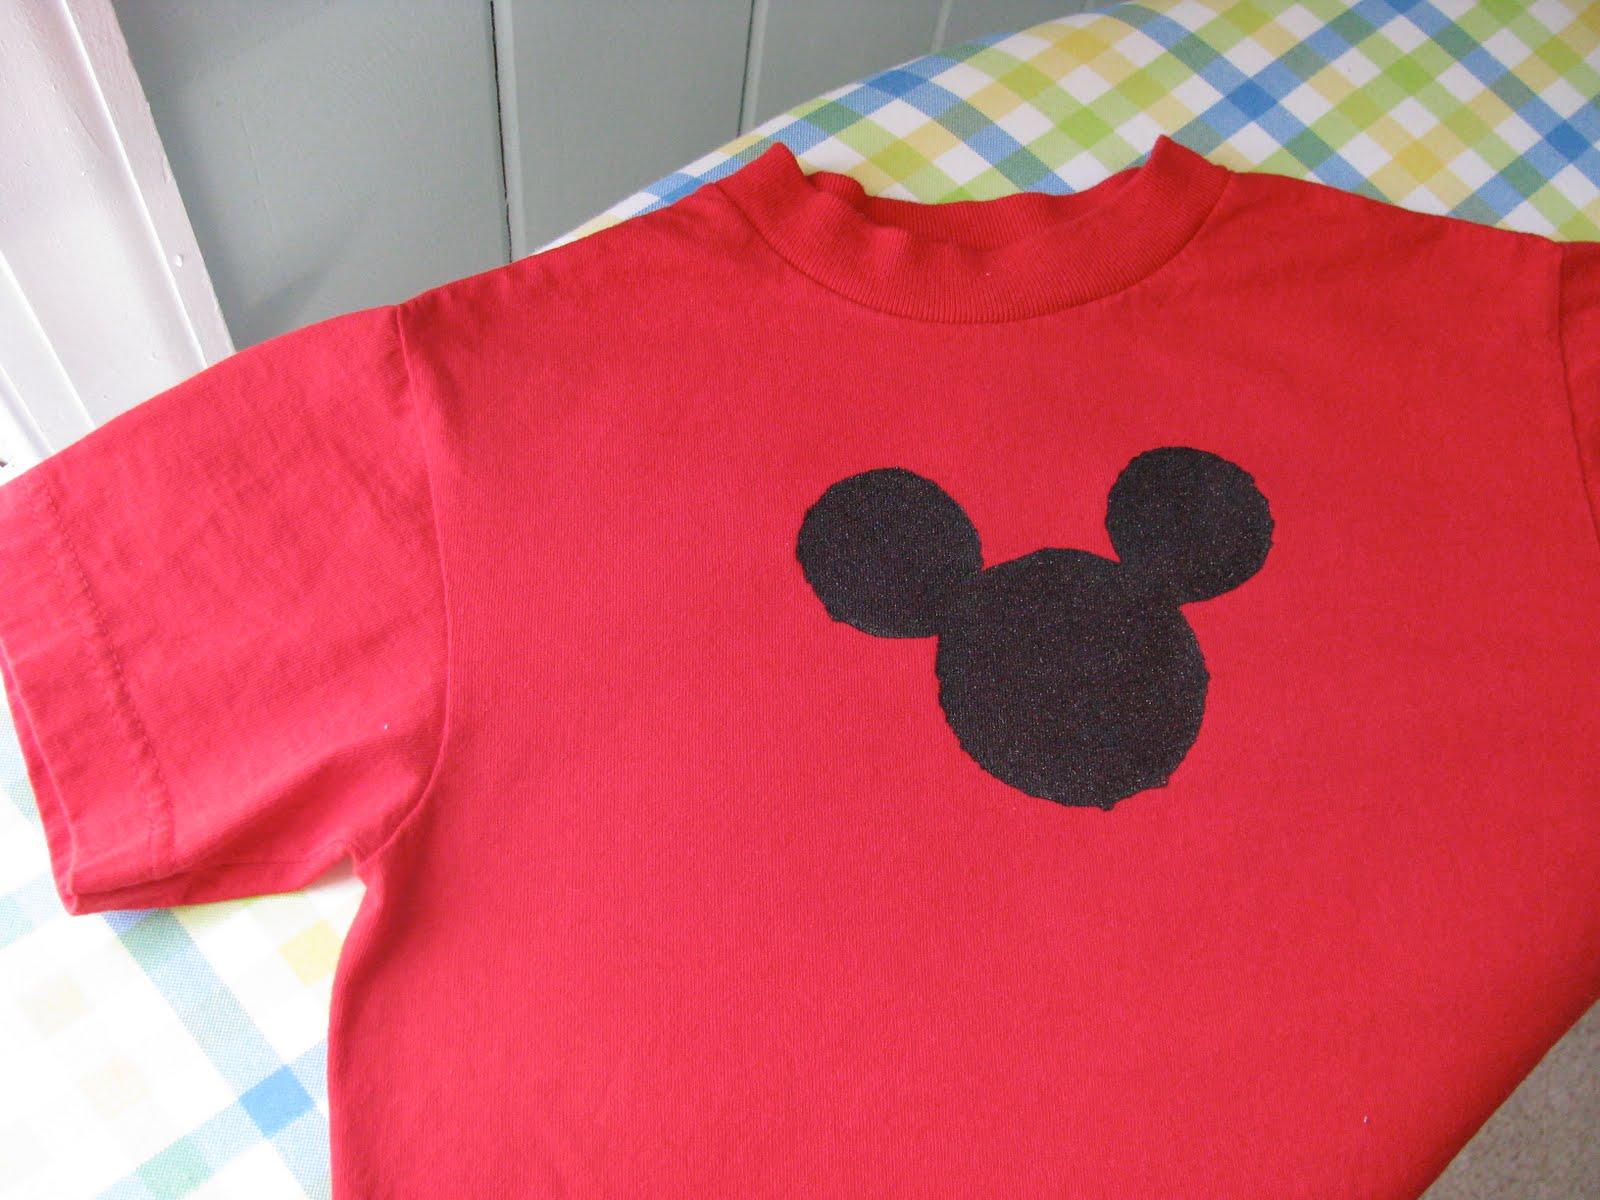
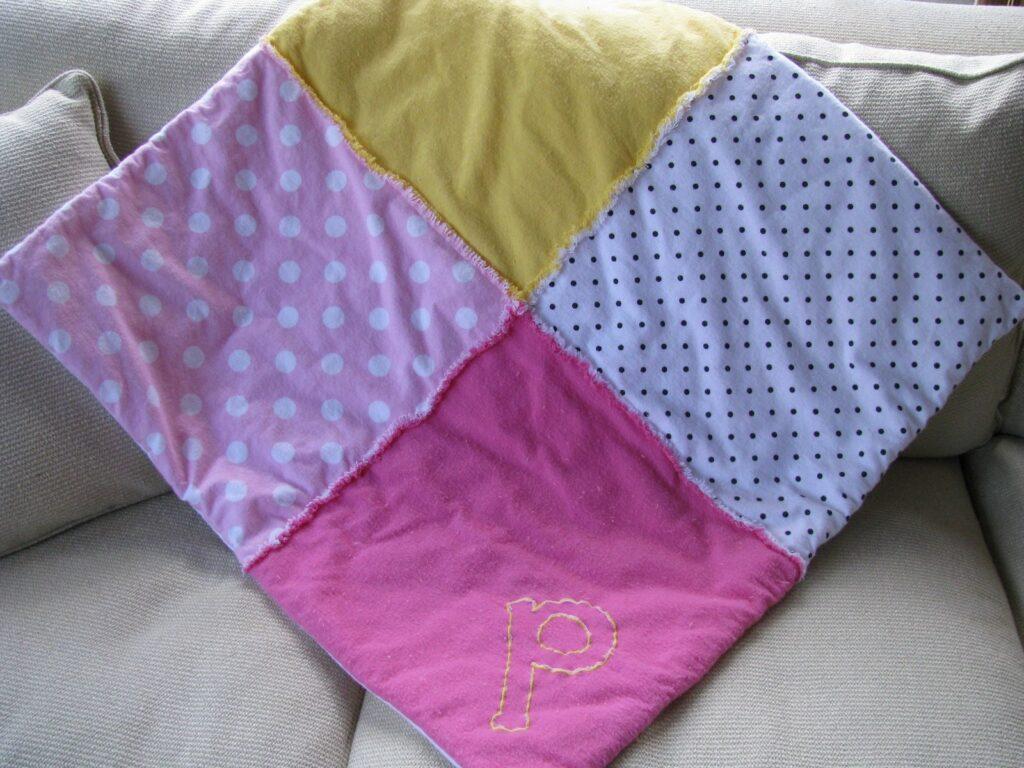
It’s freezer paper stenciling!! I’m a little in love with this technique, can you tell? I was taught how to do this by my dear friend Rockie at our March Create Craft Club meeting and I’ve gone wild with it on everything from Mickey Mouse shirts (can you guess where we are going this summer?) to onesies and most recently the monogrammed pillow cases for my friend’s bachelorette weekend.
You’ll need:
- Regular Acrylic Paint
- Textile Medium (you can find this near the acrylic paint at Michael’s)
- Freezer Paper (from the grocery store or Walmart near the tin foil)
- Exacto Knife
- Sponge Brush
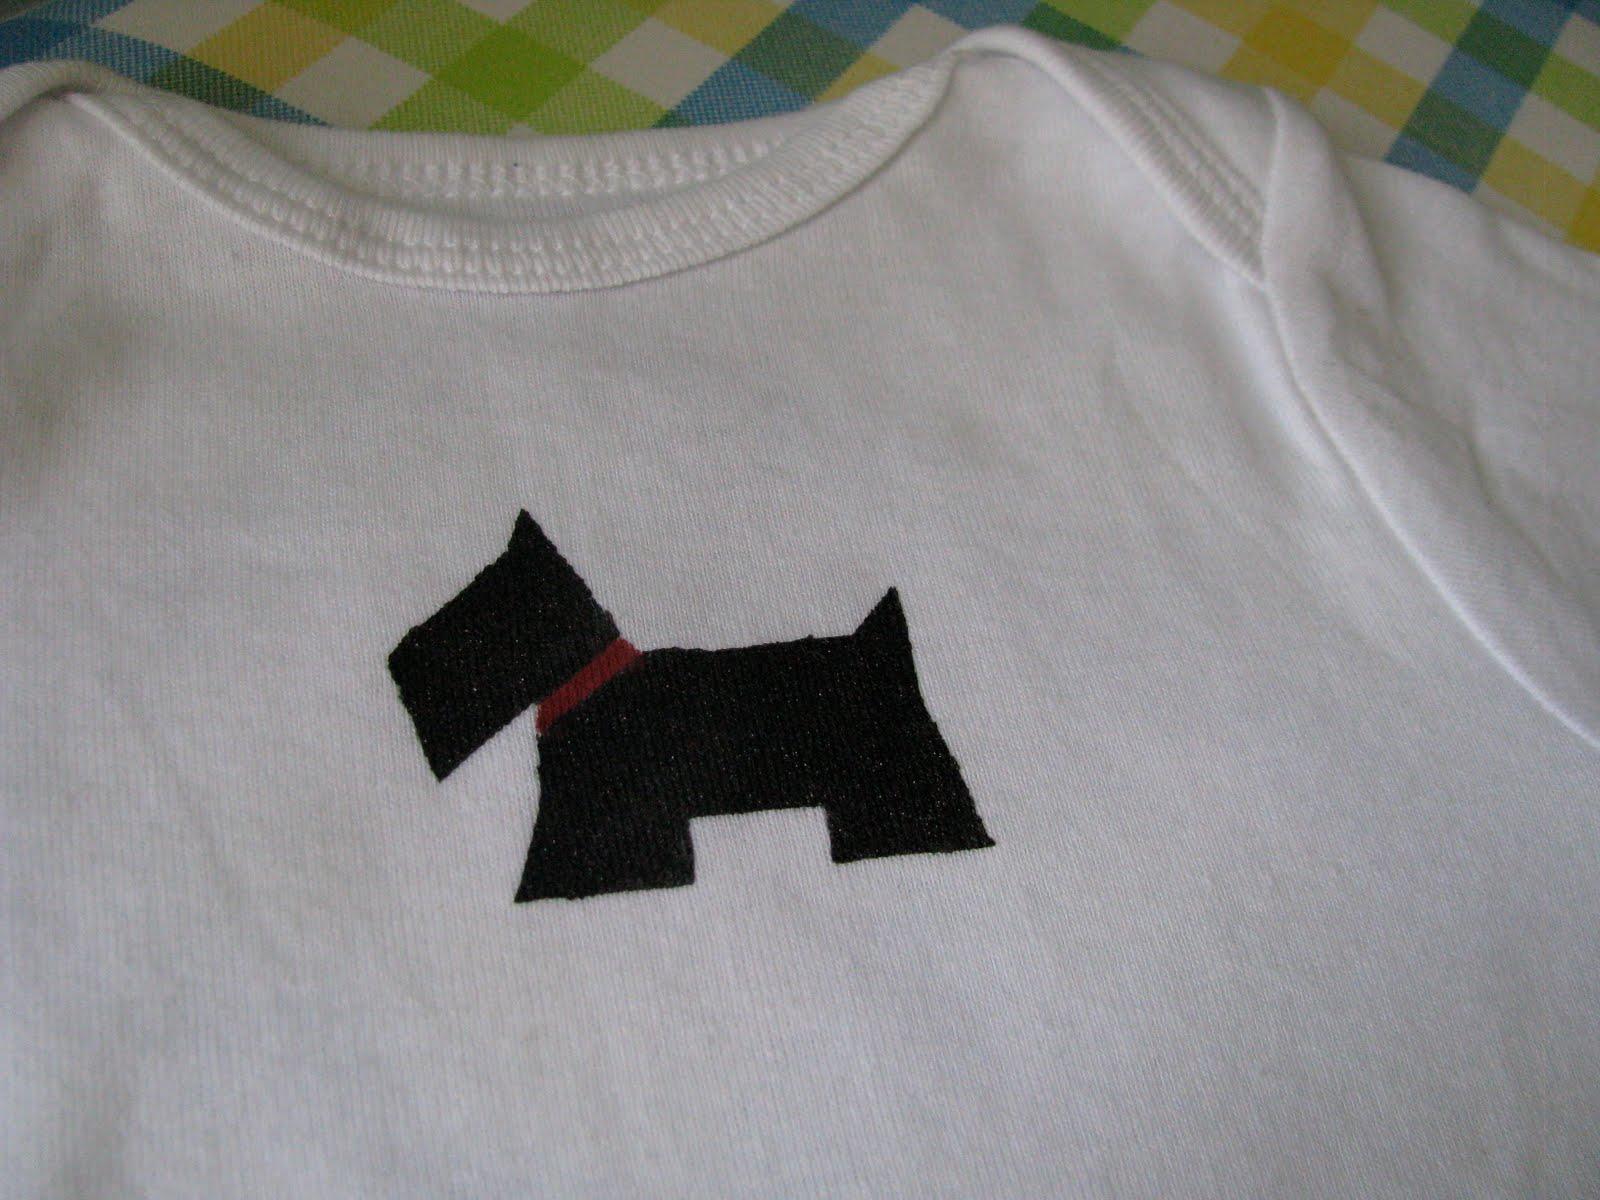
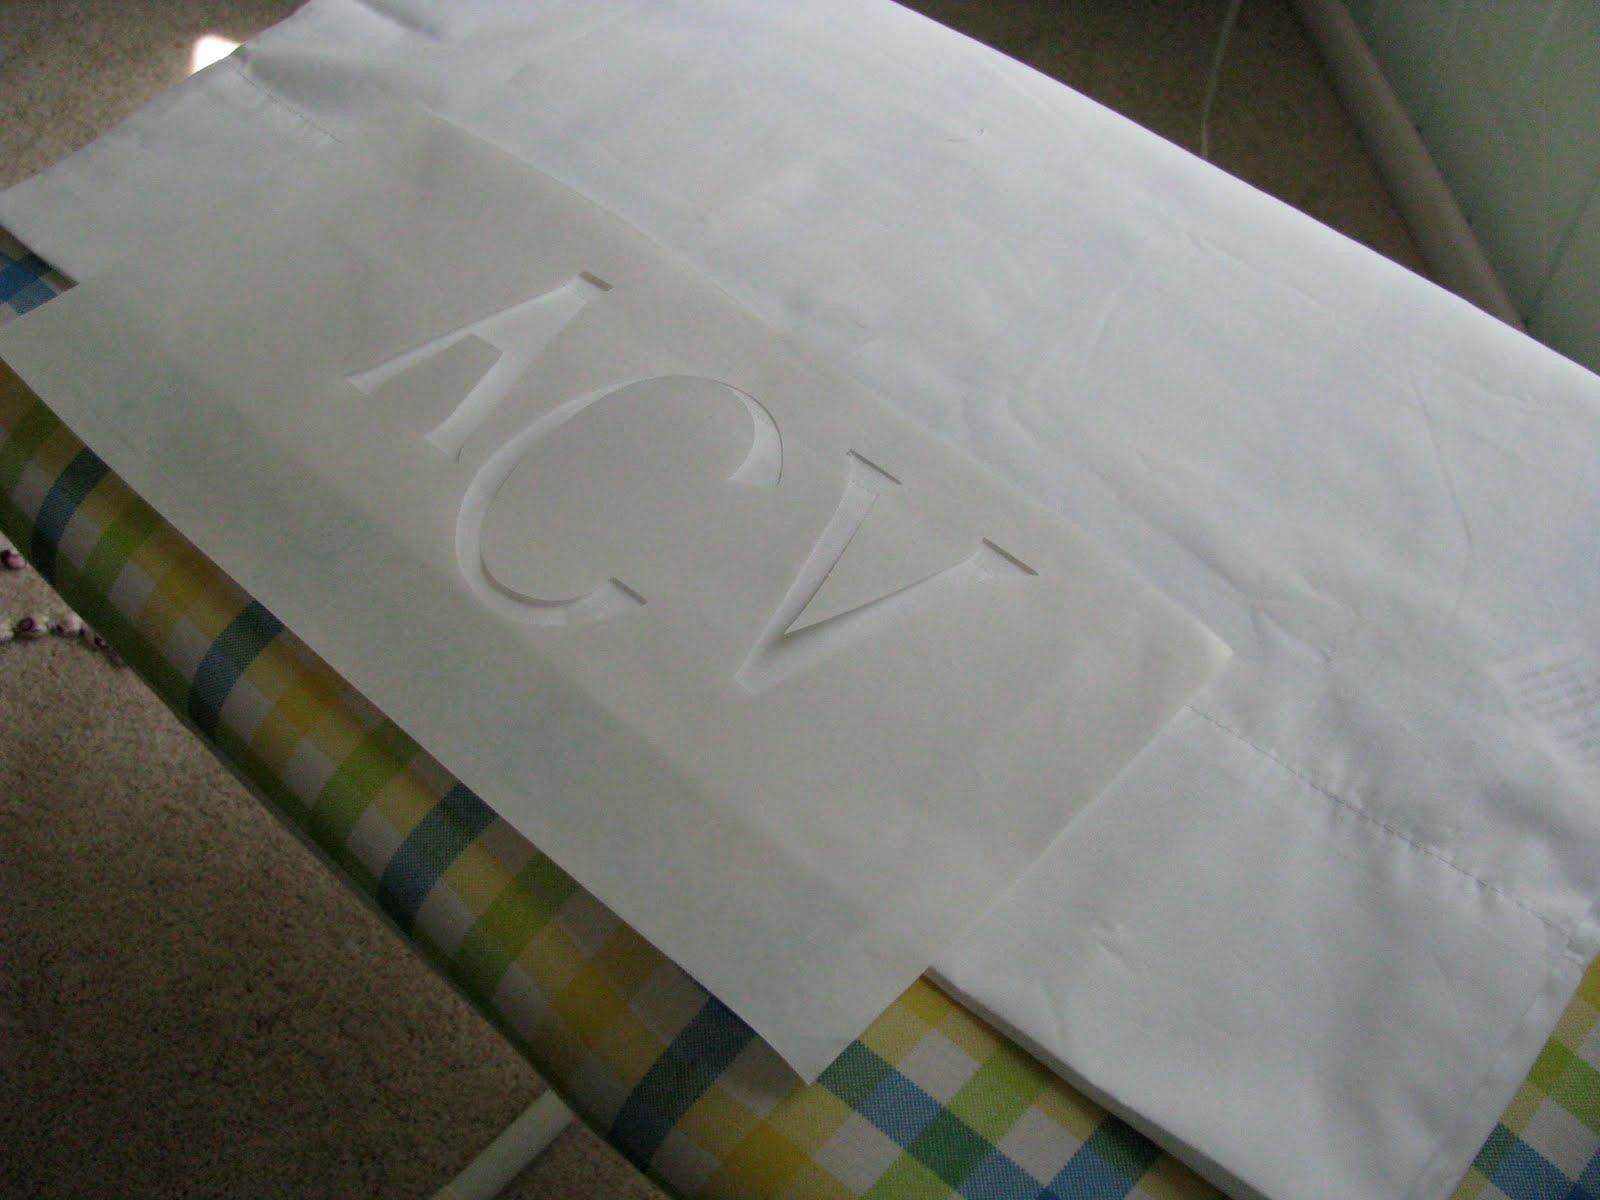
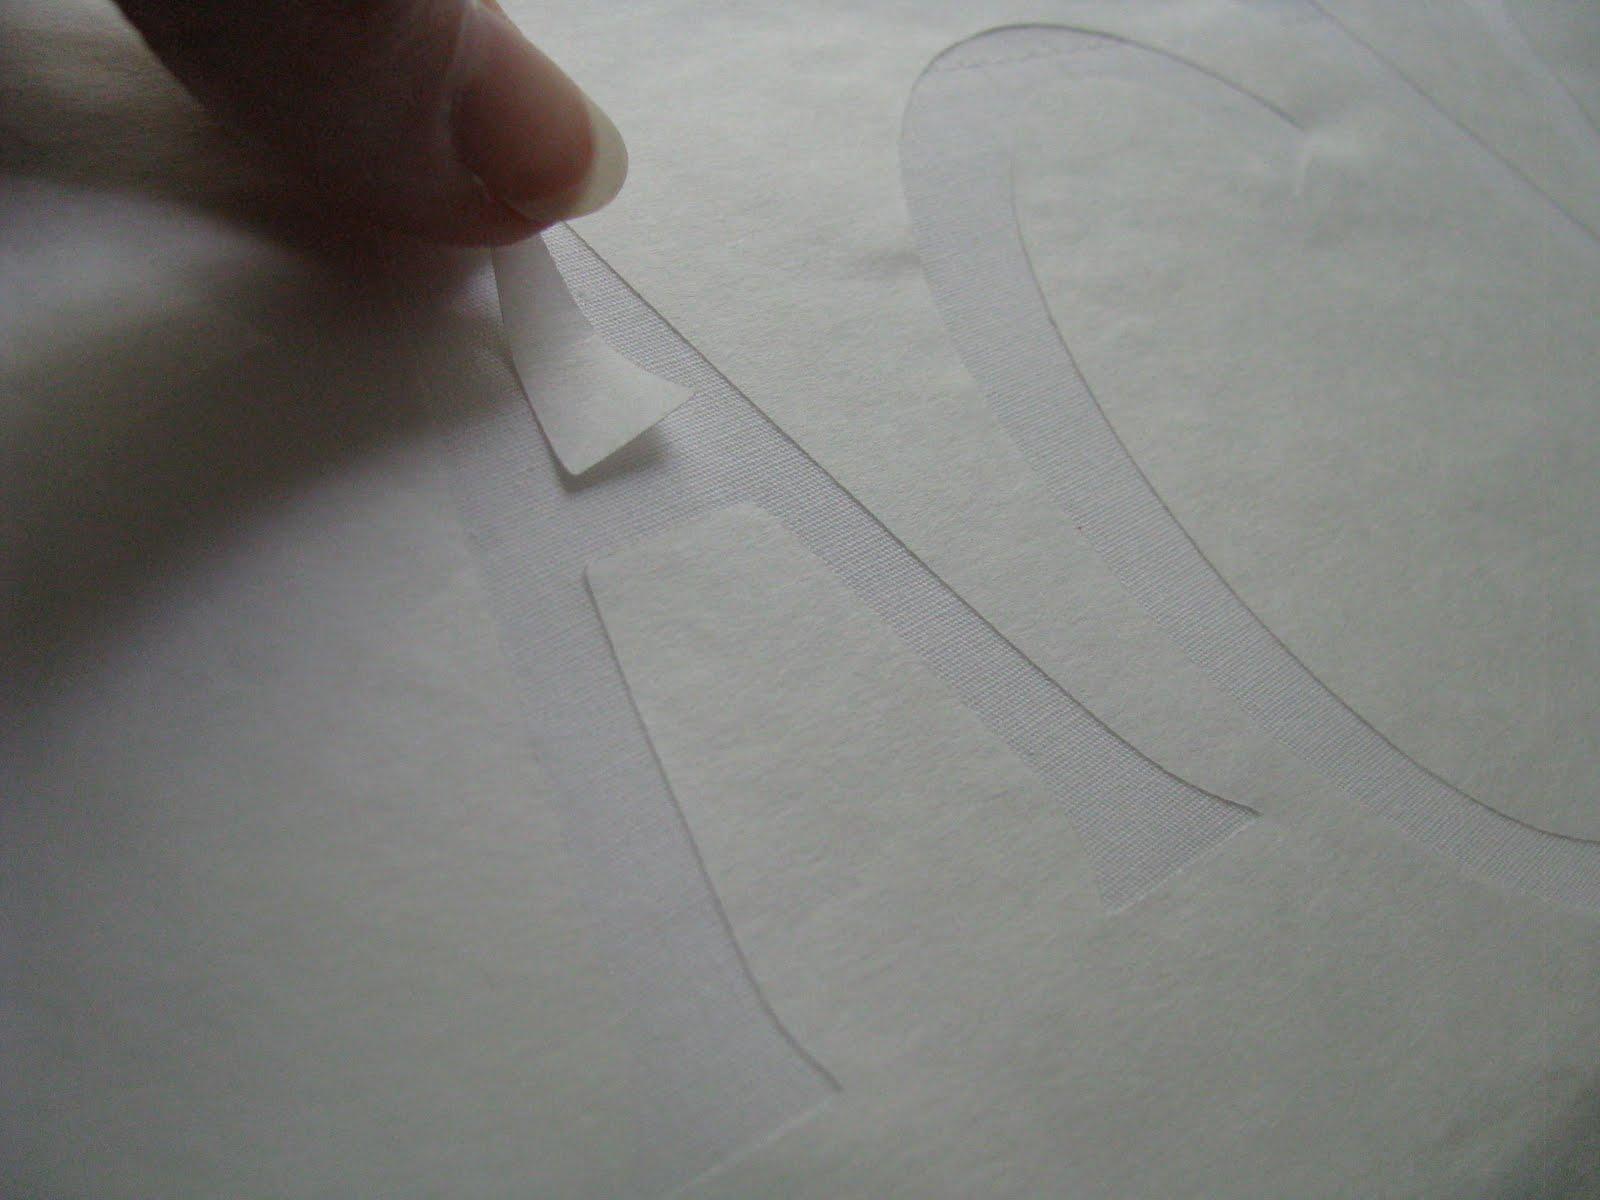
To make the monogrammed pillowcases I used my Cricut machine. I put the freezer paper (shiny side down) on the sticky board and it worked beautifully. You don’t need a Cricut machine though, you can either free hand a design directly on to the freezer paper (like I did with the Mickey shirt, scottie dog and car designs in the pictures above) or you can print directly on to the freezer paper using your printer. Be sure to print or draw on the non-shiny side of the freezer paper then you can cut out your design with the Exacto knife.
Once your design is cut out, place it on the fabric item you want to print. Cut out another piece of freezer paper that is the same size as your design and place it on the back of the fabric you are working with the shiny side up. (The freezer paper design will adhere to the front of your fabric and the scrap piece of freezer paper on the back will protect from any paint that might seep through. You could also use cardboard, but I found that the freezer paper works best because it doesn’t slip.)
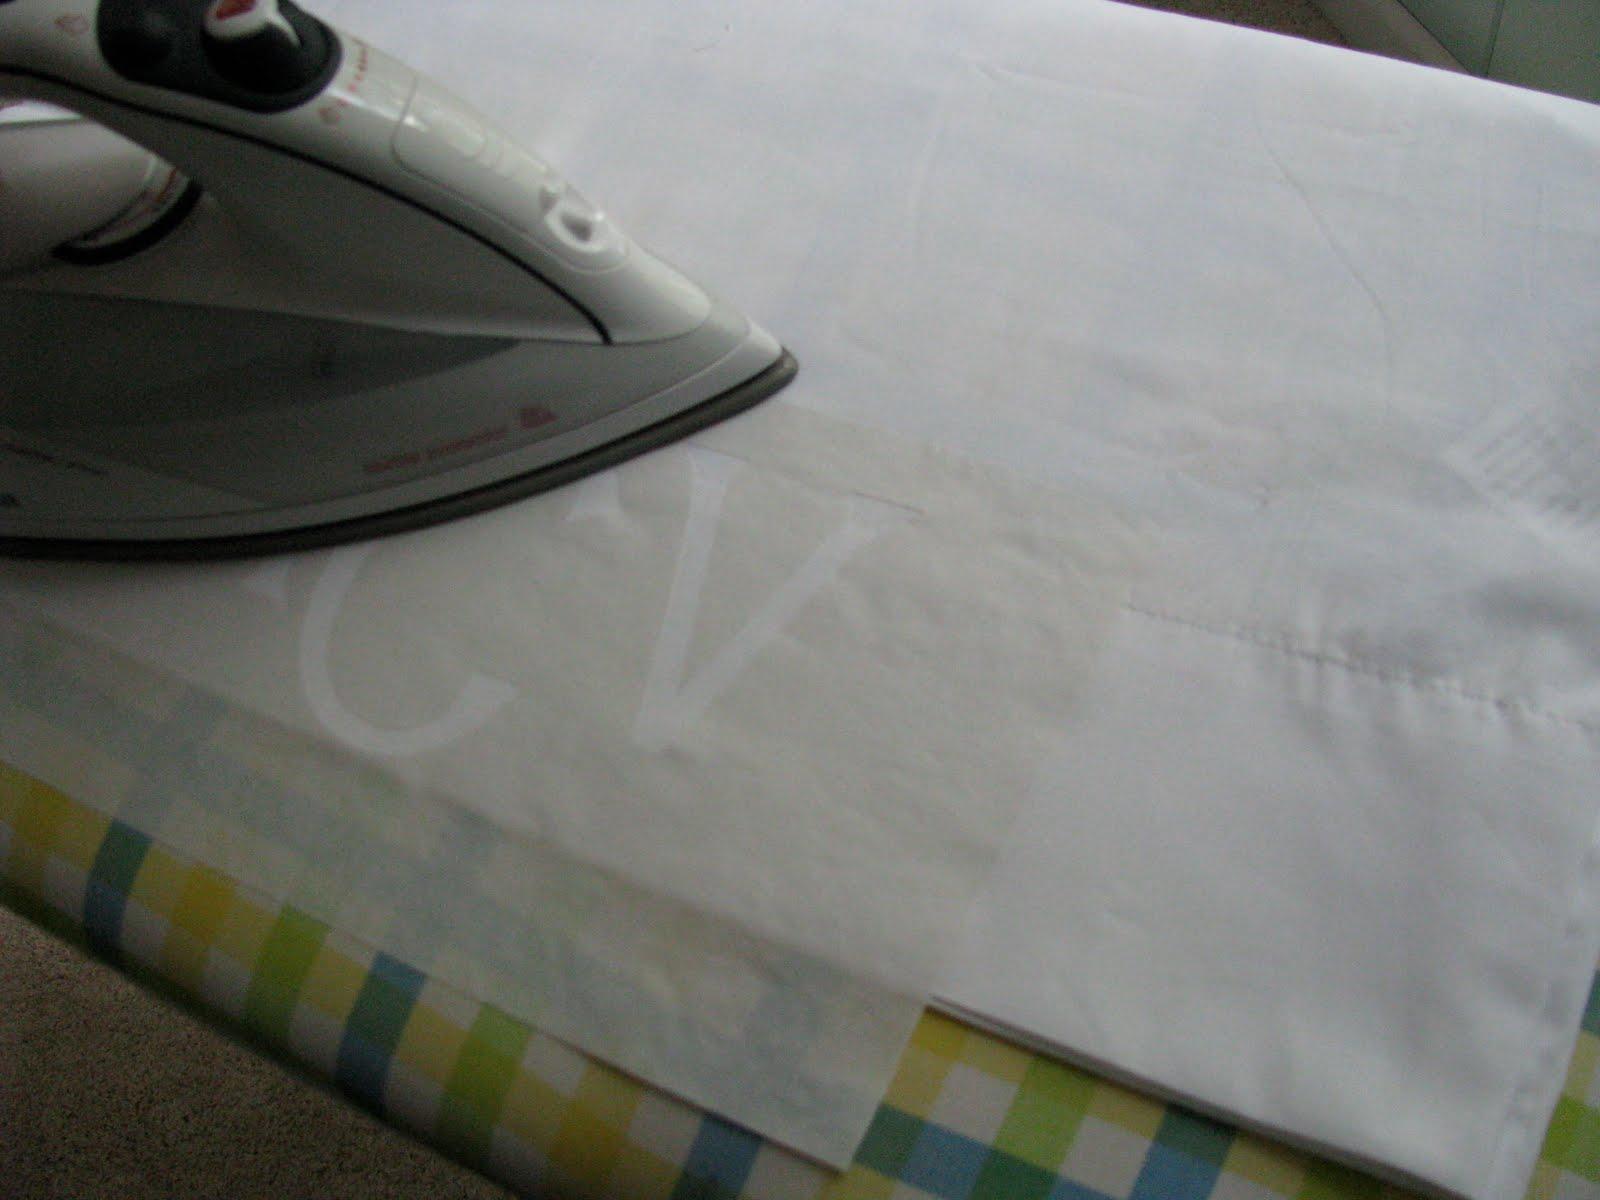
Then use a hot iron (just hot, no steam) to press the freezer paper down. The paper will adhere temporarily. If you keep the iron on too long the paper will start to bubble up a little, I wouldn’t recommend this.
If you want to make a more detailed design or if you want to make a portion of the design another color, put the freezer paper over the portion you want to add more detail to later. After the first color of paint has dried you can lift off this part of the freezer paper and add the second color (like with the red scottie dog collar above).
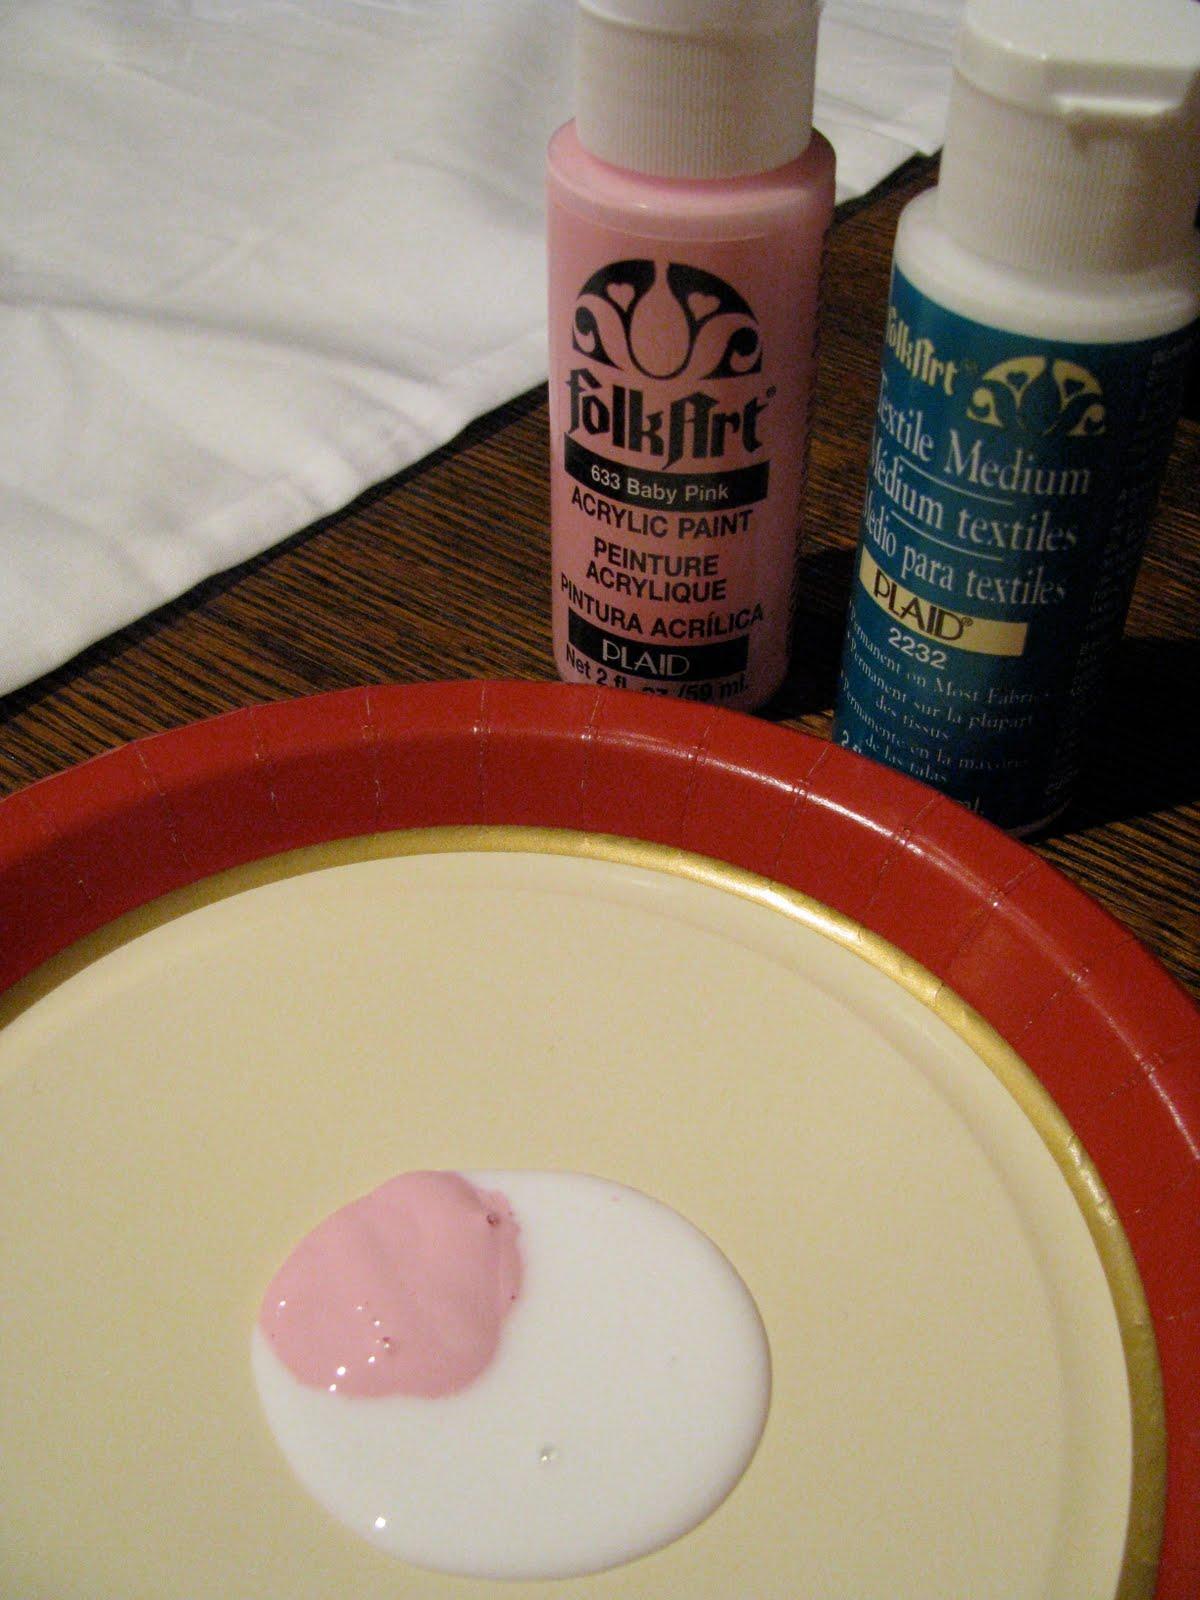
Next mix one part acrylic paint with two parts of the textile medium.
Apply this paint to your stencil using the foam brush.
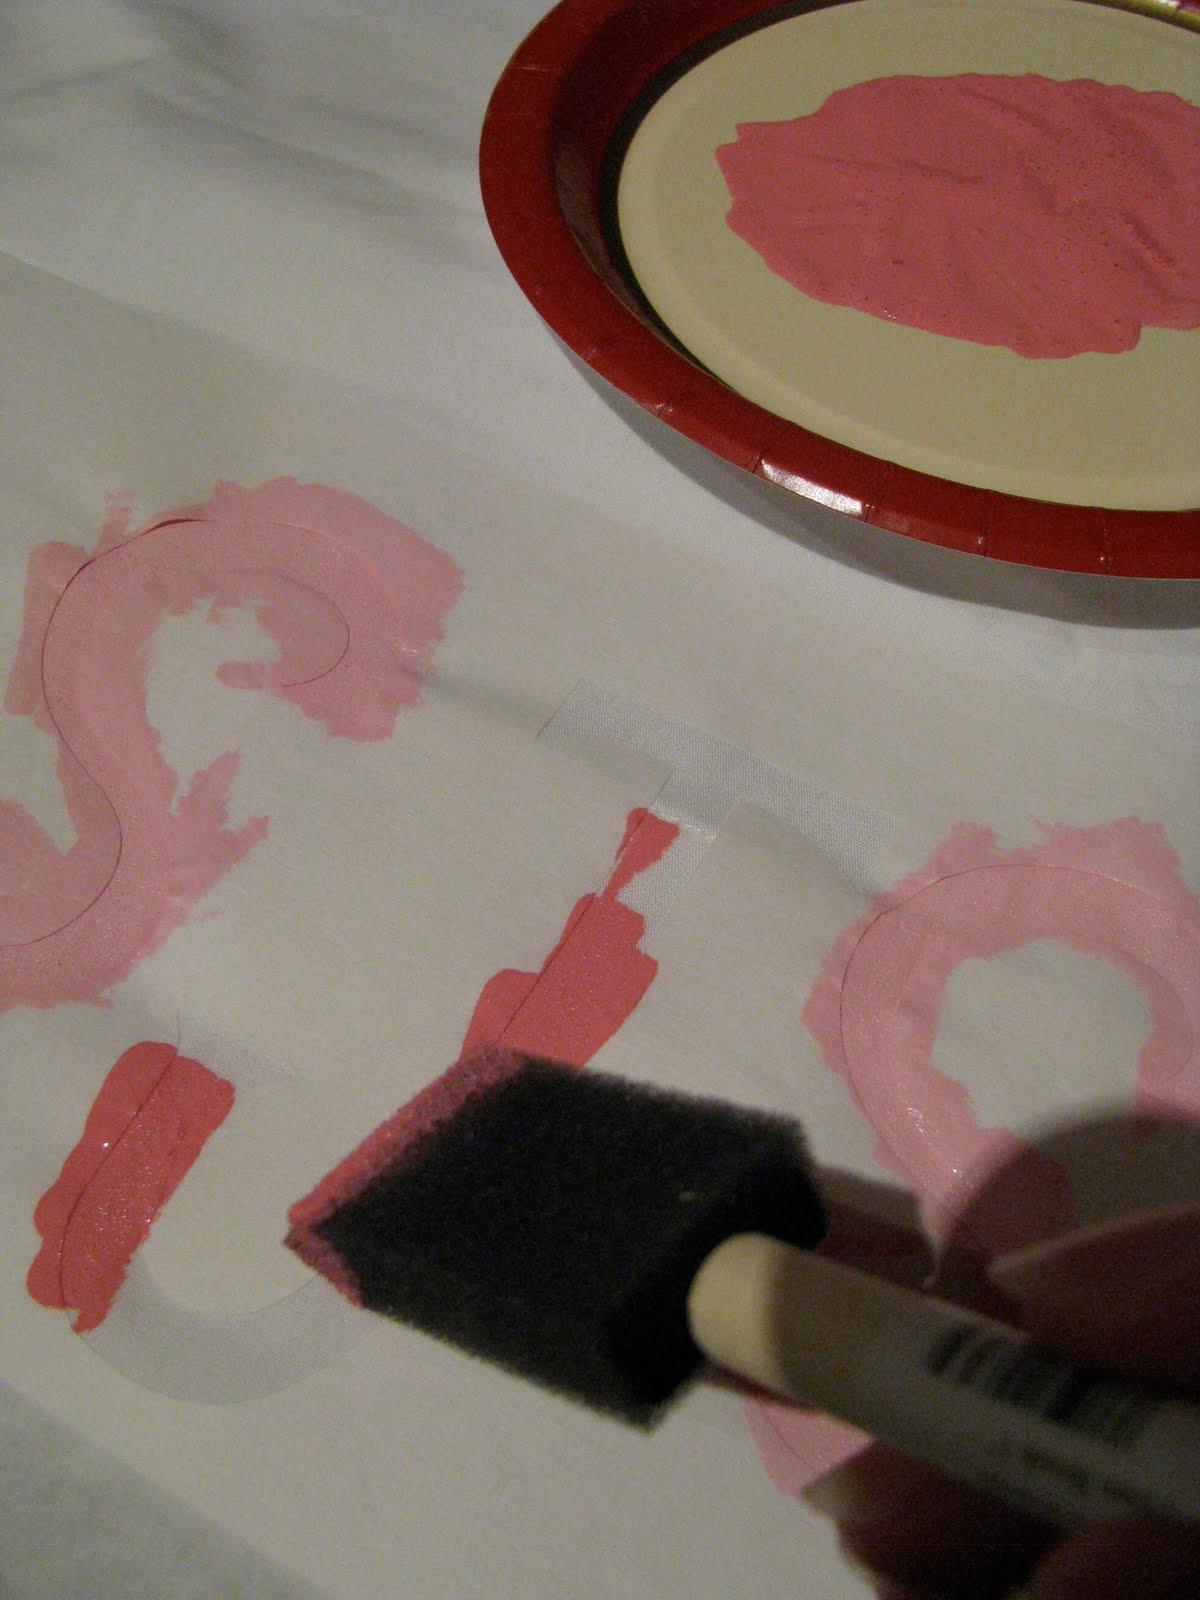
Keep the freezer paper on for 24 hours and allow the paint to dry completely. Once it is dry you can peel off the freezer paper. Finally, iron the design one last time with a hot iron for a few seconds. This will set your design and it’s now on there permanently. You may want to turn your design inside out and machine wash in cool water for the first time after using it. Happy Stenciling!!

Sarah,
Great post! I hope to try this soon. So what would the washing instructions be for these items? Machine wash and dry?
Thanks!
I LOVE freezer paper stenciling. I have been obsessed since I FINALLY got around to trying it. I have so many plans for more projects involving this. 😉
I actually have just used puff paints and painted like normal (because that is what I have had in the home). They work the same and is a simple wash and dry.
I blogged the same thing yesterday, LOL! Great minds….
Thank you! I have been too intimidated to try this…thinking "it can't really be that simple" but you have made it sound easy and doable.
I'm gonna buy some medium and try it! xo
It really is that easy!! I can't get enough of it!
Washing instructions: For the first wash, you may want to turn your design inside out and machine wash in cool water, then you can wash like normal for all subsequent washes.
Have fun!
-Sarah
Thank you for a great tutorial on this technique.
sarah, this paint works really well so you don't have to mix the fabric medium: http://tiny.cc/g7xhe plus, it's like $1.50 at michael's!
looks great! I have recently started using freezer paper too and LOVE it! I didn't think about putting it in the printer though- will have to try that too!
Is freezer paper the same thing as wax paper? I have looked for months for freezer paper and no one seems to know what I'm talking about. (I'm in Canada..? maybe just a different term?)
Lindsey, great suggestion about the other paint! I haven't used that before, so I'll have to check it out!
Janet, Wax paper has wax on both sides of the paper, so if you used that it would stick to your iron… translation… big mess! Freezer paper has wax on only one side, so that's the ticket! I'm not sure exactly where you can get it in Canada, anyone else know?
http://motherhoodunedited.blogspot.com/2010/05/adventures-in-freezer-paper-stenciling.html linked to in this post thanks for the inspiration!
Totally cute. One of the best freezer paper tutorials I've seen. Thanks for sharing a great idea and tutorial.
I can't wait to try this, I have everything but the textile medium on hand.
I have been wanting to try this for a while! Thanks!
can you freezer stencil on stretch knits? i wanted to make some pjs for my kids with something stenciled on the bottoms, but I wasn't sure if the paint would crack or distort when the knit stretched.
That is a great question, and one I unfortunately don't know the answer to. Give it a try on something you don't care too much about and let me know how it goes!
-Sarah
Nice job! I've linked this to my freezer paper post too today, well done!
Thank you – great tutorial! The more crafty blogs I visit the more I convince myself that I actually NEED a Cricut machine and not just want one.
~Amy @ Permanent Kisses
Sarah,
Can you share the settings for your Cricut? I'm having problems with it ripping my paper. Thanks so much for your help- love your blog!
Thanks!!! How did you secure the inner part of the "A"? Did you just re-iron it over again? :]
Claire, I ironed the full design first, then came back over the design and ironed the inner parts of any of the letters. Happy crafting!
I love the bug car onesie and burp cloth…where did you get the car template, my nephew would look adorable in that onesie.
Renita