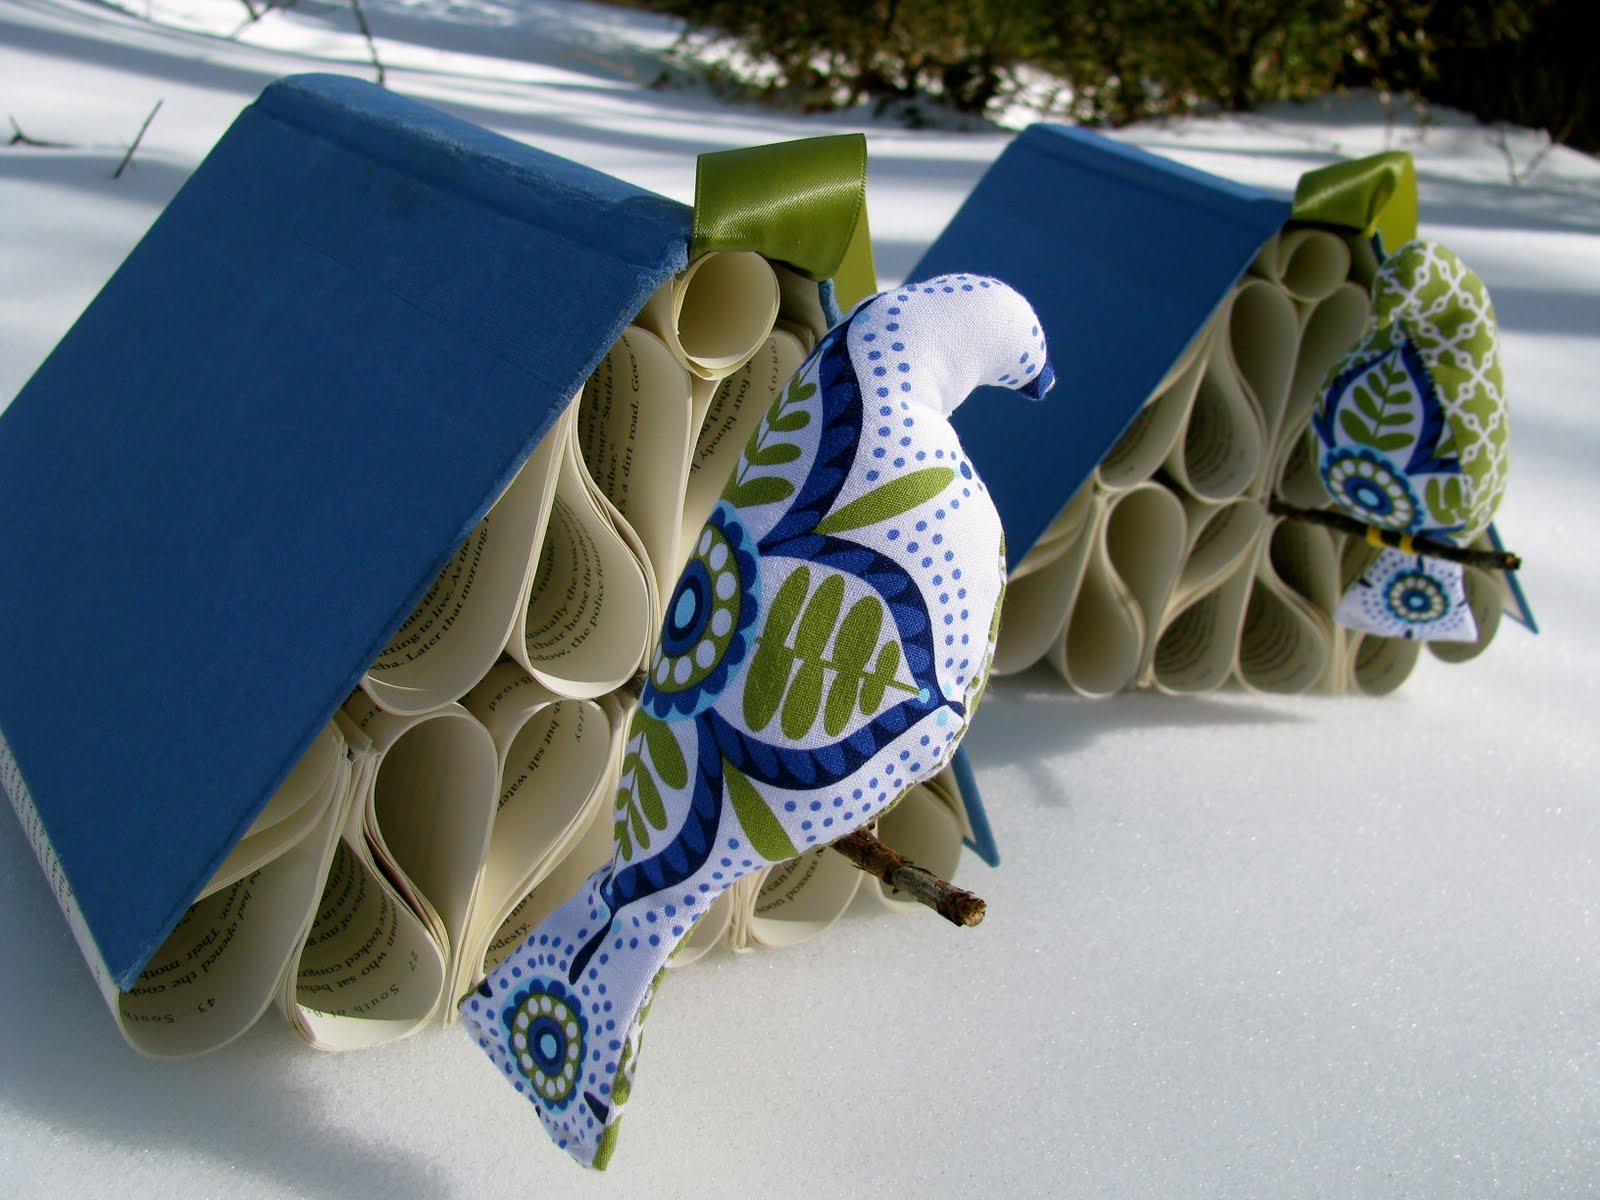
Since last week was Valentine’s week I decided to call my book houses… err, bird houses “Lovebird Book houses!” Here’s the tutorial so you can make your own!
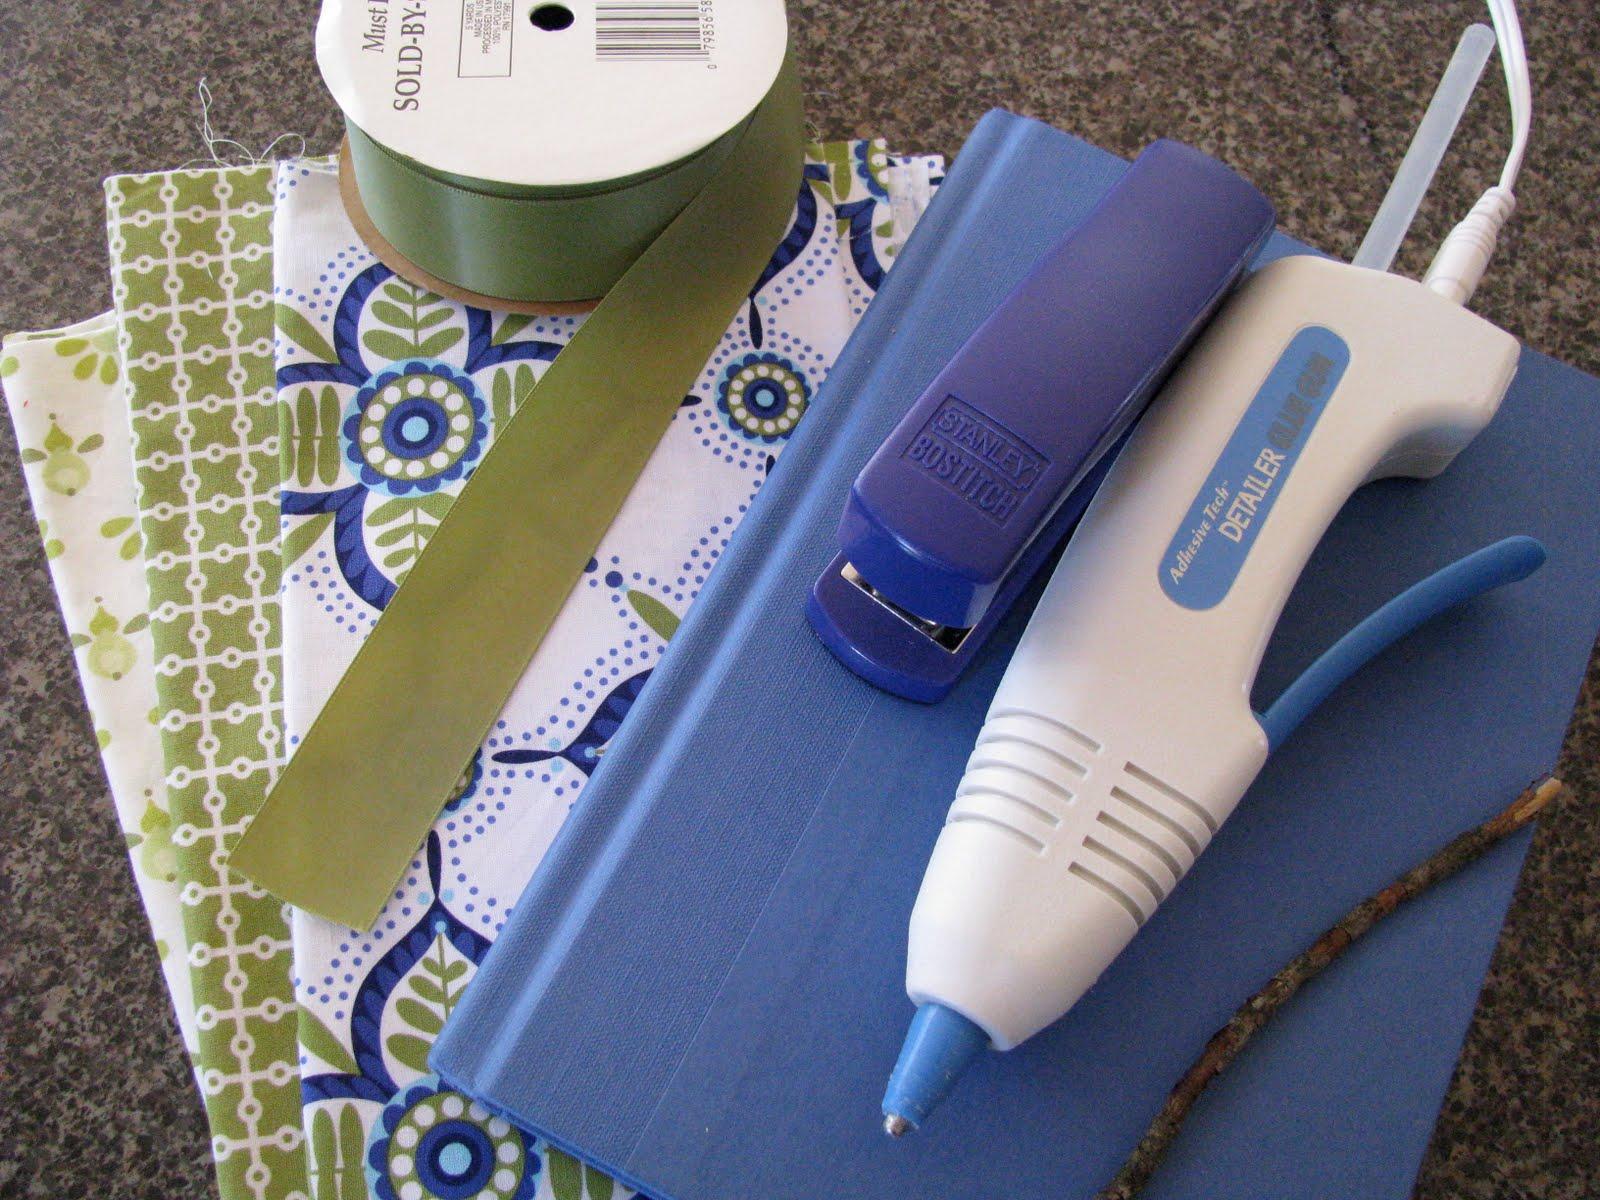
You’ll need:
- Ribbon
- Glue Gun
- Hardback book
- Stapler
- 2 scrap pieces of different coordinating fabrics
- Twig
- Yellow or Orange embroidery floss
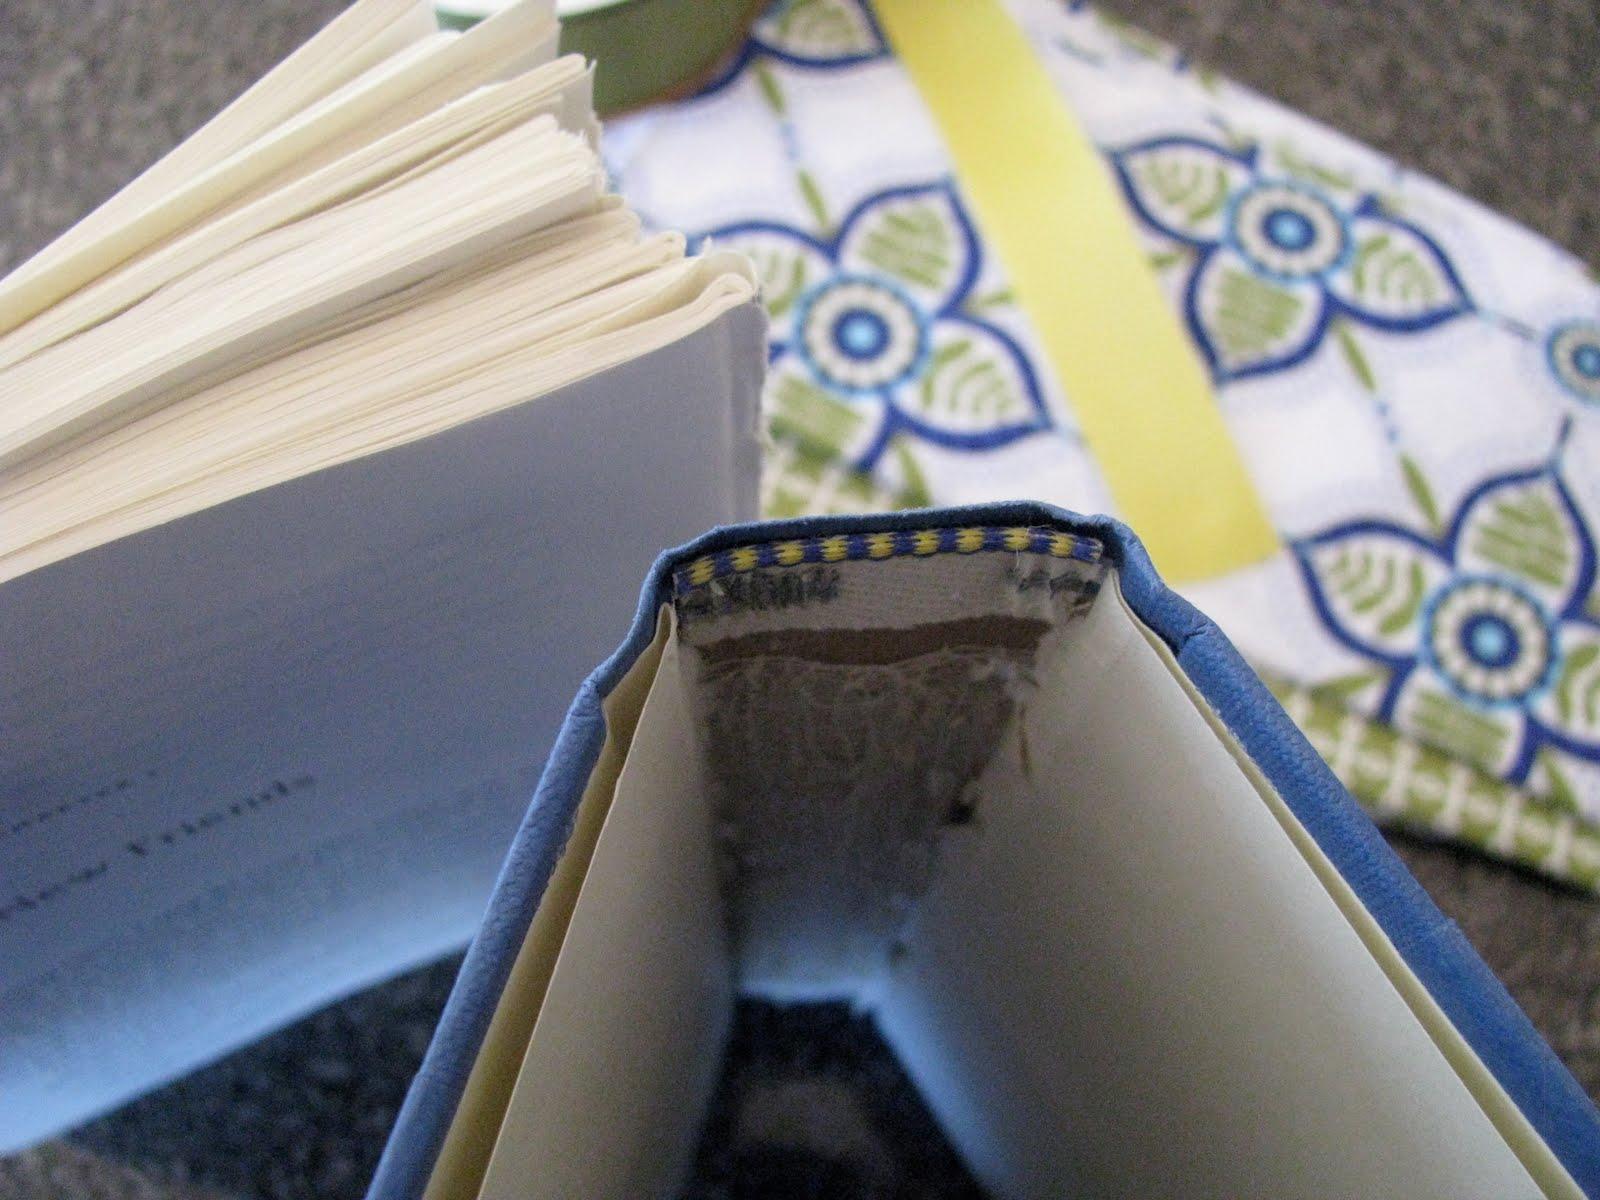
Starting in the middle of your book, you will pull out all of the pages. Can you see how the book is constructed with small groupings of pages sewn in together? It’s best if you can rip out a grouping at a time.
Be sure to leave one of the all white pages on one side of the book. In the picture below I saved two, but you only need one. Your book binding will look like this.
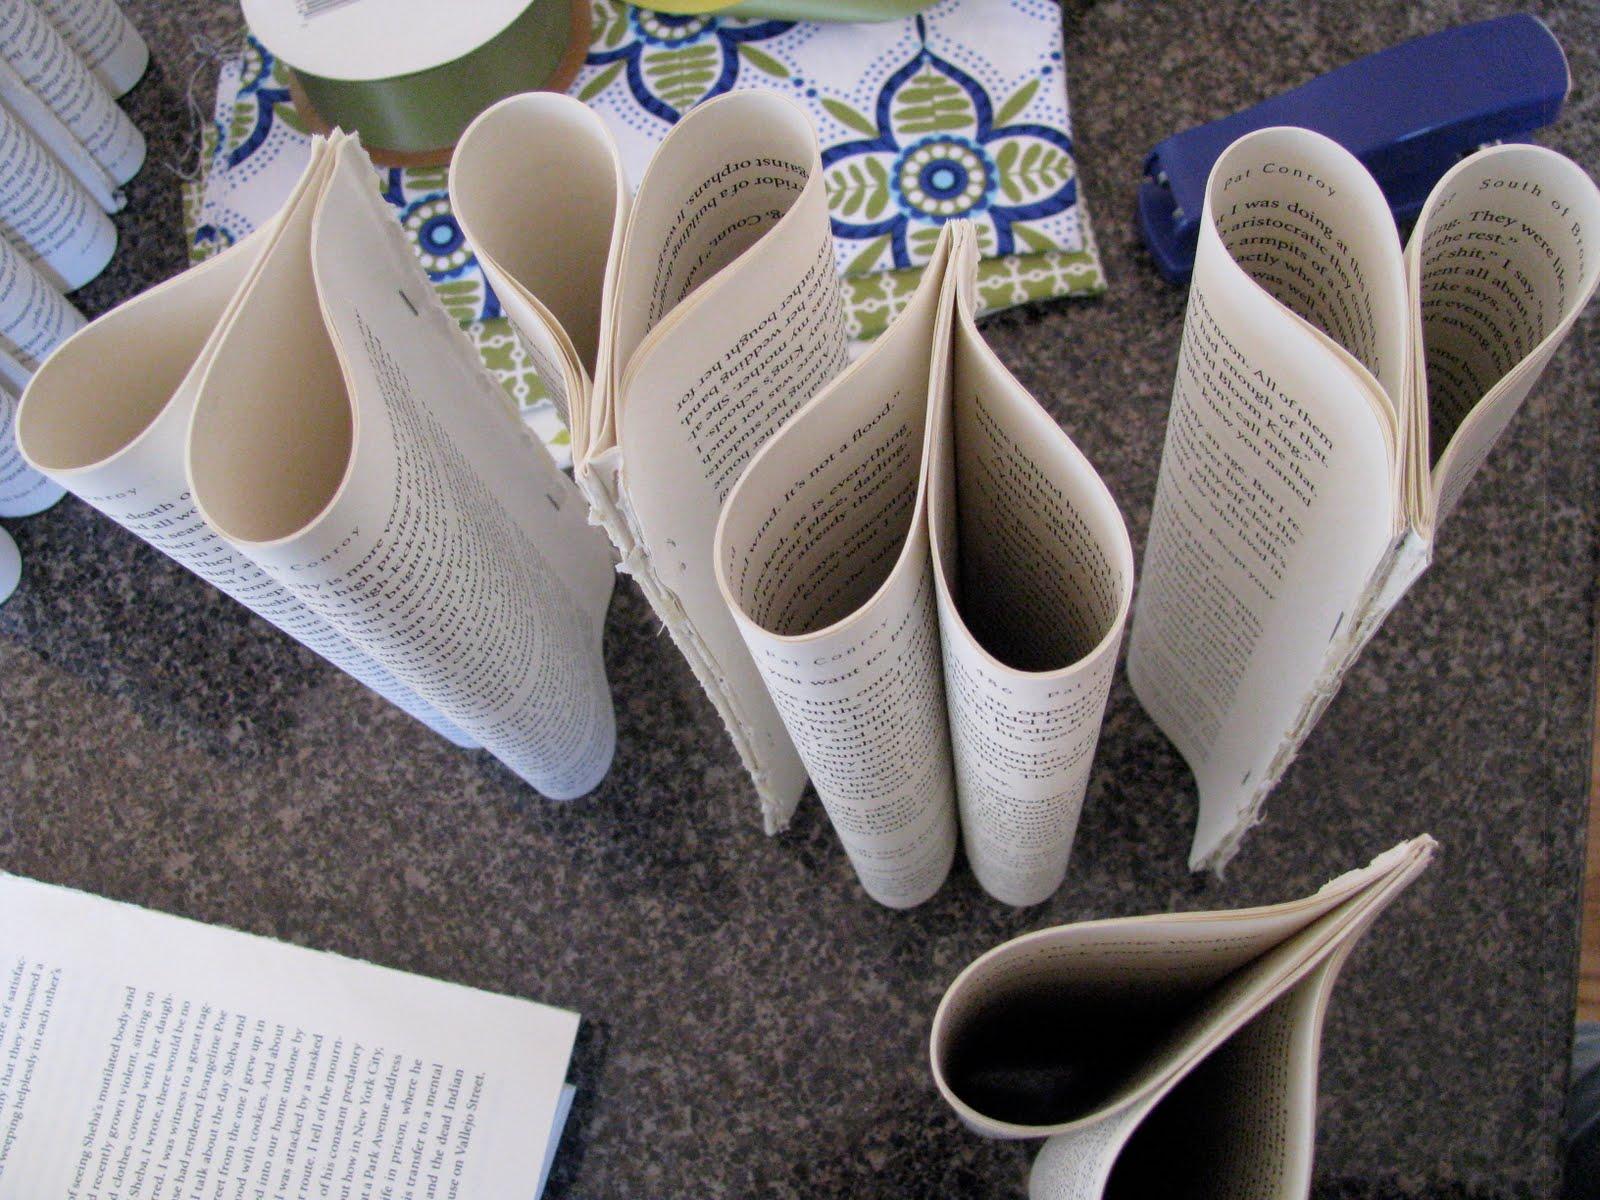
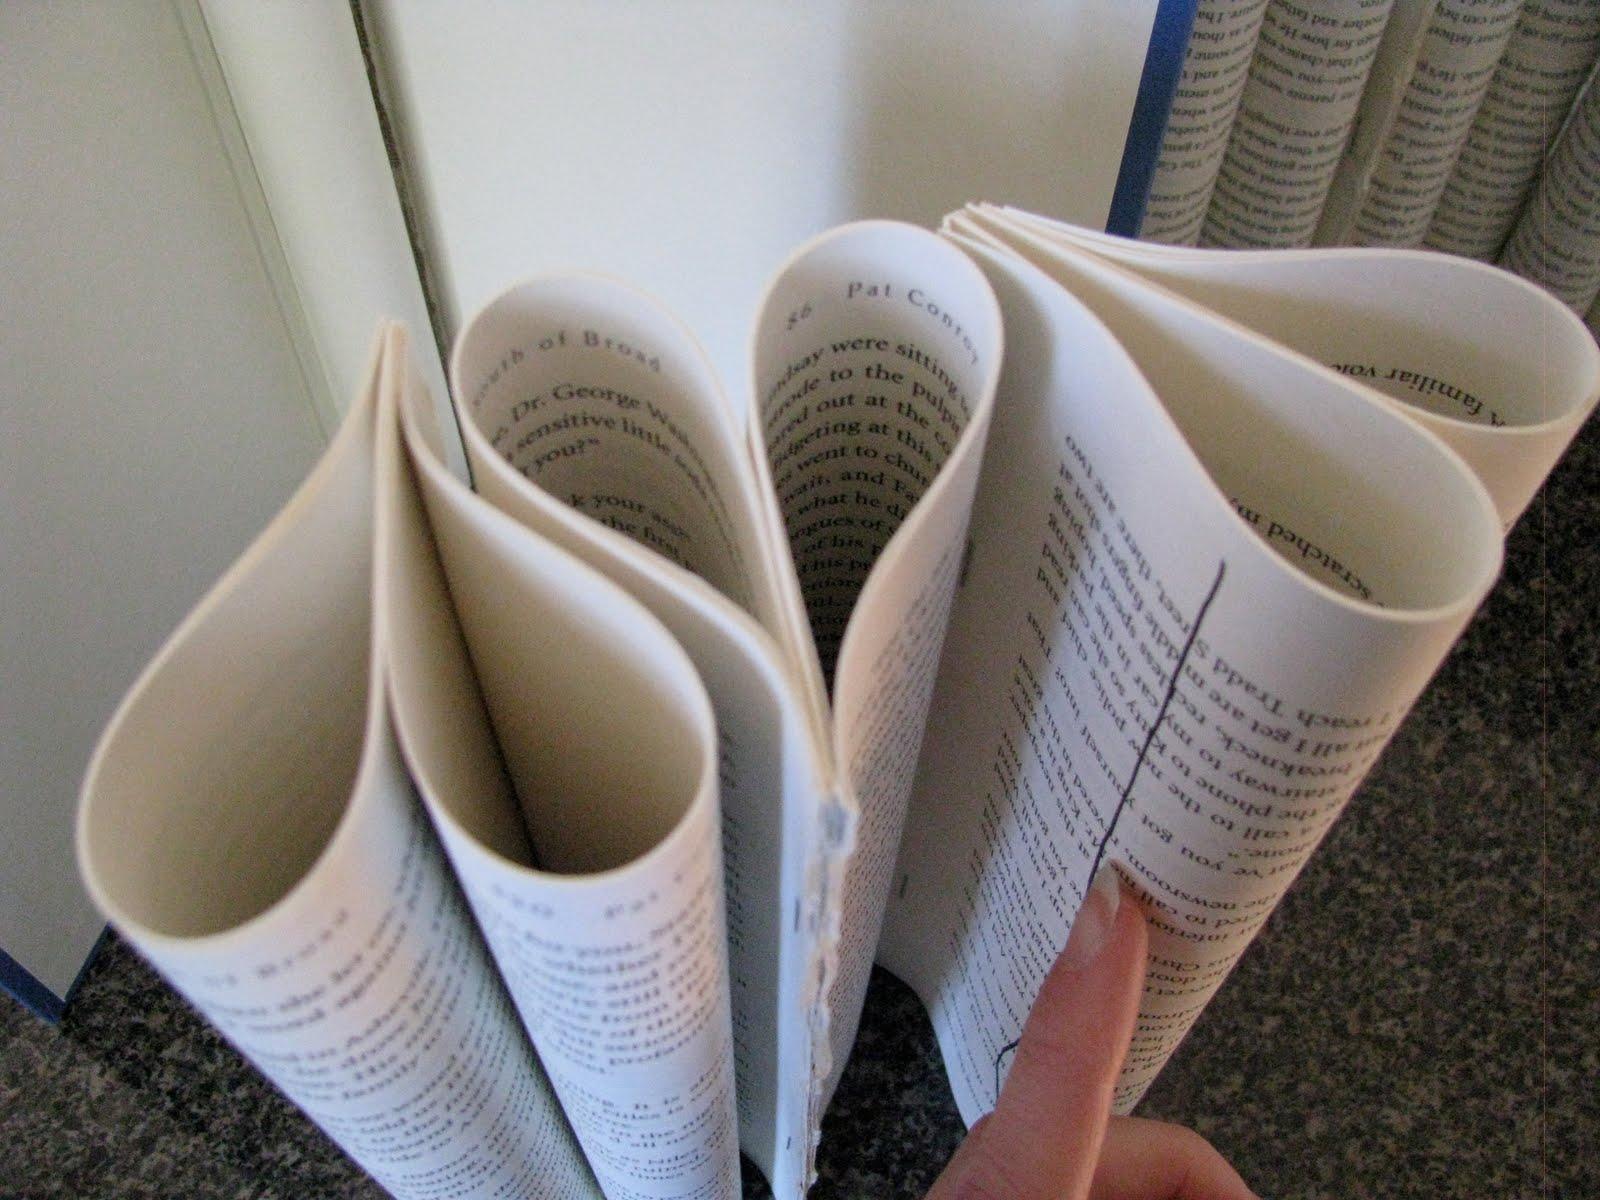
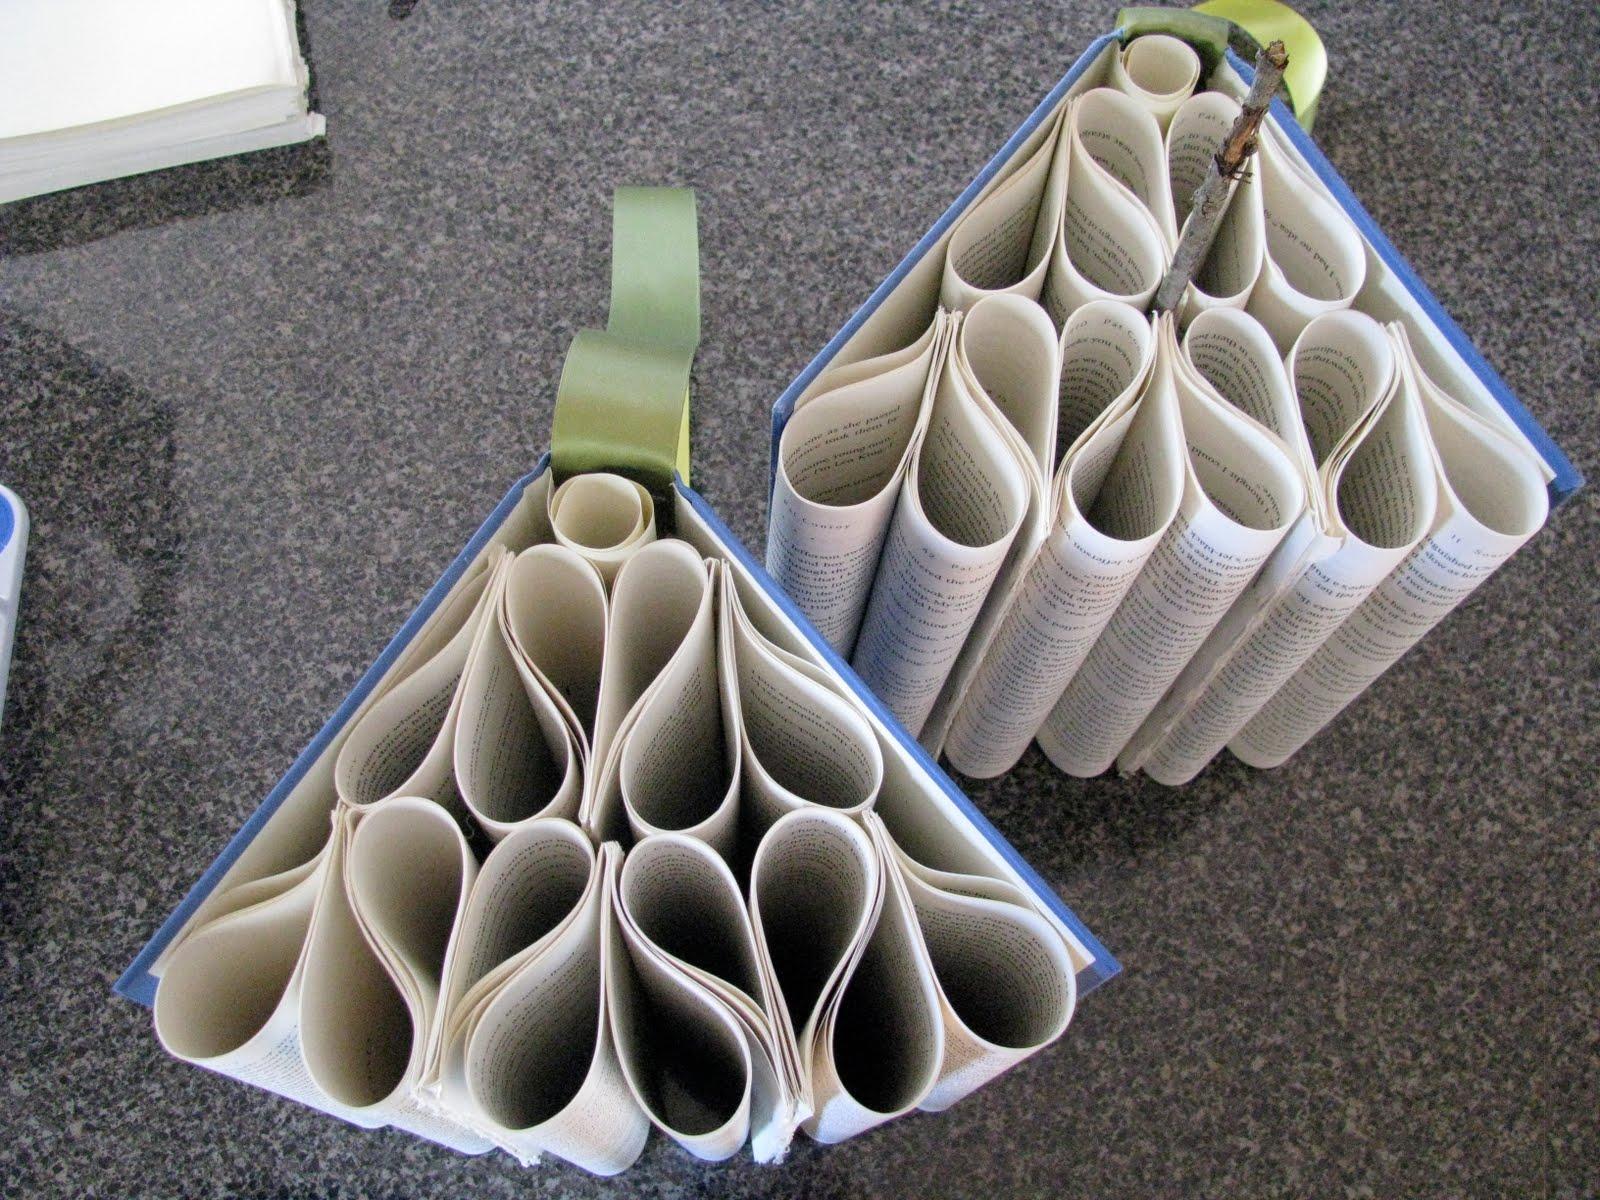
Next grab about 6 pages from your book and fold them in half lengthwise (without creasing them, like in the picture below). You’ll attach two of these groupings of about 6 pages each to make one “heart.” Attach the two groupings together with the stapler. Be sure your staple is about 2 inches from the edge on the top and the bottom so that you can’t see the staple when you’re looking at your finished project.
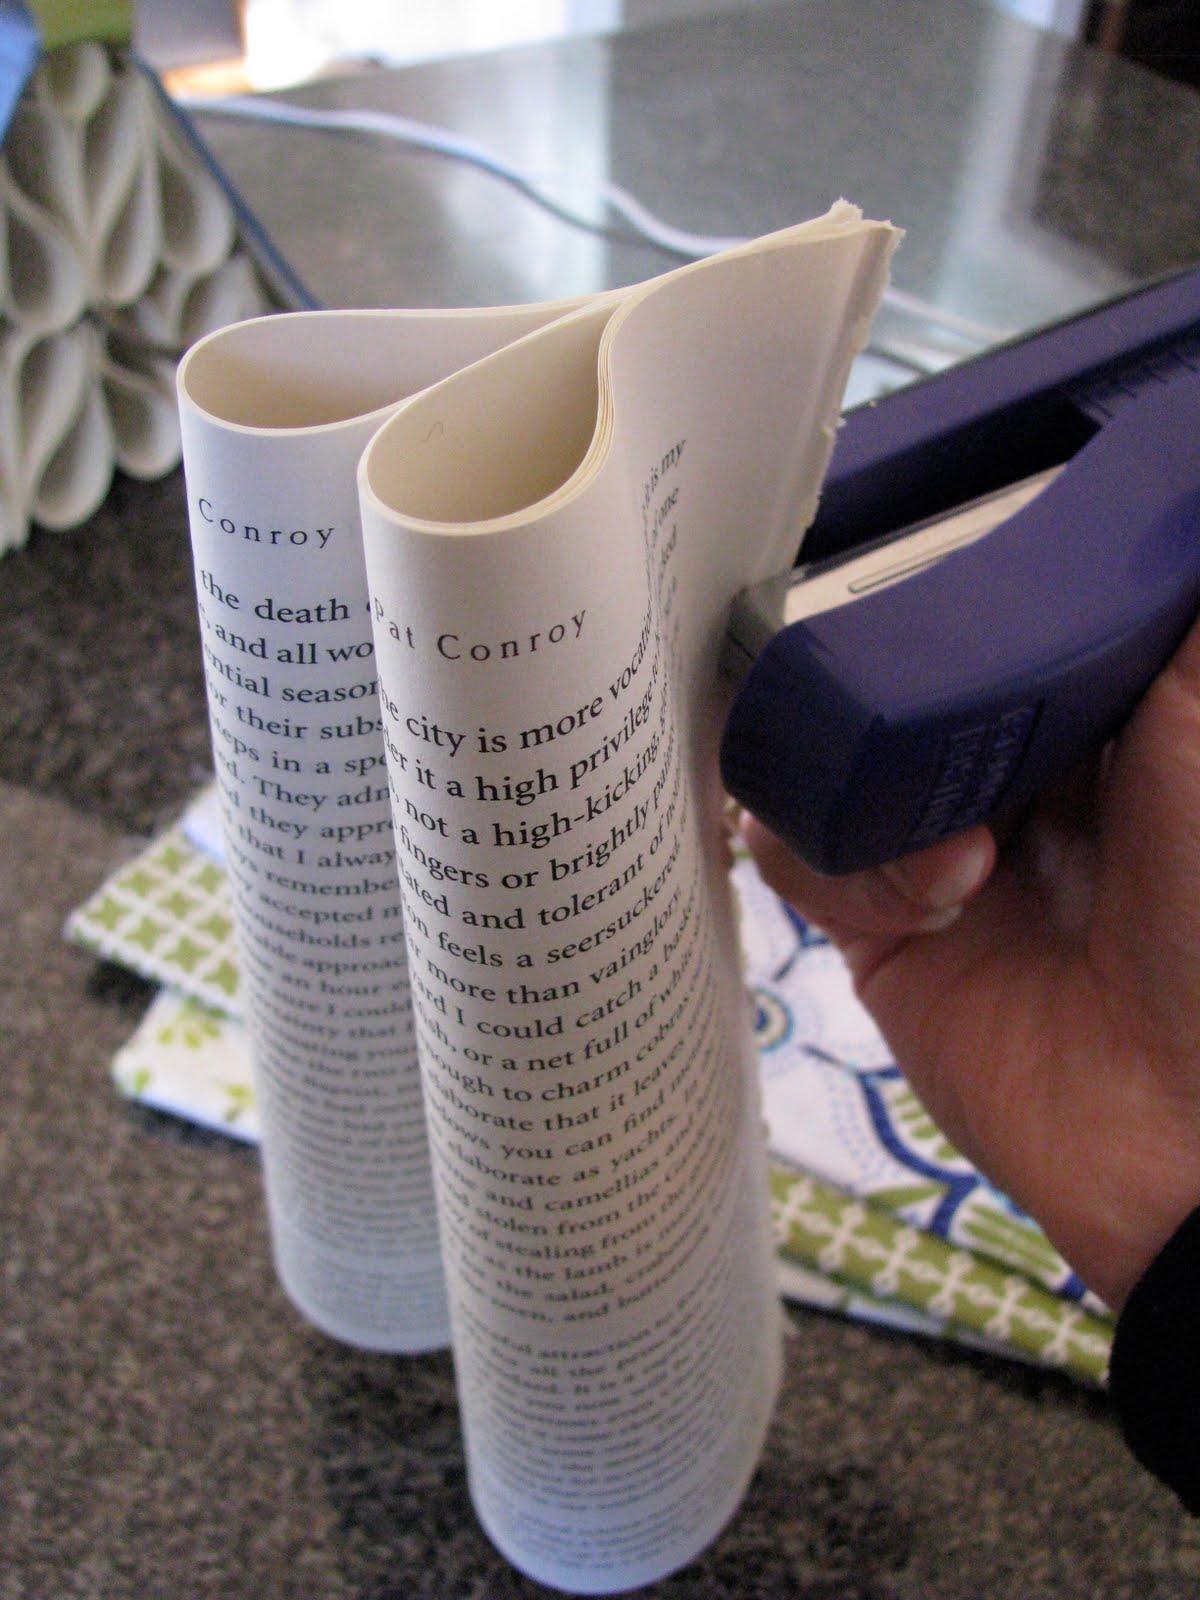
Make 8 “hearts” using the process I just described and put them to the side. Wondering what to do with the rest of your book pages? Make a wreath!
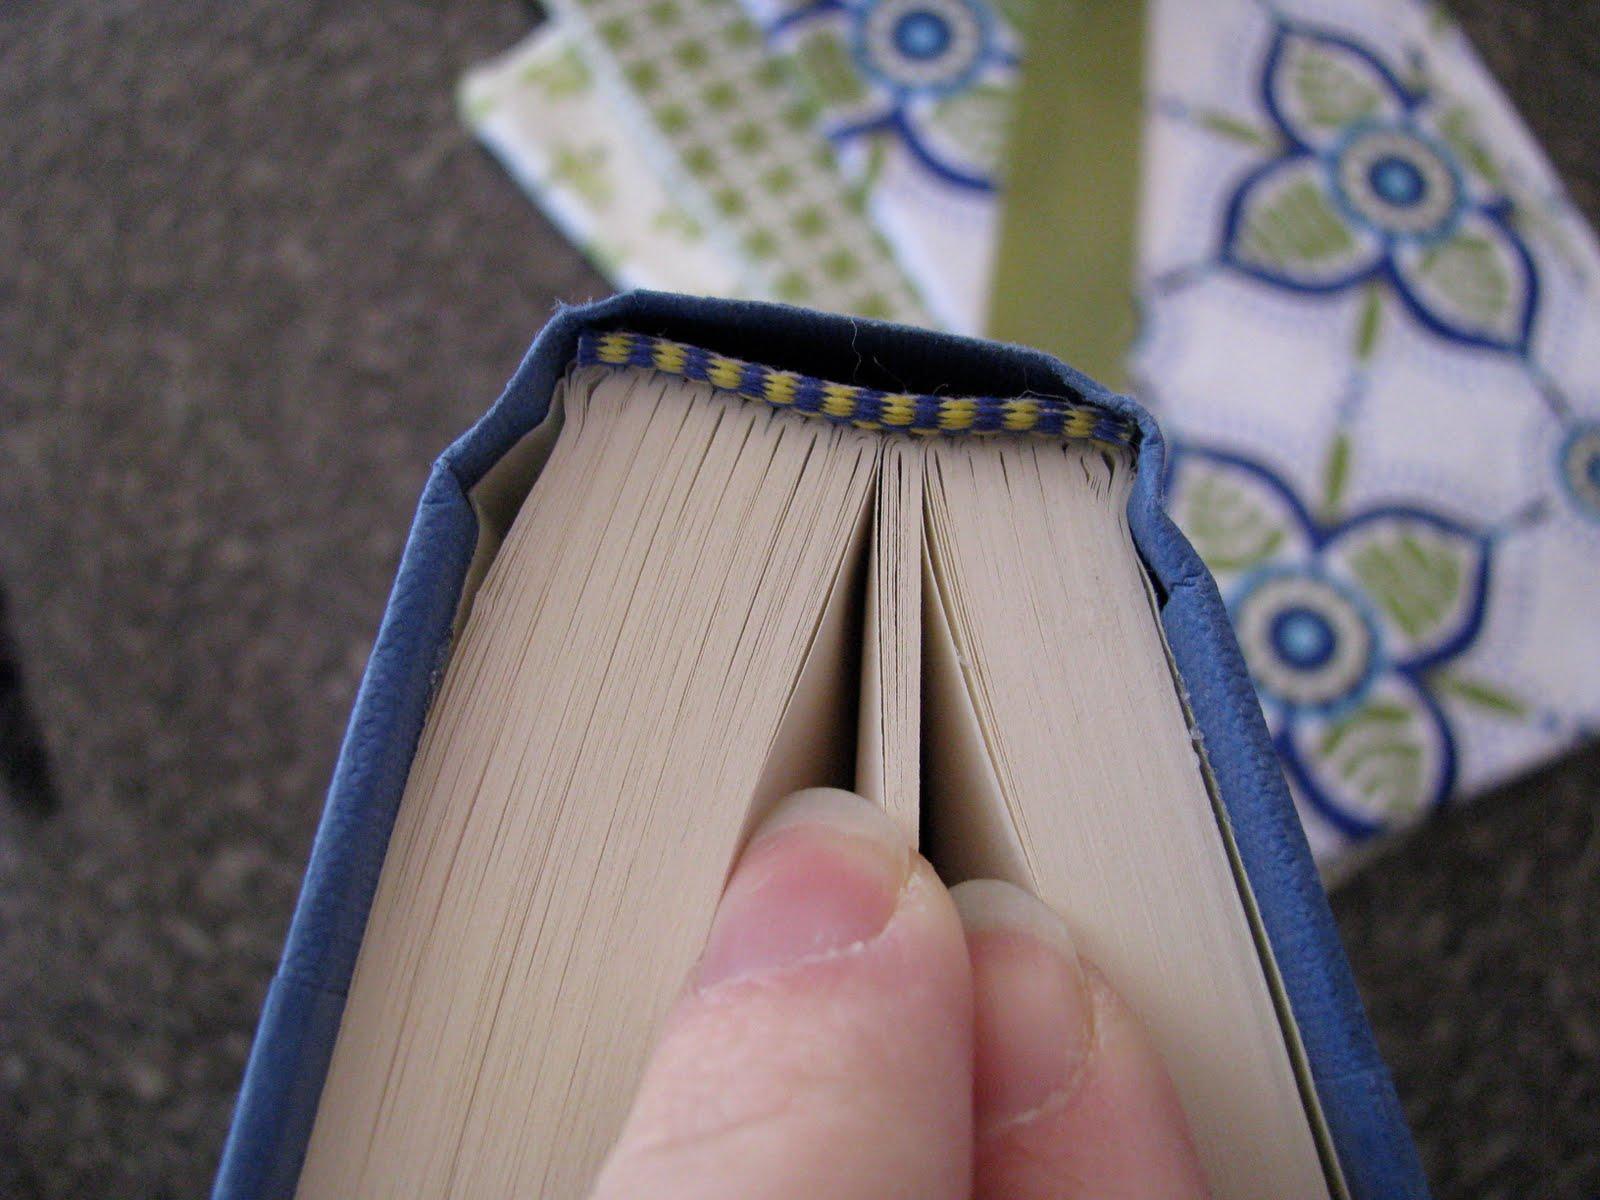
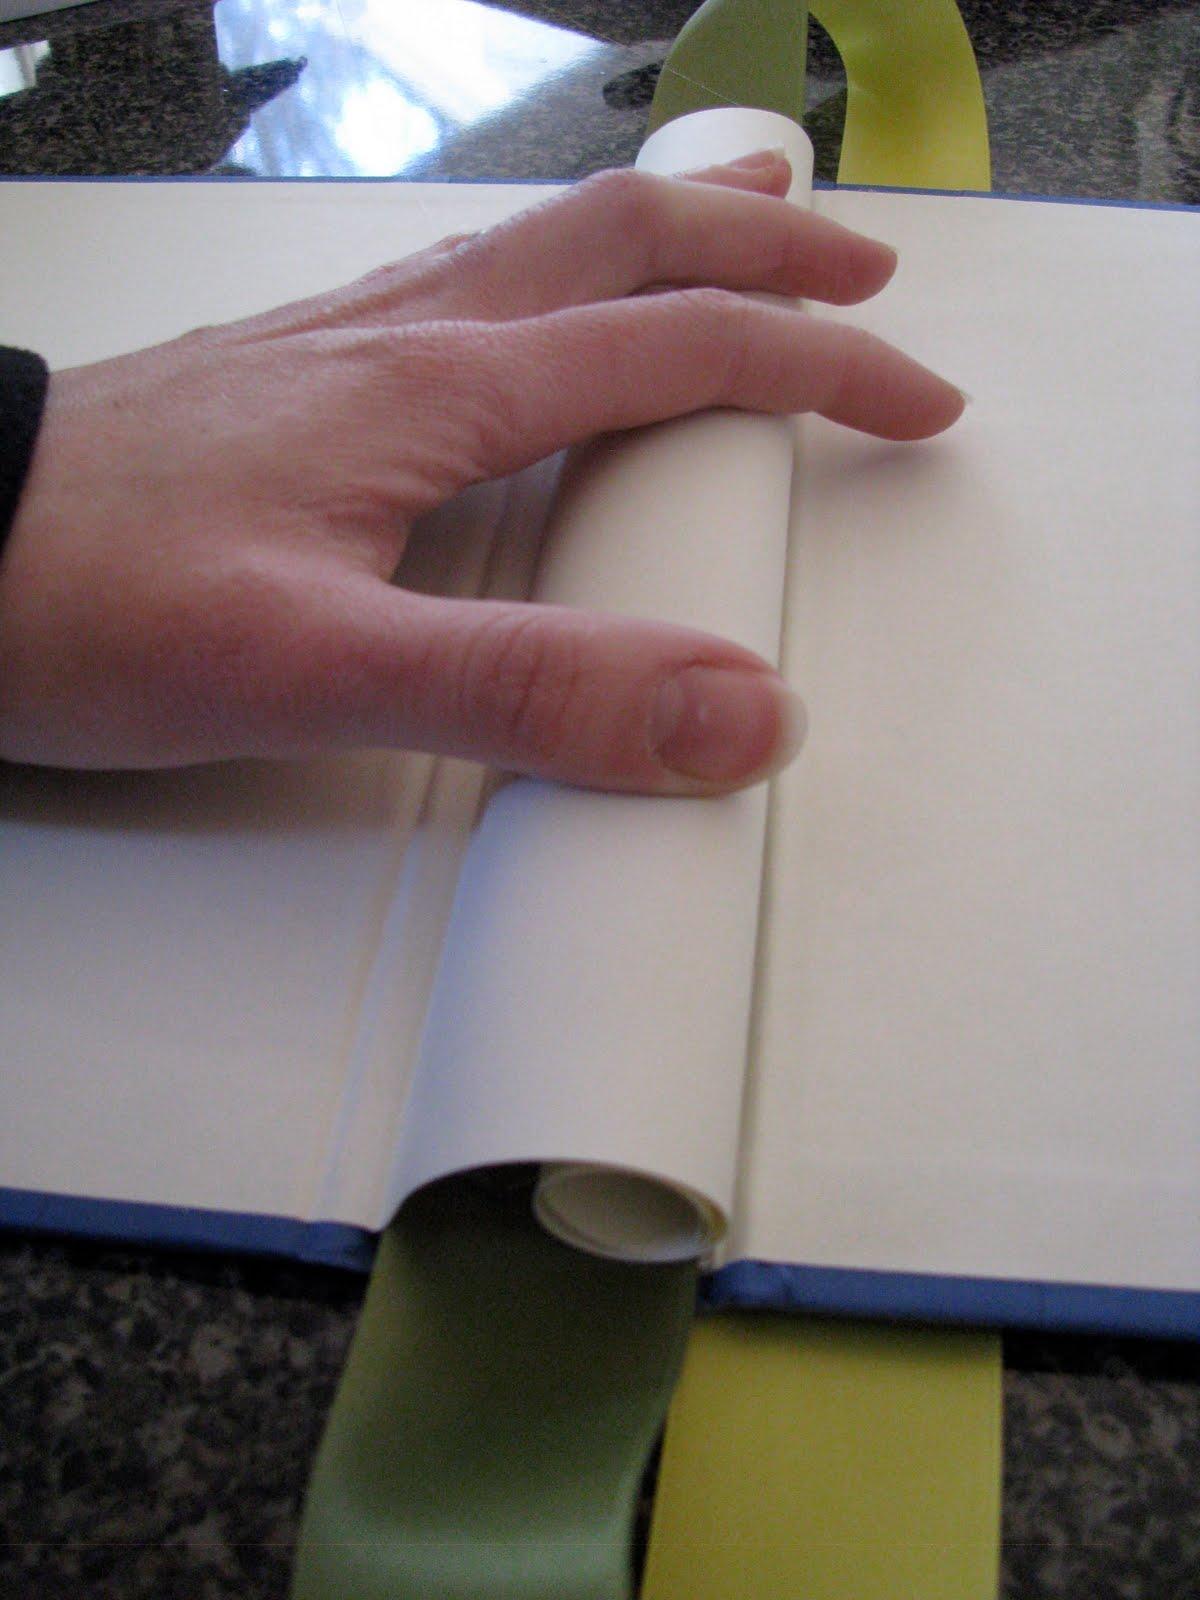
Heat up your glue gun because we’re moving on to the fun part! First, glue the ribbon down to the book binding. Glue about 1 1/2 to 2 inches of ribbon down on each side to be sure it is secure. That is how your project will hang, so make sure your ribbon isn’t twisted before you glue it down.
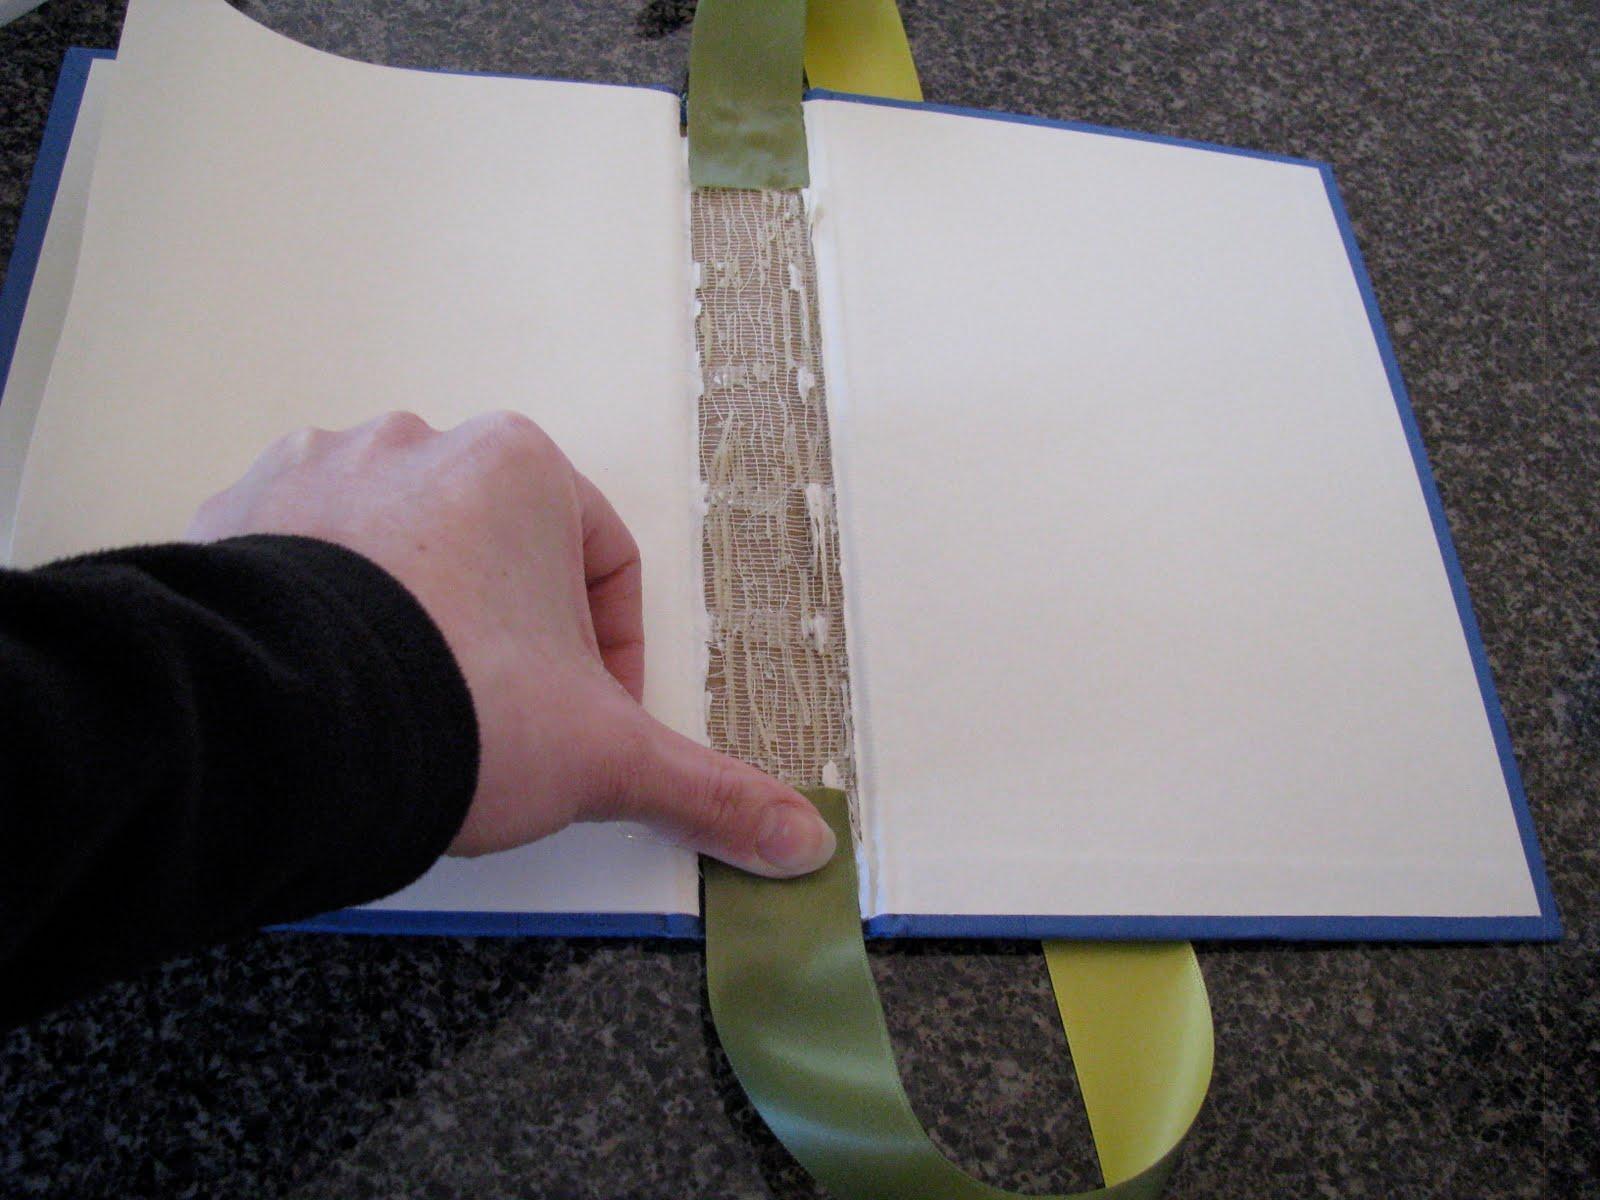
Remember the one sheet of all white paper that we didn’t rip out earlier? Using your glue gun draw a line of glue starting in the center of the book binding and moving toward the edge of the paper. Roll the page down the glue line and secure it to the center of the book over the top of the ribbon.
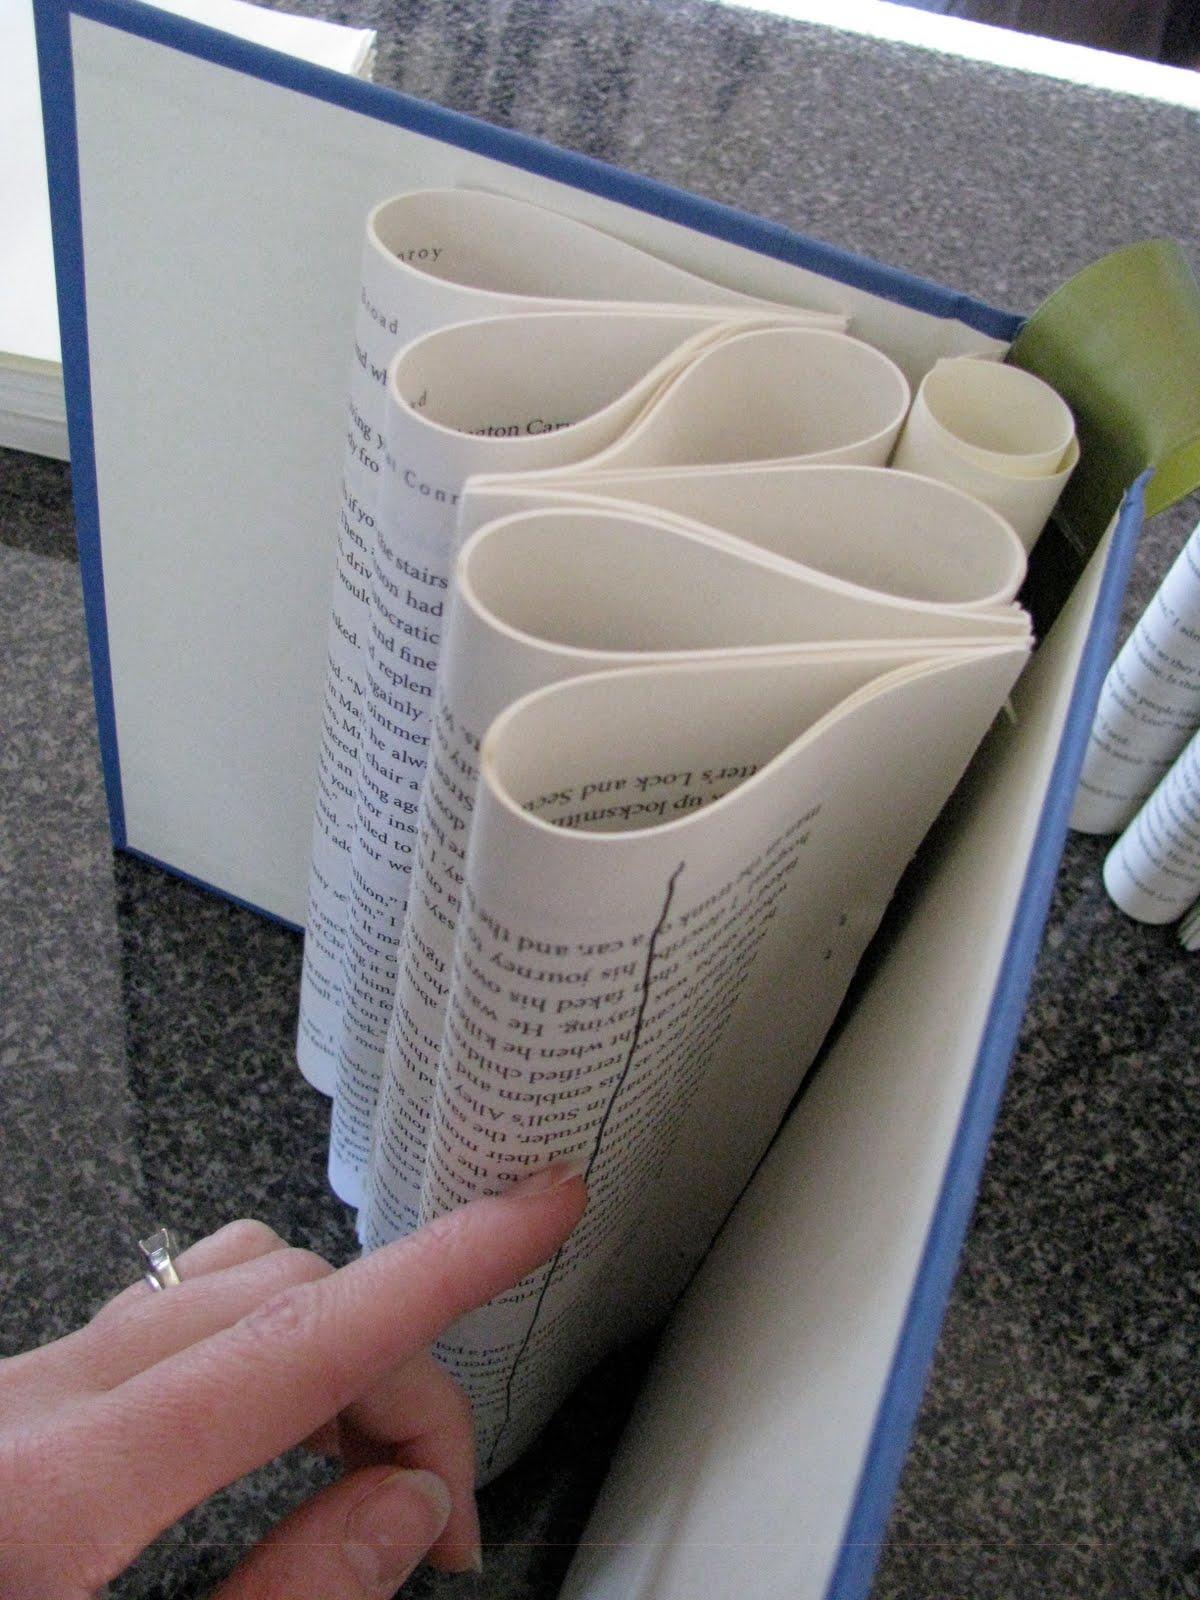
While that’s cooling off, grab 3 of your hearts and we’ll start glueing those together. The key with the glue gun is similar to the trick I showed you earlier with the stapler… don’t glue right up to the edge of the paper, because you’ll see it gooping out of the front or back of your project. Instead, start glueing about 1 inch in on the line that I’ve drawn below. Put your glue right on that line and press the hearts together in a down, up, down pattern. (Does that make sense?)
Glue that segment of 3 hearts to the book binding where I’m pointing in the picture below.
With the 5 remaining hearts, glue those together in a down, up, down, up, down pattern and once the grouping is together, glue those to the binding and the other grouping where I’ve indicated below.
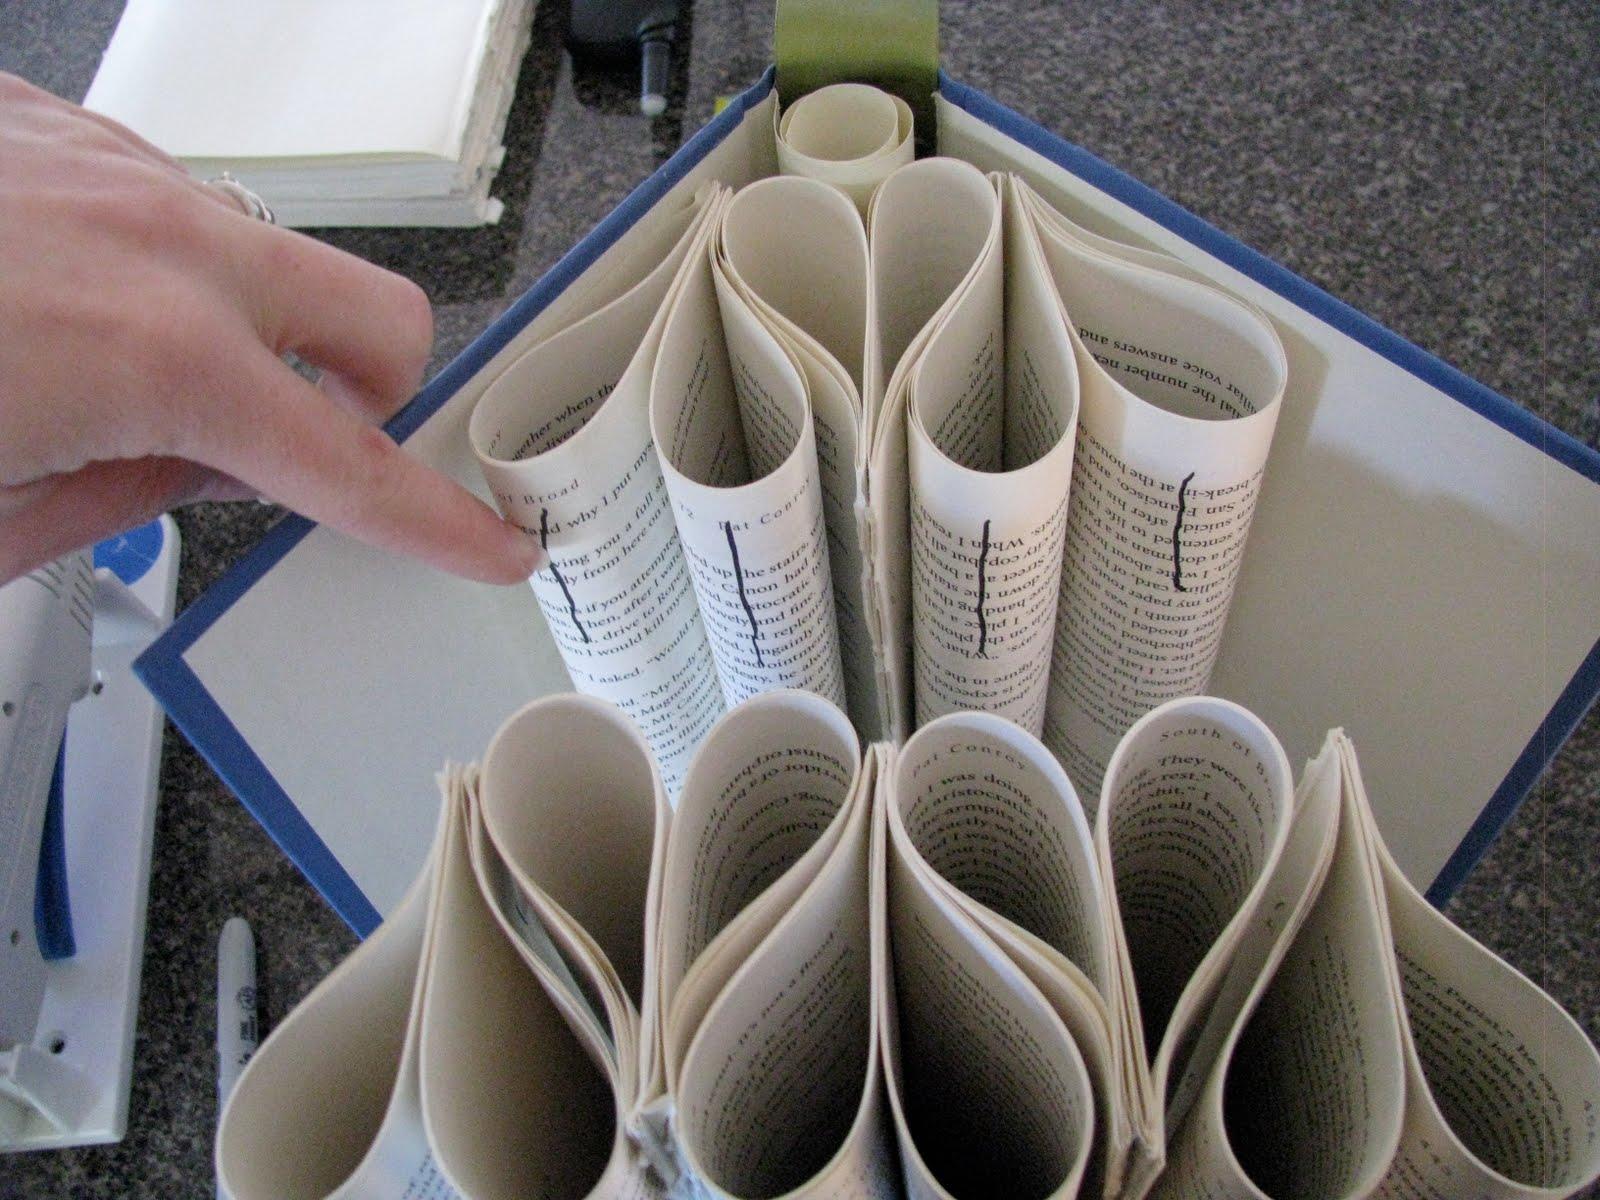
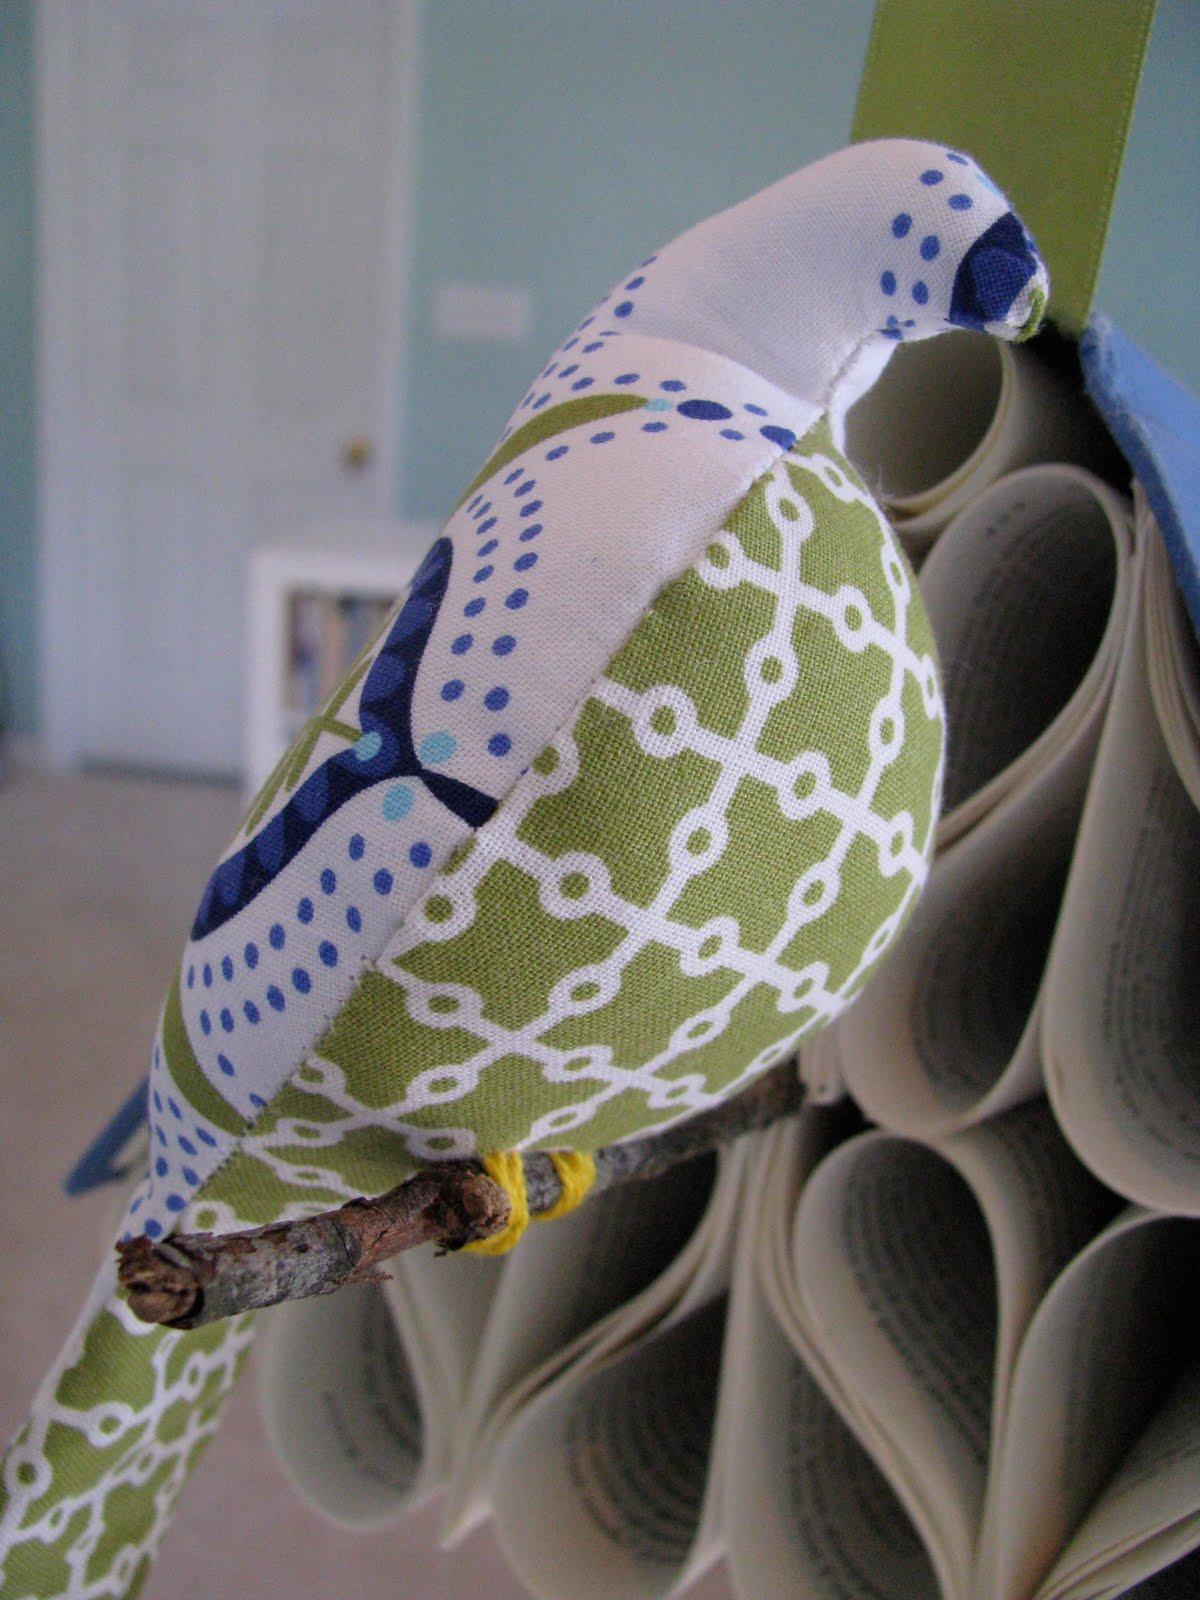
Put glue on the end of your twig and stick it in securing it to the middle of your book house.
To make the stuffed fabric birds, follow the instructions from the Spool Sewing Pattern.
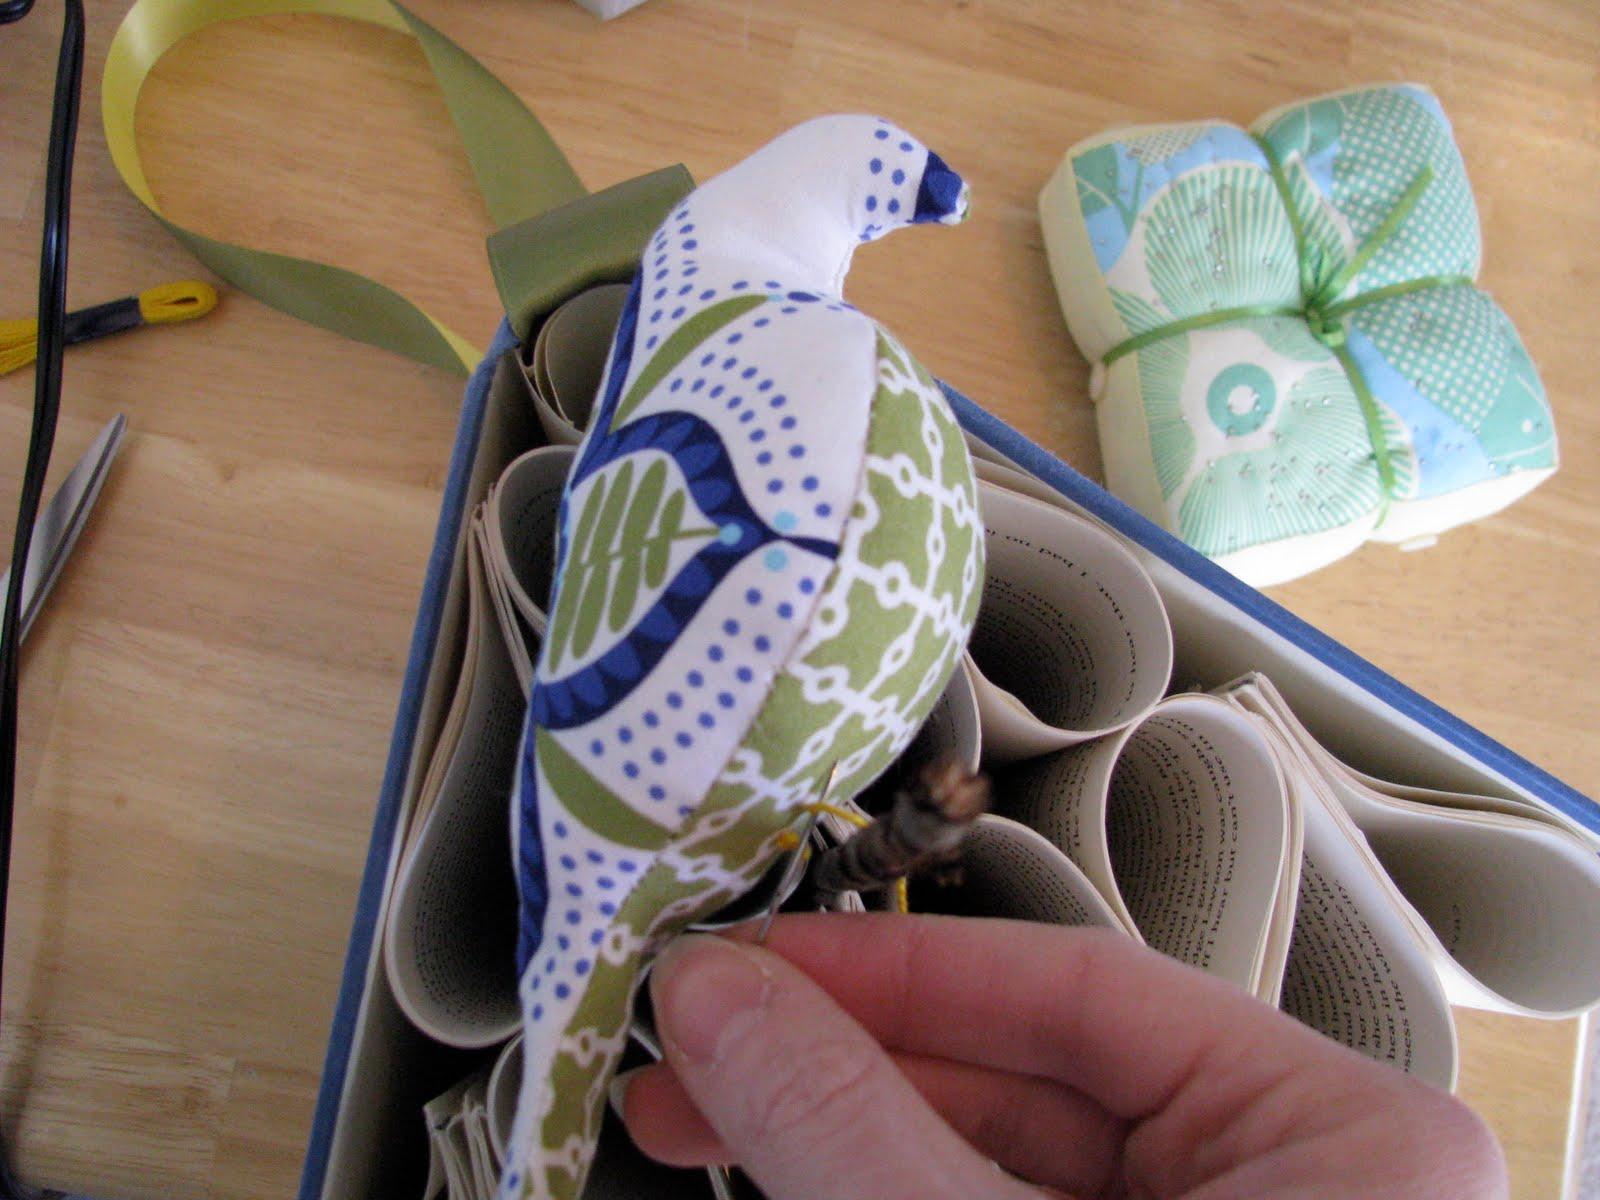
Give your birdies some feet by attaching them to the twig with your embroidery floss.
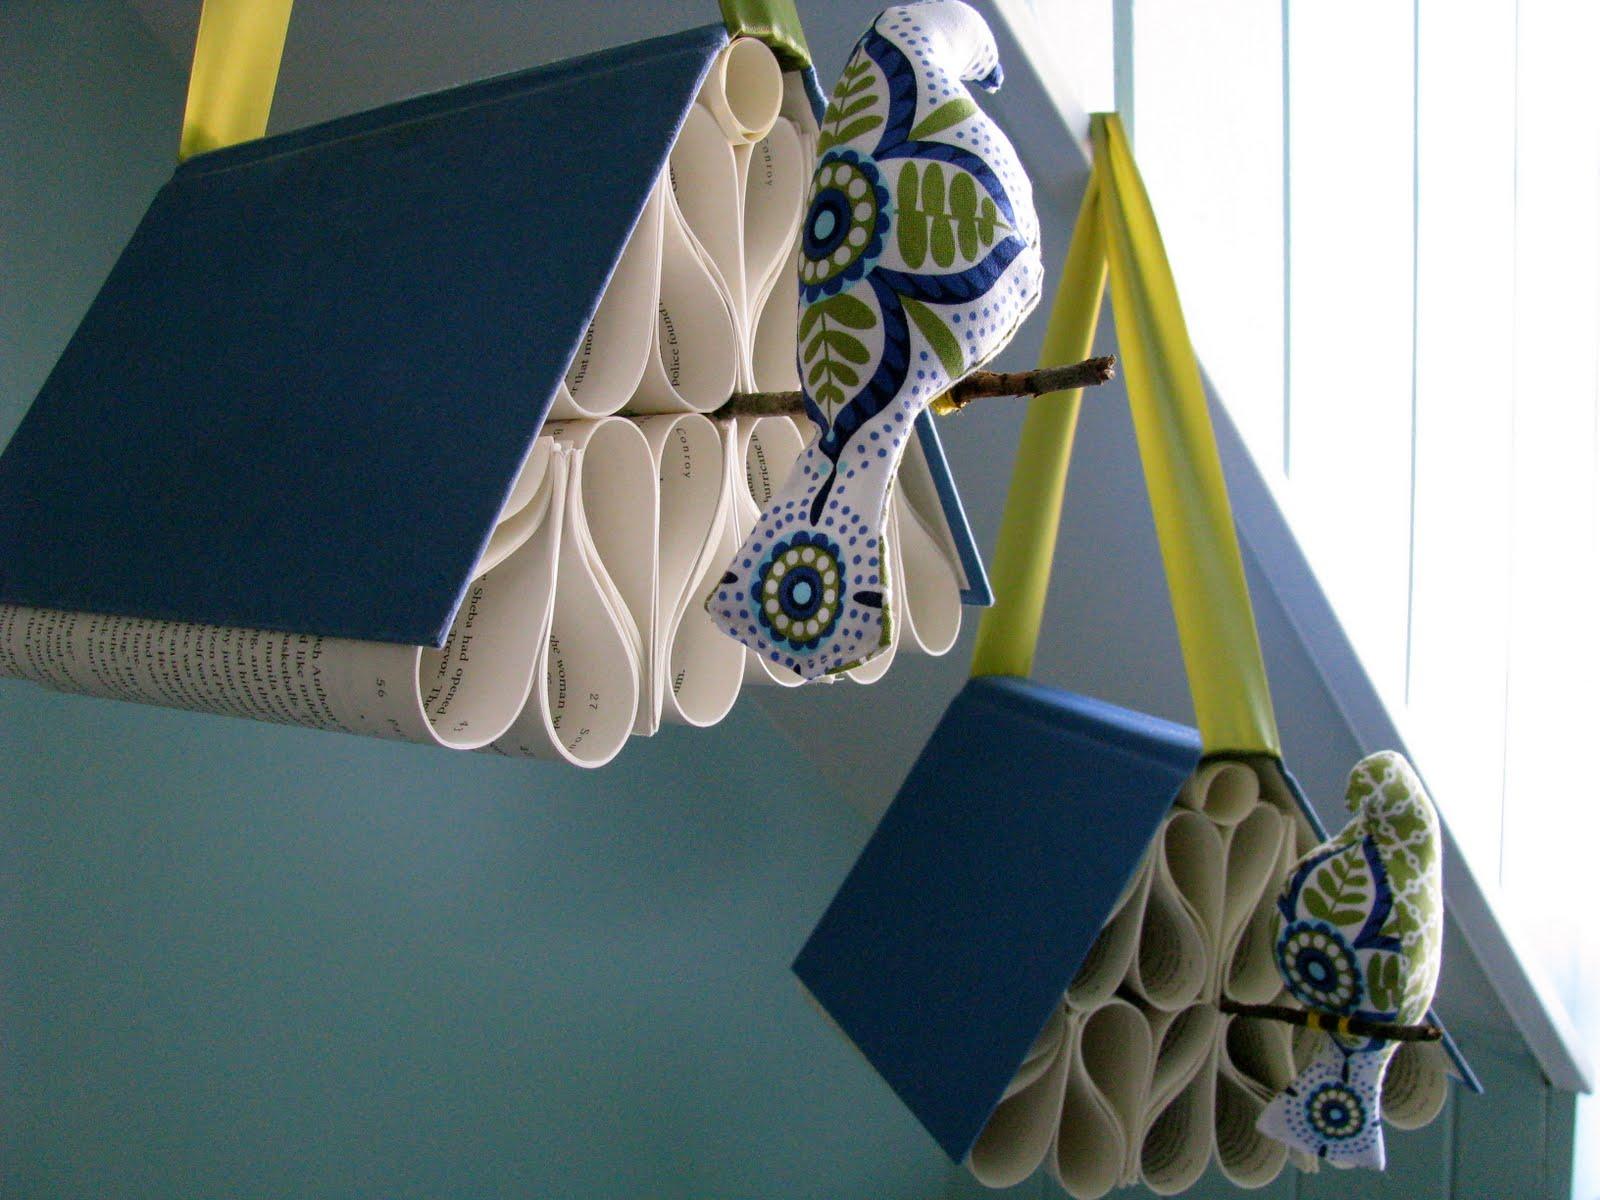
Since lovebirds are happier in pairs, make a companion and hang them above your favorite reading chair. I hope this project brings as much fun and whimsy to your home as it has mine!

So cute and such a great idea. Thanks
That is so cute and creative! i love it! Thanks so much for this, I'll be linking.
You have no idea how much I LOVE these! Anything whimsical and bird-themed is a personal favorite. Great job! I'm making some this weekend!
I love it!
I really want to make these when things calm down. Thanks for the tutorial.
One word. Wow!
Amazing!
WOOHOO!!!! I wanted this one to win so I could get my hands on a tut! THANKS!!!
SOOO neat! Thank you!
Such a great creative idea. I love book art of all kinds.
I will definitely be making these!! Thank you!
I love it.
Kiss
<:))
LOVE THIS! good idea. going to try it out 🙂
omg that is so spectacular..
Maggie
http://cuttlebugchallenge.blogspot.com
http://cuttingabove.blogspot.com
These bird book houses are amazing, I love them. I already have the pattern for the birds. I think I have to make this!!!
Adorable – I saw these on SYTYC and am thrilled you posted the tutorial. Thanks!!
LOVE these! I just made one myself from your tutorial! WAY CUTE!
Thanks again for this tutorial. I featured it on my blog with photos of the one I made as well. ( =
Heres the link:
http://paperpixiecrafts.blogspot.com/2010/12/bookhouse-tutorial.html
Hurrah! A few months ago I was trying to find this tutorial, but I couldn't remember where I had seen it or what exactly it was called, and I finally gave up looking for it. Today I completely by serendipidy stumbled on it! Thanks for such a cute idea!
Hi, this is a really great tutorial, and a brilliant idea! I stumbled upon your blog while looking for templates for a project I'm working on for grad school, and just got curious.
Side note, if you're interested, the groupings of pages within a book are called a signature. If you ever decide to play with bookbinding, which I personally think is an incredibly fun thing to do, it helps to differentiate between signatures and pages. 🙂