As promised, here’s the glass etching tutorial. It comes with one big warning though: This technique is super, mega addicting!
I’ve done it two different ways. This is the tutorial using an Exacto knife. The tutorial I’ll share with you today is my new way of doing it with my fancy pants new toy… the Cricut machine! Yippee!!
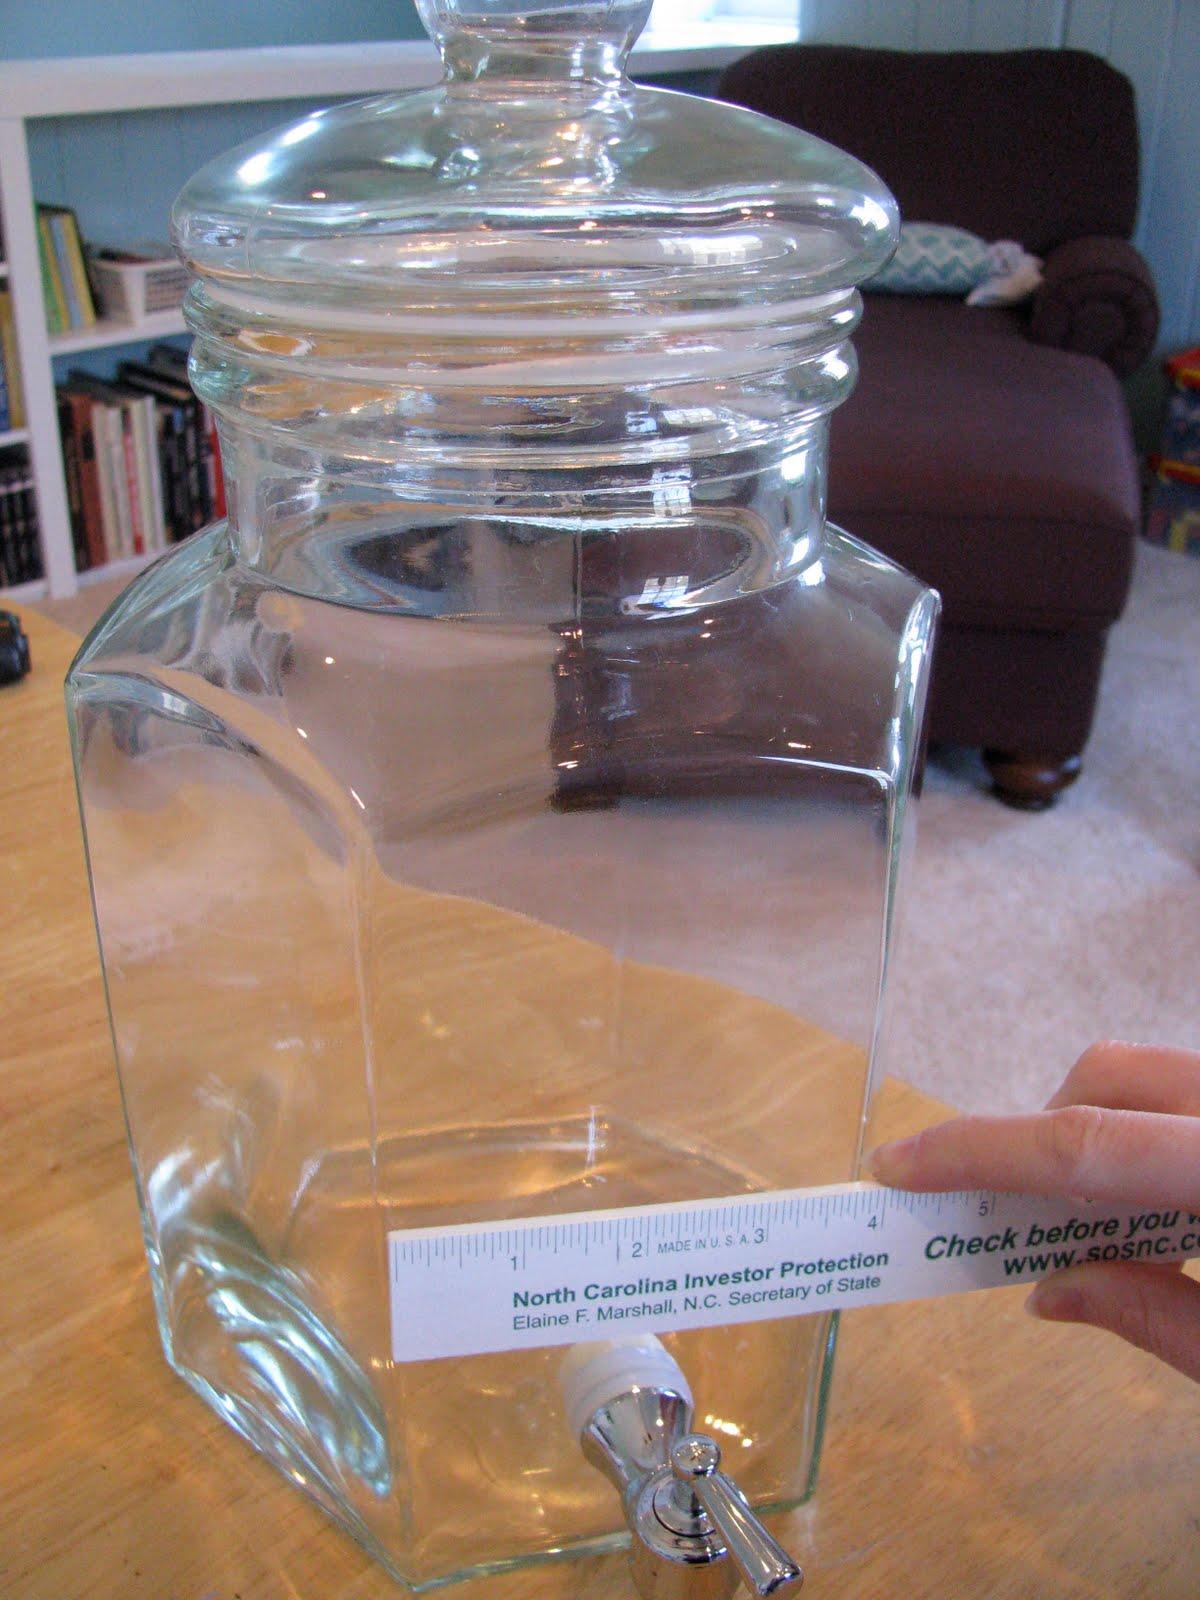
First, measure your piece.
Next, I used the Alphalicious cartridge to cut a 4 1/2 inch crest out of contact (laminating) paper.
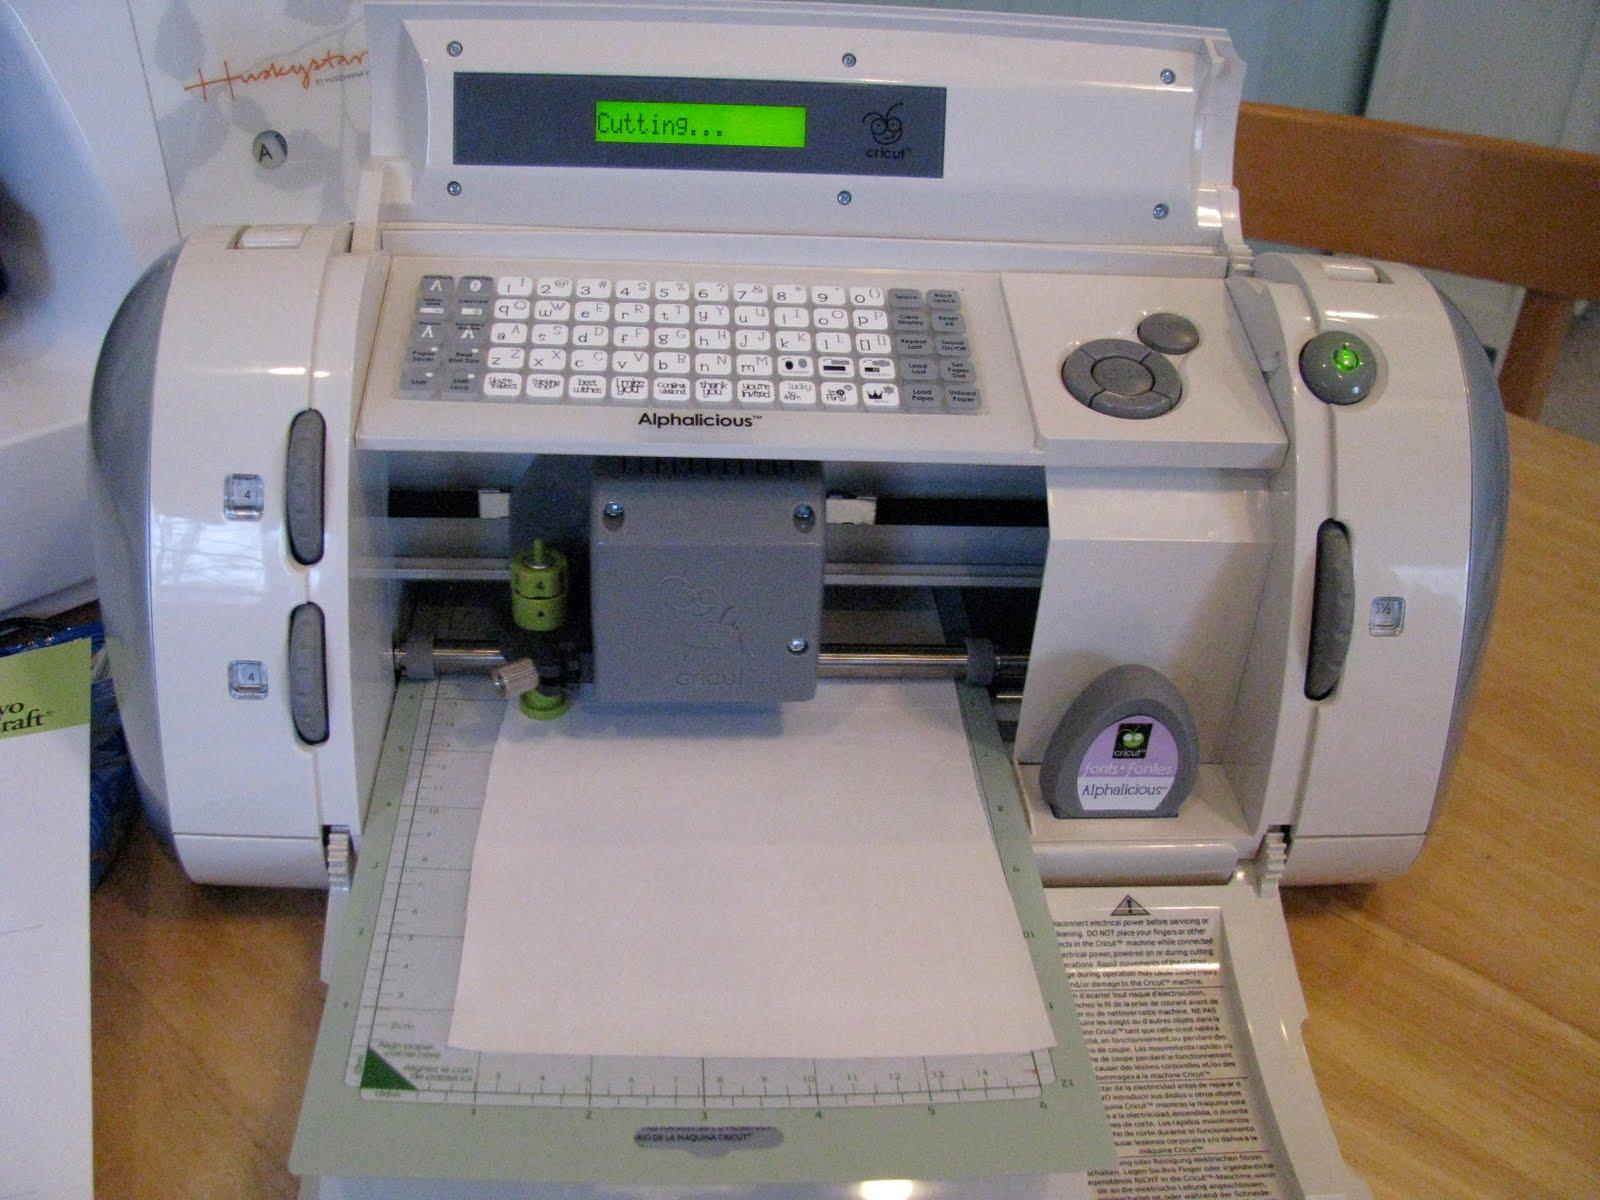
(Note: If you don’t have a Cricut machine, but you want to do a design like this one, you can freehand the design on a piece of paper then tape it to the inside of the glass. Place the contact paper on the outside of the glass and cut it with an Exacto knife.)
Place the contact paper on the glass.
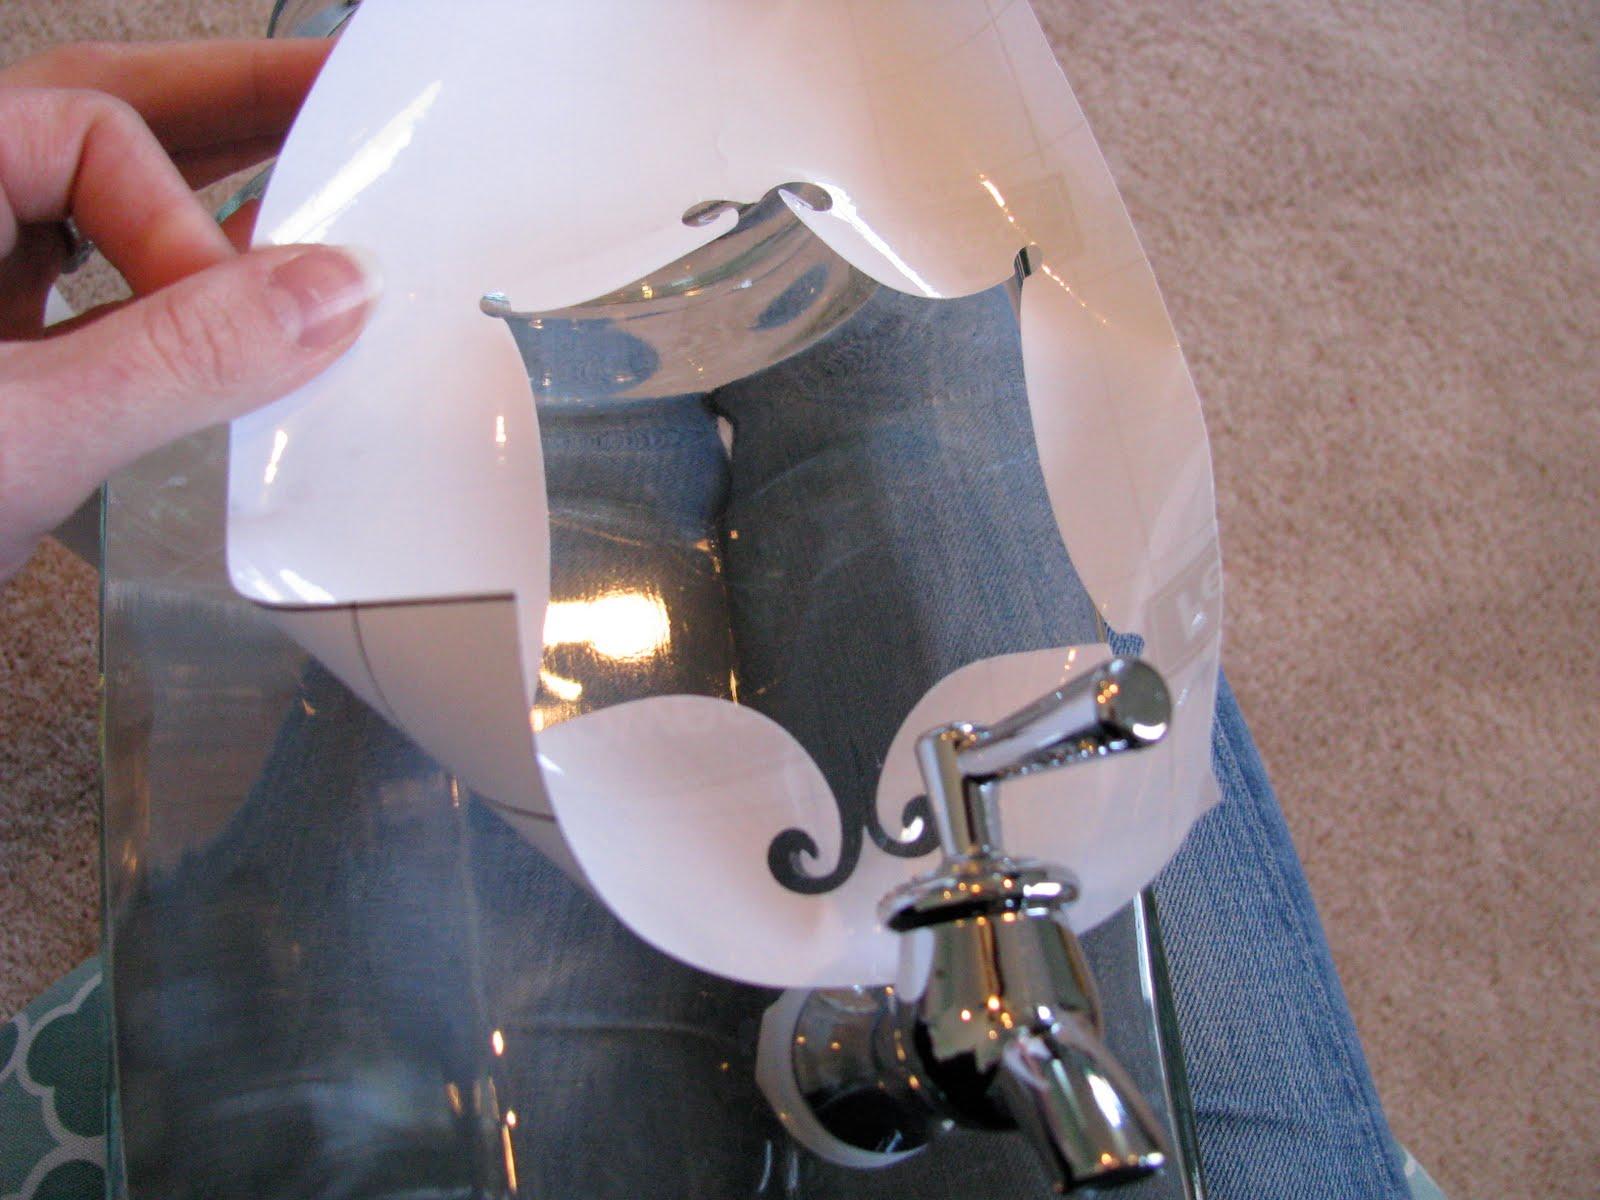
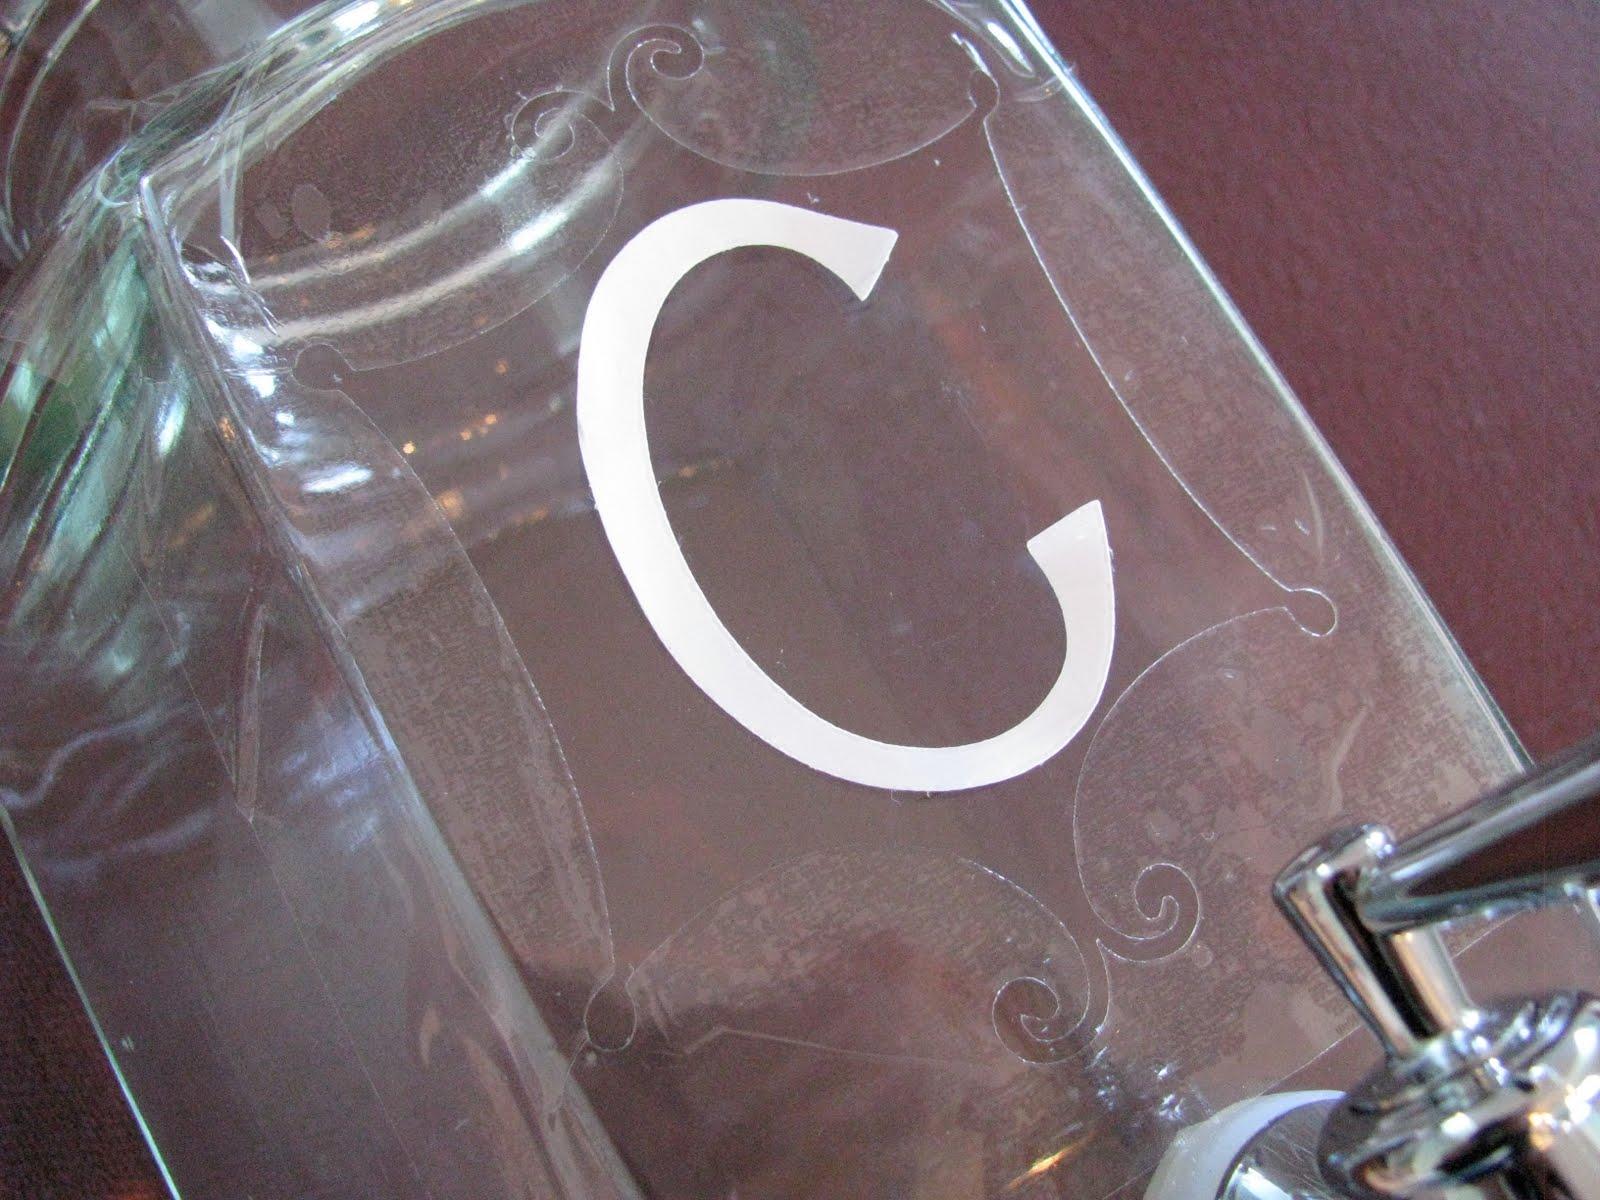
Then I cut a 3 inch capital “C” again, using the Alphalicious cartridge.
Using a foam brush, cover with a thick layer of Armour Etching Cream and let it sit 10 minutes.
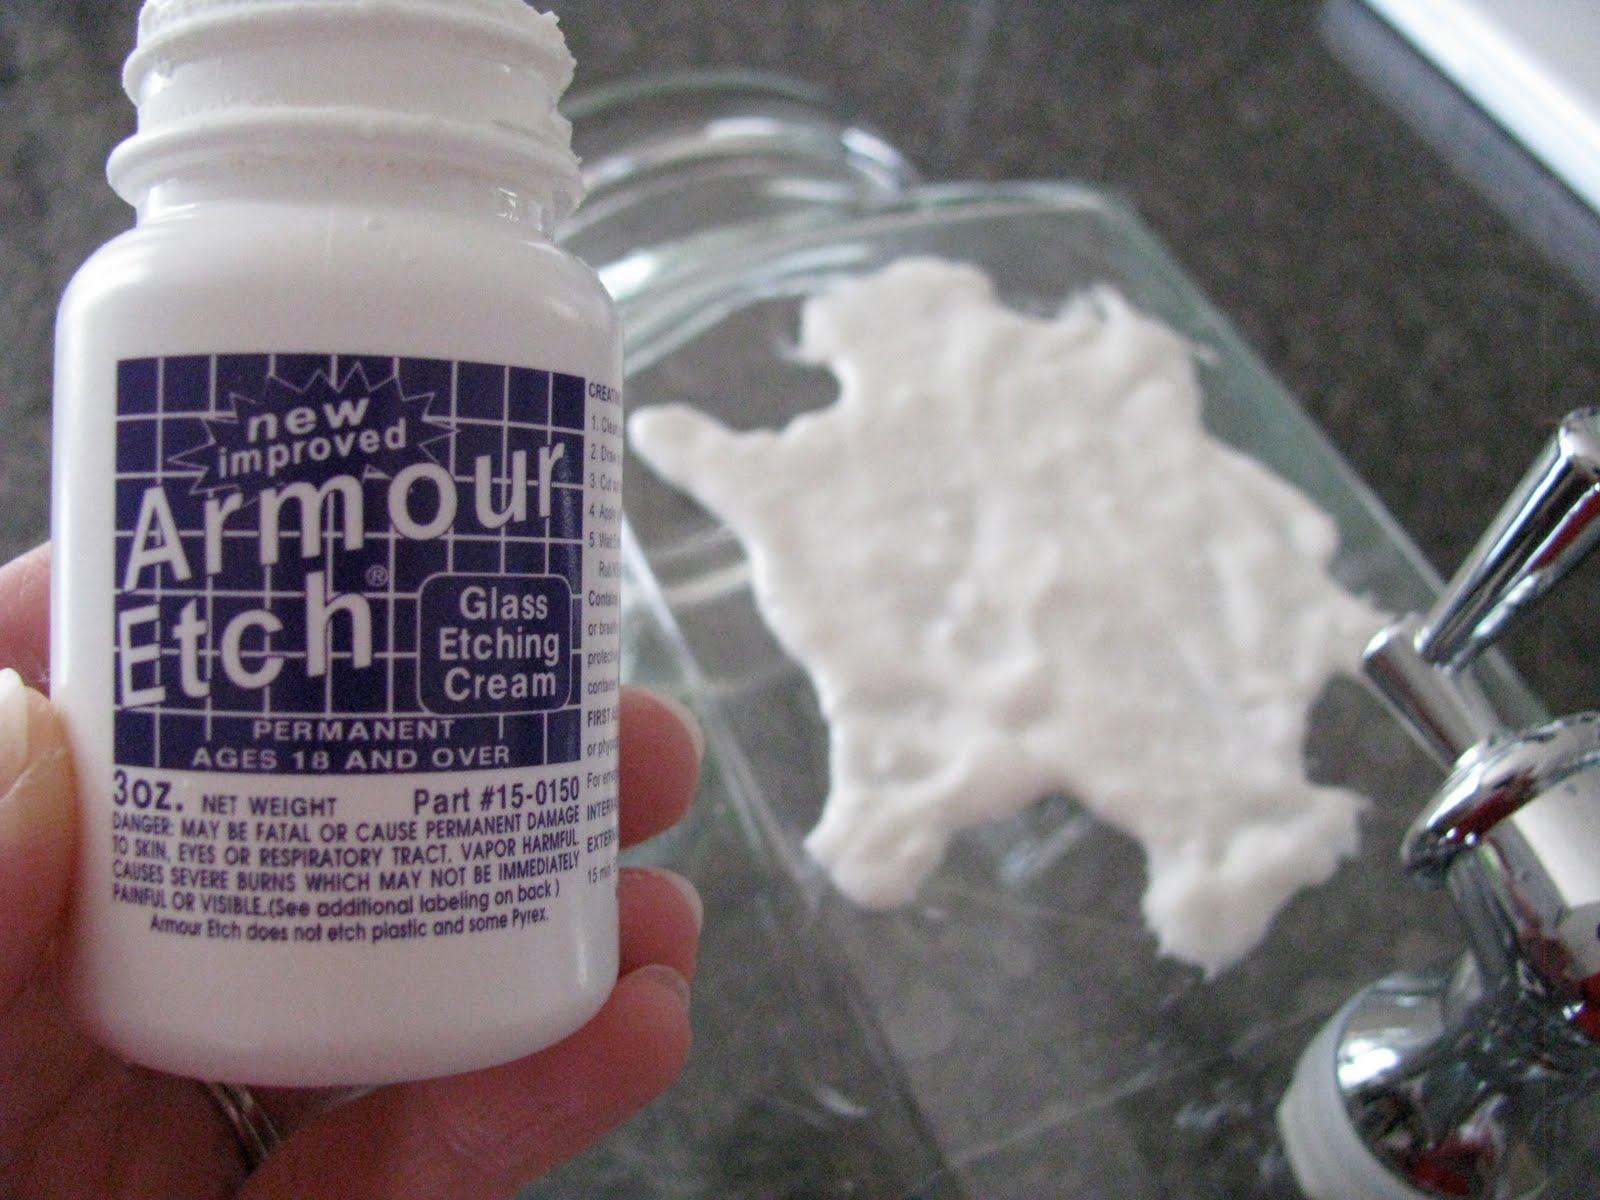
Wipe it off and repeat with another layer for 10 minutes. The great part about this cream is that you can reuse it! So when you’re done with your two 10 minute sessions, wipe the cream off and wash your project with water.

Don’t remove the contact paper until you have thoroughly washed the cream off and I recommend NOT washing this in a sink that’s porcelain or enamel, a stainless steel sink works best. Before attempting this project, please see the considerations here.
 Easy Peasy!!
I am itching to try this. Thanks for the tutorial!
You got a cricut!!!! AWESOME!!!
I have been wanting to try glass etching…I may just have to now!
That is gorgeous…I might just have to try that one of these days!
Thanks for sharing!
Totally charming – now just looking for the right container!
I've been wanting to try etching for a while now. Thanks for the submission on SYTYC! I do have a question, though. If you say the cream can be reused, why do you have to put another layer on after 10 minutes? Can you just leave it on 20 minutes? And do you just put the cream back in the bottle after you use it? Sorry if these are stupid questions!
Kari,
Those are really great questions actually! The reason I scrape the cream off and reapply is that sometimes there are tiny bubbles or spots you may have missed during the first application, so when you reapply you're sure to get those spots before you pull off your plastic and notice them too late. And yes, I just put the cream right back in the bottle! I've done multiple projects with the same bottle and I notice no difference in its potency. Thanks for the great questions!
That is so cute, I love this! how fun at a party. Thanks so much, I'll be linking.
beautiful!
I have another question. 🙂 Where do you find your contact paper? I tried Michael's and Joanne today, and neither had it. I know I can find it online, but I hoped to get it quicker at a store. I bought Armour Etch today, so I'm itching to give it a try. No pun intended!
Hey Kari,
The contact paper (laminating paper) is an office supply, so you can buy it from an office supply store like Office Max in sheets or in a roll. It's expensive, but you'll get a lot of use out of one roll.
-Sarah
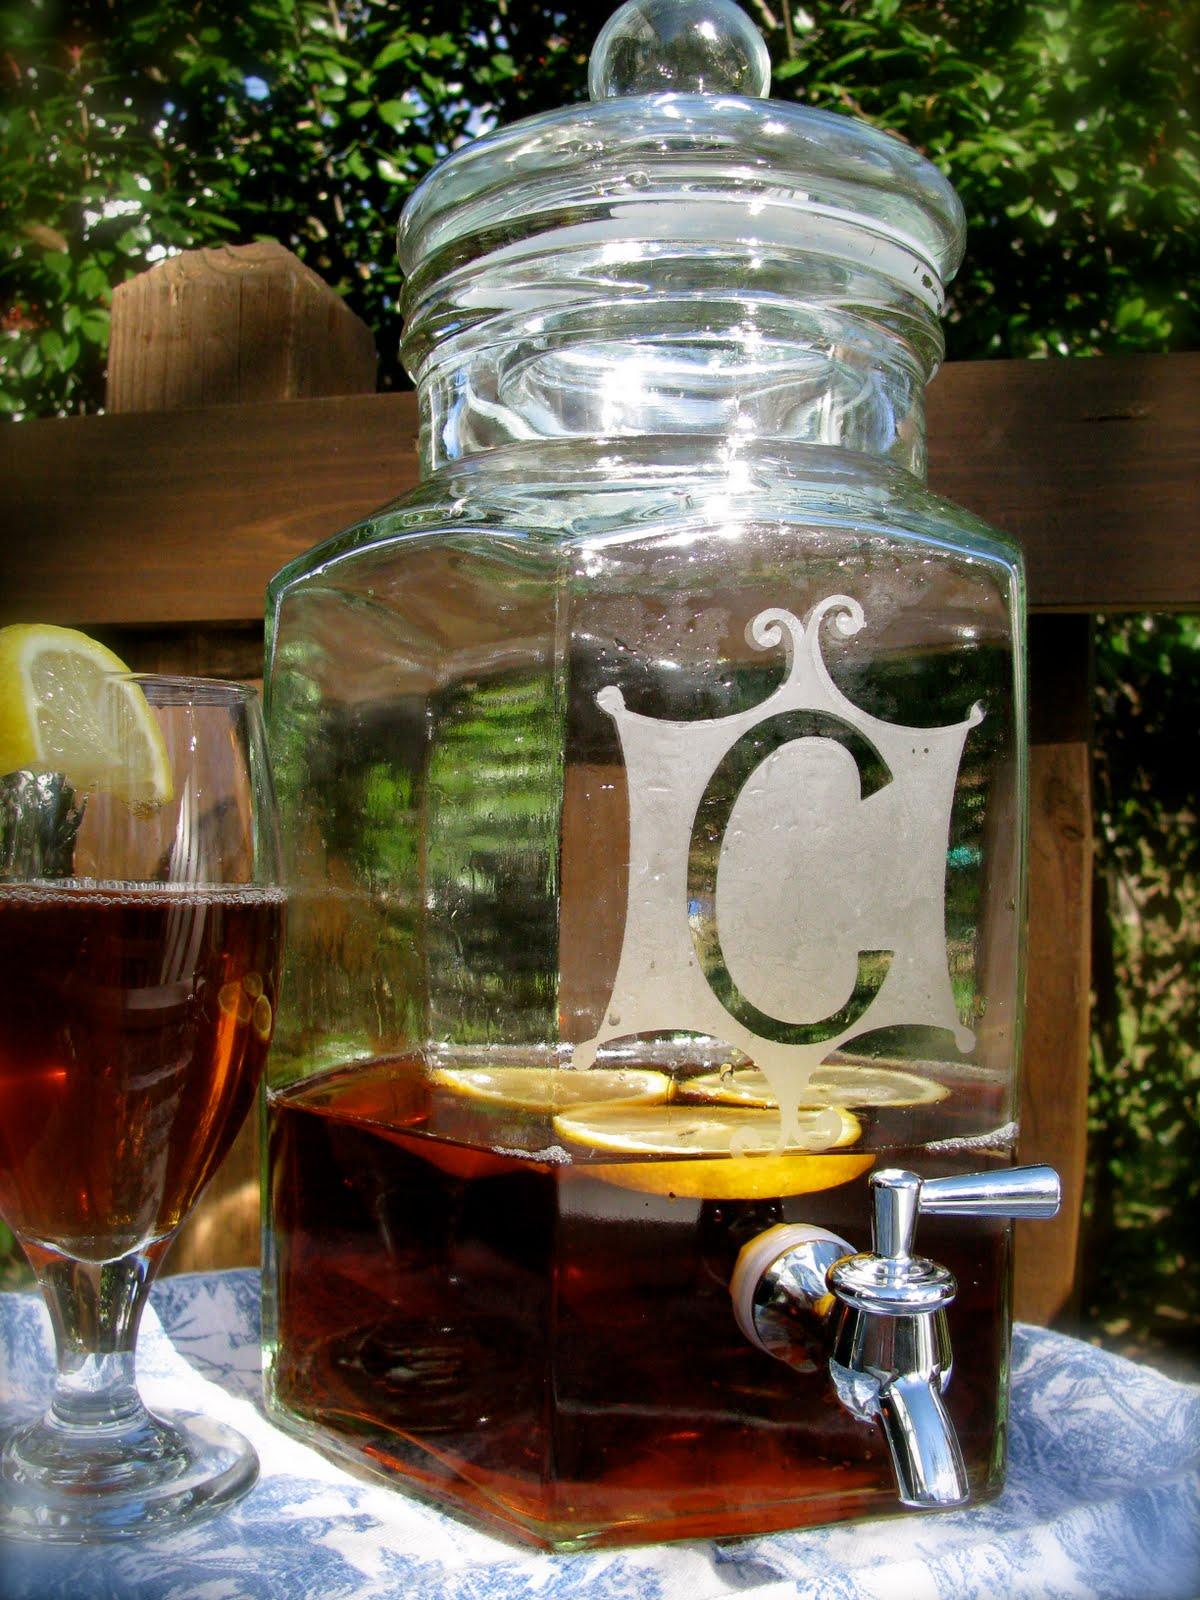
I LOVE this idea. TFS Where did you find such a neat tea jar?? I would love to do this for my daughter for her birthday in April. Thanks again!!
I found the jar at World Market, but you might be able to find something similar at Walmart once they put the spring stuff out.
-Sarah
just did this with my mom- we used vinyl instead of contact paper but it turned out the same! thanks for such a great tutorial! I posted a link to your great tutorial on my blog- thanks again!
I apologize if you have already answered this (I quickly looked over the comments) but where can you purchase Etching Creme?
You can buy the etching cream at Michaels. The small bottle I bought was something like $11, but you can reuse it over and over.
-Sarah
Thanks for this. I get your posts emailed to me and this was one of my favorites that I was going to try. Decided to do it this week for parents and in-laws anniversaries – Can't wait to start – just wanted to say thanks for your constant inspiration. I LOVE getting the updates and save for later almost all of them!
Very nice looking! I so want to start etching some glass myself. Just haven't found the time yet.
Thanks for sharing!
Brittany
http://www.prettyhandygirl.com
I would like to try this
Etched Glass activity such as yours. Thanks for showing.